In this article, you will learn a step-by-step guide on how to effectively achieve a stunning whitewashed brick using chalk paint. Discover the secrets to transforming your tired-looking brick surfaces into timeless and elegant focal points. By following these simple instructions, you will be able to enhance the aesthetic appeal of your home or any desired space, all while adding a touch of character and charm. Get ready to unlock the potential of your brick surfaces as we explore the art of whitewashing with chalk paint.

Choosing the Right Chalk Paint
When it comes to whitewashing brick with chalk paint, one of the first considerations is the type of brick you are working with. Different types of brick may absorb the paint differently or have varying textures, so it’s important to choose a chalk paint that is suitable for the specific type of brick you have. Additionally, consider the desired color you want to achieve with the whitewash. Chalk paint comes in a wide range of colors, so take the time to select the perfect hue that will complement your space and add the desired aesthetic touch. Lastly, opting for high-quality chalk paint is essential. Not only will it provide better coverage and longevity, but it will also result in a more professional and polished finished look.
Preparing the Brick Surface
Before applying the chalk paint, proper preparation of the brick surface is crucial to ensure the best possible outcome. Begin by thoroughly cleaning the brick to remove any dirt, dust, or grease that may impede the adhesion of the paint. A mixture of water and mild detergent applied with a scrub brush can effectively clean the brick. After cleaning, inspect the surface for any loose mortar and remove it using a chisel or mortar scraper. Once the brick is cleaned and any loose mortar is removed, it is recommended to sand the surface lightly. This helps to create a slightly rough texture that allows the chalk paint to adhere better to the brick. Lastly, tape and protect any surrounding areas that you want to keep paint-free, such as nearby windows or trim.
Mixing and Preparing the Chalk Paint
To achieve the perfect whitewash effect, mixing and preparing the chalk paint correctly is essential. Start by preparing the chalk paint according to the instructions provided by the manufacturer. This may involve thinning the paint with water or using a dilution agent specifically designed for chalk paint. Follow the recommended ratios to ensure the consistency is appropriate for your desired outcome. Once the paint is prepared, thoroughly mix it to achieve a consistent color and texture. It’s important to remember that proper mixing will ensure an even application and a cohesive look.
Testing the Whitewash Mixture
Before applying the whitewash mixture to the entire brick surface, it’s always a good idea to test it on a small section of brick first. This allows you to see how the color and coverage will appear before committing to the entire project. Apply the mixture to the test section and evaluate the results. Adjust the ratio of water or dilution agent if needed to achieve the desired effect. Taking the time to test the whitewash mixture will help ensure that the final outcome meets your expectations and avoids unwanted surprises.

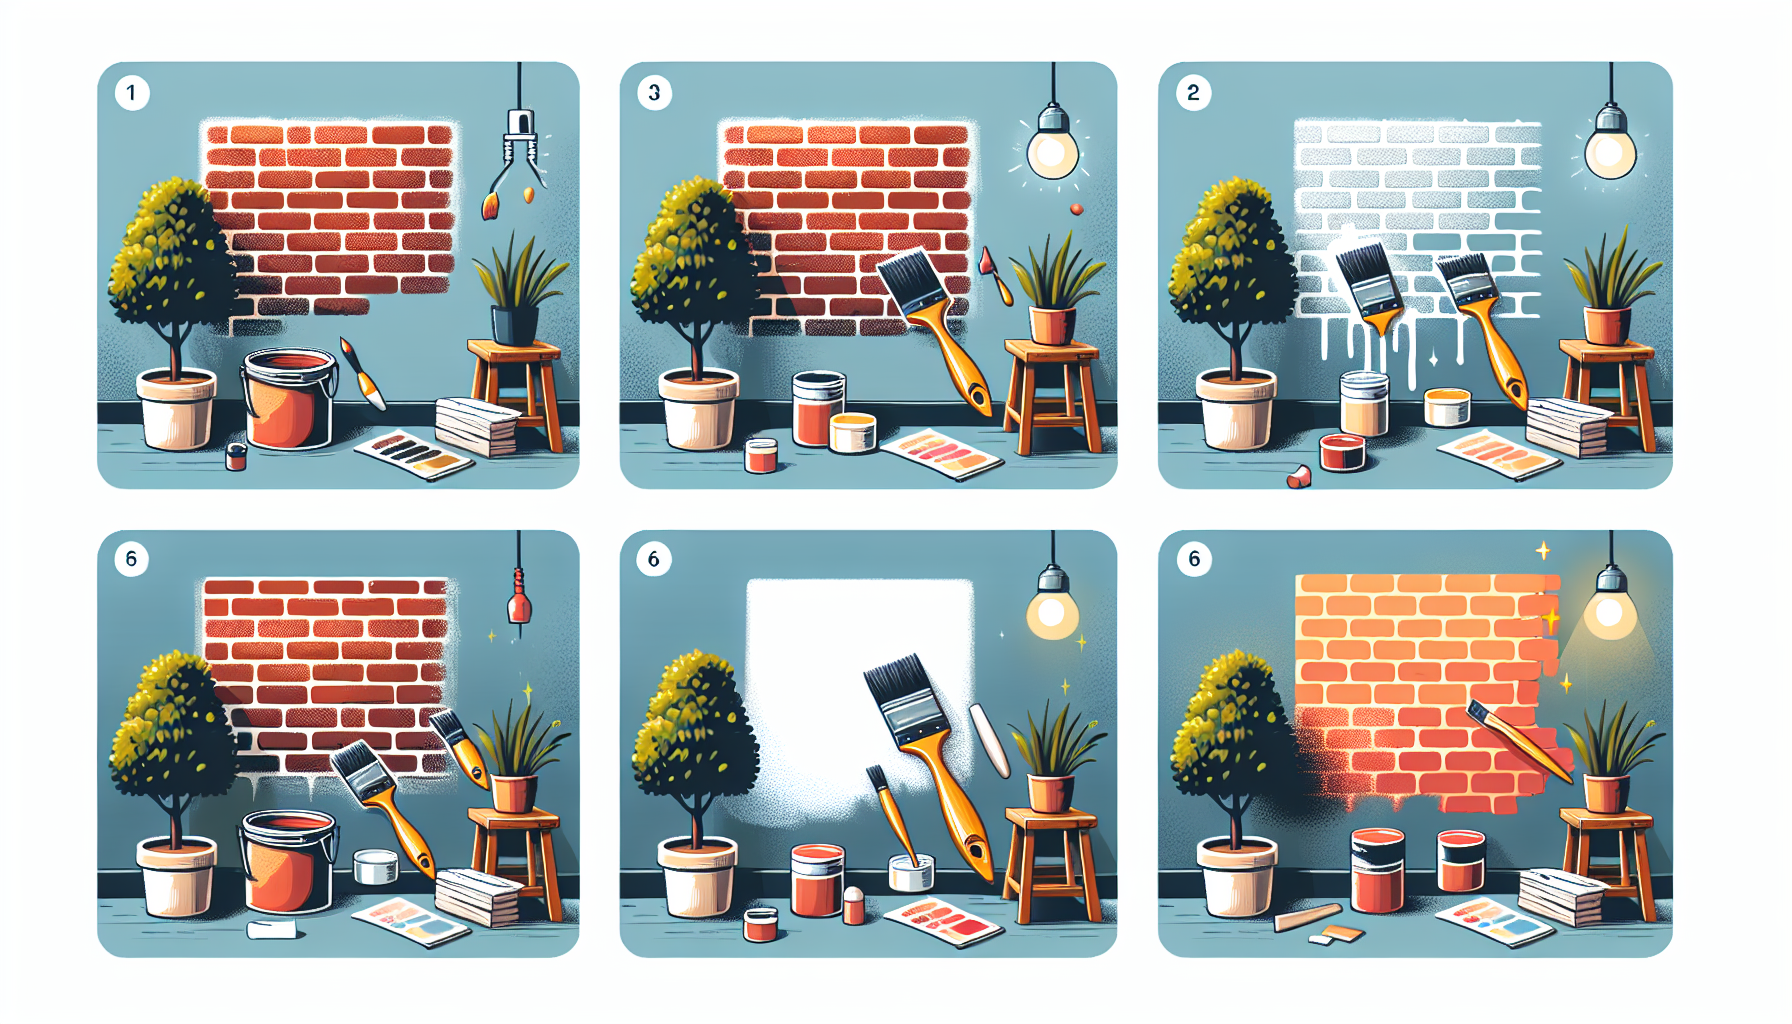
Applying the Whitewash
When applying the whitewash, starting with an angled brush is recommended. The angle allows for easier maneuverability and access to the brick’s crevices and joints. Dip the brush into the whitewash mixture and apply it to the brick in smooth, even strokes. Work in small sections to ensure that the paint is applied consistently and evenly. As you progress, use blending and feathering techniques to create a natural and seamless transition between sections. These techniques help to achieve a more authentic and aged appearance. Continue applying the whitewash until the entire brick surface is covered.
Considering a Second Coat
After applying the first coat of whitewash, take a moment to evaluate its coverage. If you are satisfied with the results, a second coat may not be necessary. However, if the coverage is uneven or if you desire a more opaque finish, applying a second coat may be beneficial. Allow the first coat to dry completely before assessing the need for a second coat. It’s important to note that adding a second coat may deepen the color and enhance the overall whitewash effect.
Finishing Touches
Once you are satisfied with the whitewashing process, it’s time to add the finishing touches. Sealing the whitewashed brick is recommended to protect the paint and enhance its durability. There are various sealants available specifically for chalk paint that can be applied according to the manufacturer’s instructions. Additionally, remove any paint splatter or excess paint from surrounding surfaces using a damp cloth or sponge. Lastly, clean your brushes and tools thoroughly to ensure their longevity and proper reuse in future projects.
Caring for Whitewashed Brick
To maintain the beauty of whitewashed brick, regular cleaning and maintenance are essential. Use a soft brush or cloth to gently remove any surface dust or dirt. Avoid abrasive cleaners, as they may damage the paint or disrupt the whitewash effect. Instead, use mild detergents or gentle cleaning solutions specifically formulated for painted surfaces. It’s also important to monitor the whitewashed brick for any signs of damage, such as chipping or peeling. Promptly address any issues to prevent further deterioration and ensure the longevity of your whitewashed brick.
Troubleshooting and Tips
In the event of uneven coverage during the whitewashing process, there are a few troubleshooting tips that can help rectify the situation. Applying extra paint to lighter areas, or lightly sanding and redoing a specific section can help achieve a more consistent appearance. If mistakes occur, such as excess paint or accidental drips, they can typically be fixed by gently sanding the affected area and reapplying the whitewash. It’s important to remember that whitewashing brick with chalk paint is just one method, and alternative techniques such as limewashing or lime washing may also be worth considering for different effects or finishes.
Inspiration and Design Ideas
Whitewashed brick can add a touch of elegance and charm to any space. Exploring different whitewash styles can be a source of inspiration when deciding on the desired look for your brick. From a solid coat of white to a more translucent effect that allows the natural color of the brick to shine through, there are numerous techniques and styles to choose from. Additionally, incorporating whitewashed brick in interior design can create a stunning focal point and elevate the overall aesthetic of a room. Whether used as a backsplash in a kitchen or as an accent wall in a living room, whitewashed brick adds character and warmth to any space. The possibilities are endless when it comes to utilizing this timeless and versatile design element.