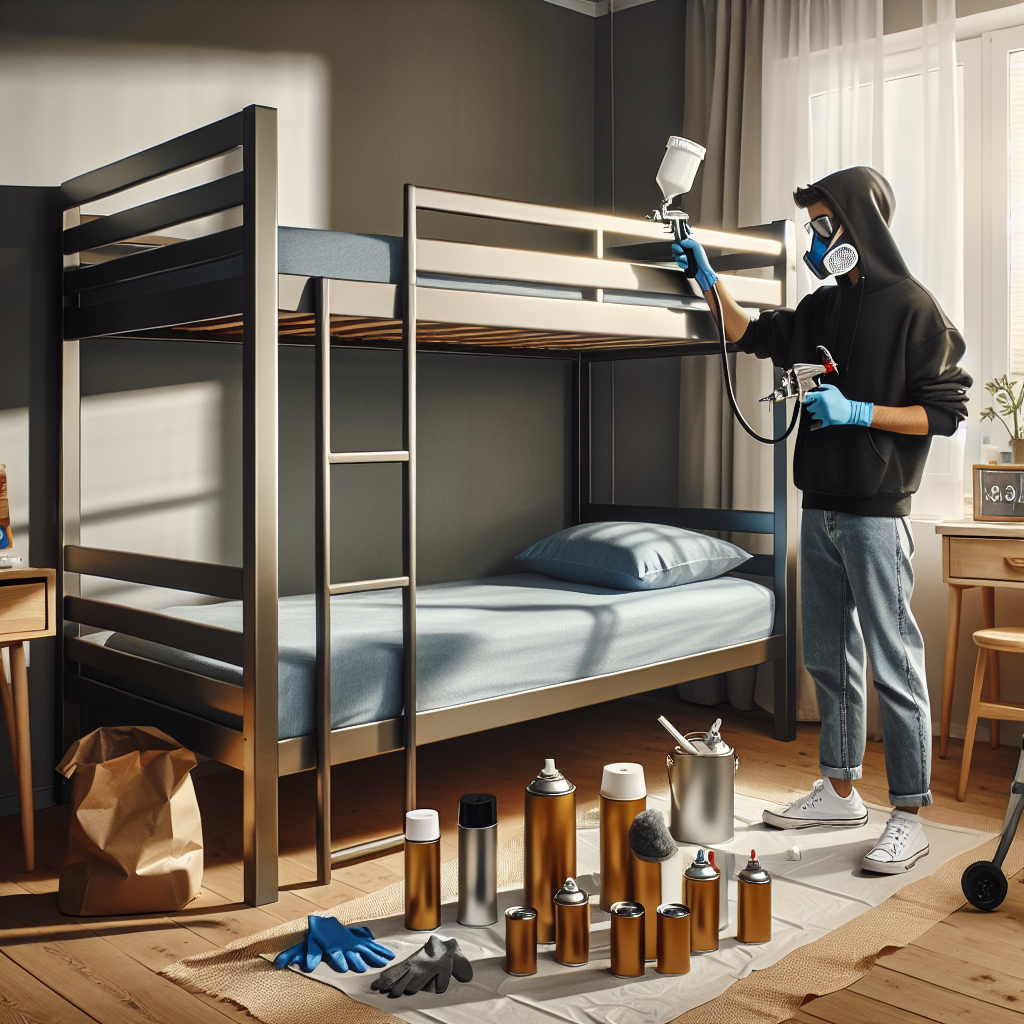
This article provides a step-by-step guide on how to effectively spray paint metal bunk beds. With clear instructions and expert advice, you will learn the necessary tools and techniques to achieve a professional finish on your bunk beds. From preparing the surfaces to choosing the right paint and applying it evenly, this article covers everything you need to know to give your metal bunk beds a fresh, vibrant look. Whether you want to revamp an old set or personalize a new one, this guide will ensure that your spray painted metal bunk beds become a standout feature in any bedroom.
Choosing the Right Location
When it comes to spray painting your metal bunk beds, selecting the right location is crucial. You should choose a well-ventilated area with plenty of space to move around. Ideally, this space should be free from dust, debris, and other potential contaminants that could ruin the finish of your painted bunk beds. Consider setting up a makeshift spray booth using drop cloths or tarps to protect the surrounding area from overspray. It’s important to choose a location that allows for easy access to all sides of the bunk beds, ensuring even coverage during the painting process.
Preparing the Area
Before you begin disassembling and preparing your metal bunk beds for spray painting, it’s essential to prepare the area where you will be working. Remove any furniture, rugs, or other items that could get in the way. Cover the floor and nearby surfaces with plastic or drop cloths to protect them from stains and accidental overspray. This will help keep your work area clean and make the cleanup process much easier once you’re finished painting.
Workspace Considerations
When choosing your workspace for spray painting, consider the size and height of the metal bunk beds. Make sure there is enough room for you to move around comfortably without bumping into walls or other objects. If the bunk beds are large, you may need to work in sections, rotating them to access different areas for painting. Additionally, ensure that your workspace has adequate lighting so you can clearly see the surfaces you are painting. Good lighting will help you identify any uneven coverage or missed spots during the painting process.

This image is property of images.unsplash.com.
Disassembling the Bunk Beds
To ensure a smooth and even paint job, it is vital to disassemble the bunk beds before painting. Begin by removing the mattresses, bedding, and any other accessories from the beds. Take note of how the different bed frames and parts are connected and label them if necessary. This will make reassembling the bunk beds much easier later on. Use the appropriate tools to carefully take apart the bunk beds, keeping track of all the screws, bolts, and other fasteners. By disassembling the bunk beds, you will have better access to all the nooks and crannies, allowing for more thorough surface preparation and a more professional-looking finish.
Cleaning the Surface
After disassembling the bunk beds, it’s essential to thoroughly clean the metal surfaces to remove dirt, grease, and any other contaminants. Start by wiping down the surface with a clean, lint-free cloth dampened with a mild detergent or all-purpose cleaner. This will help remove any surface dirt. For stubborn stains or grease, use a gentle scrub brush or sponge to agitate the affected areas. Once the surface is clean, rinse it thoroughly with water and allow it to dry completely before moving on to the next step. Cleaning the bunk beds properly will ensure proper adhesion of the primer and paint, resulting in a longer-lasting and more durable finish.
Sanding the Metal
Sanding the metal surfaces of your bunk beds is an important step that helps create a smooth and even surface for the primer and paint to adhere to. Start by using a medium-grit sandpaper (such as 120 or 150 grit) to lightly sand the entire surface of the metal. This will help remove any remaining dirt or debris and also roughen up the surface slightly, allowing for better adhesion. Pay close attention to any areas with chipped or peeling paint, as these may require more thorough sanding to ensure a seamless finish. After sanding, use a clean, damp cloth to wipe away any dust or residue before proceeding to the next step.

This image is property of images.unsplash.com.
Choosing the Right Primer
Selecting the appropriate primer is crucial for achieving a professional-looking finish on your metal bunk beds. Look for a primer specifically designed for metal surfaces. This type of primer will provide excellent adhesion, corrosion resistance, and durability. Additionally, consider choosing a primer that is compatible with the type of paint you plan to use for the best results. Some primers are specifically formulated to enhance the performance and longevity of certain types of paint. Read the manufacturer’s instructions and product labels carefully to ensure you select the right primer for your project.
Priming the Bunk Beds
Once you have chosen the right primer, it’s time to apply it to the metal surfaces of your bunk beds. Start by stirring the primer thoroughly to ensure the color is consistent throughout. Using a high-quality paintbrush or a paint sprayer, apply a thin and even coat of primer to the bunk beds, working in long, smooth strokes. Be sure to cover all the surfaces thoroughly, including hard-to-reach areas such as joints and corners. Avoid applying the primer too thickly, as this may result in drips or an uneven finish. Allow the primer to dry according to the manufacturer’s instructions before moving on to the next step.
Tips for Even Coverage
To achieve a professional-looking finish, it’s crucial to ensure even coverage of both the primer and paint. Here are a few tips to help you achieve consistent and uniform results:
- Start with a clean surface: Remove any dust or debris before applying the primer or paint to prevent imperfections and adhesion issues.
- Use the proper tools: A high-quality paintbrush or a good paint sprayer will help you achieve smooth and even application.
- Apply thin coats: Multiple thin coats of primer and paint are better than a single thick coat. Thin coats dry faster, are less likely to drip or sag, and result in a smoother finish.
- Overlap each stroke: When applying the primer or paint, overlap each stroke slightly to ensure complete coverage and avoid leaving any visible lines or streaks.
- Take your time: Rushing through the painting process can lead to sloppy results. Take your time and work methodically, ensuring each area is adequately covered before moving on.

This image is property of images.unsplash.com.
Choosing the Right Paint
Selecting the right paint for your metal bunk beds is essential to achieve a durable and visually appealing finish. Look for a paint specifically formulated for metal surfaces and designed to withstand wear and tear. Consider choosing a paint that offers rust and corrosion protection, especially if your bunk beds will be exposed to external elements or humidity. As with the primer, it’s crucial to read the manufacturer’s instructions and choose a paint that is compatible with the primer you have applied.
Considerations for Metal Surfaces
When painting metal surfaces, there are a few additional considerations to keep in mind. First, make sure the paint you choose is suitable for both interior and exterior use, depending on where your bunk beds will be located. Additionally, consider the finish of the paint. Glossy finishes can be more durable and easier to clean, but they may also highlight imperfections and scratches more prominently. Satin or matte finishes, on the other hand, can help hide minor flaws but may not be as resistant to wear and tear. Ultimately, the choice of paint finish will depend on your personal preference and the desired aesthetic for your metal bunk beds.
Using the Spray Can Properly
Spray painting can be an efficient and effective way to coat your metal bunk beds with paint. However, using a spray can properly is crucial for achieving the best results. Before starting, shake the can vigorously for several minutes to ensure the paint is thoroughly mixed. Hold the can at the recommended distance from the surface (usually around 8-12 inches) and depress the nozzle to begin spraying. Keep your strokes smooth and even, moving the can in a steady back-and-forth motion to avoid overspray or pooling of paint. Practice on a scrap piece of cardboard or wood to get a feel for the can’s spray pattern and adjust your technique as needed.

Maintaining Distance and Angle
Maintaining the proper distance and angle while spray painting is essential for achieving an even and consistent finish. Hold the spray can at a right angle to the surface you are painting, keeping the nozzle perpendicular to the bunk beds. This will help ensure that the paint is evenly distributed and minimizes the risk of drips or runs. As for the distance, follow the manufacturer’s recommendations on the can, typically around 8-12 inches. Start spraying slightly before the surface and continue spraying past the end to ensure even coverage. Keep your strokes overlapping slightly to prevent any gaps or lines.
Applying Thin Coats
When spray painting your bunk beds, it’s important to apply multiple thin coats rather than a single thick coat. This technique allows for better control and ensures an even and smooth finish. Apply the paint in light, sweeping motions, keeping the can moving at a consistent speed to prevent buildup or heavy coverage in one area. Allow each coat to dry completely before applying the next, following the recommended drying time provided by the manufacturer. This will help prevent smudging, dripping, or marring the previous coat of paint. Building up the paint gradually with thin and even coats will result in a more professional-looking finish.
Applying the Base Coat
Before applying the base coat, make sure the bunk beds are clean, dry, and free from any dust or debris. This will help the paint adhere properly and ensure a smooth and even finish. Start by applying a thin and even coat of paint using the spray can or a paintbrush, depending on your preferred method. Use long, sweeping strokes to cover the entire surface of the bunk beds, following the grain or direction of the metal to maintain a consistent look. Once the first coat is applied, allow it to dry completely before proceeding.

Allowing Drying Time
After applying the base coat, it’s crucial to allow sufficient drying time before adding additional coats or reassembling the bunk beds. Drying times can vary depending on the type of paint you are using, the temperature, and humidity levels in your workspace. Refer to the manufacturer’s instructions on the paint can for specific drying time recommendations. It’s always better to wait longer than recommended to ensure the paint has fully cured and is resistant to scratching or damage. Rushing the drying process can result in smudges, surface imperfections, or even paint peeling.
Adding Additional Coats
To achieve a more professional-looking finish, it’s often necessary to apply multiple coats of paint. After the base coat is dry, assess the coverage and determine if additional coats are needed. Apply subsequent coats in the same manner as the base coat, using thin and even strokes to ensure even coverage. Allow each coat to dry completely before applying the next, following the manufacturer’s instructions. Applying multiple coats will help achieve a richer color, enhance the durability of the finish, and ensure complete coverage of the metal surfaces.
Applying a Clear Coat
To enhance the durability and protect the painted surface of your metal bunk beds, applying a clear coat is highly recommended. Clear coats provide an extra layer of protection against scratches, staining, and fading caused by exposure to sunlight or other external factors. Choose a clear coat specifically designed for metal surfaces and follow the manufacturer’s instructions for application. Using a brush or a spray can, apply a thin and even coat of clear coat to the bunk beds, making sure to cover all the surfaces. Allow the clear coat to dry completely before adding any additional layers or reassembling the bunk beds.
Buffing the Surface
Once the clear coat has dried, you may consider buffing the surface of your painted metal bunk beds to achieve a smoother and more polished look. Use a fine-grit sandpaper (around 400-600 grit) or a buffing pad to gently sand the surface in a circular motion. This will help remove any minor imperfections or rough textures, resulting in a more professional and appealing finish. Be careful not to apply too much pressure or sand too aggressively, as this can damage the clear coat or expose the underlying paint. After buffing, wipe away any dust or residue and inspect the bunk beds for any touch-up or additional finishing needed.
Avoiding Common Mistakes
While spray painting your metal bunk beds, it’s important to be aware of and avoid common mistakes that can affect the quality of the finished result. Here are a few pitfalls to watch out for:
- Applying paint too thickly: Thick layers of paint can lead to drips, runs, and an uneven finish. Always apply the paint in thin, even coats for better control and coverage.
- Neglecting surface preparation: Failing to clean and sand the metal surfaces properly can result in poor adhesion and a less durable finish. Take the time to prepare the surfaces thoroughly before painting.
- Painting in unfavorable conditions: Avoid painting in excessive heat, humidity, or windy conditions, as these can affect the drying time and the quality of the finish. Choose a calm and dry day for optimal results.
- Not allowing proper drying time: Rushing the drying process can lead to smudges, surface imperfections, or paint peeling. Follow the manufacturer’s instructions for drying time and be patient.
- Forgetting to protect surrounding areas: Overspray can easily land on nearby surfaces and cause unwanted stains or damage. Use drop cloths or tarps to protect furniture, floors, and other objects in the vicinity.
Organizing and Labeling Parts
After the paint has completely dried and cured, it’s time to reassemble your metal bunk beds. To make the process smooth and efficient, organize and label all the disassembled parts. Use small bags or containers to keep screws, bolts, and other fasteners together, labeling them accordingly. This will save you time and frustration when it comes to finding the right pieces during reassembly. Additionally, refer to the manufacturer’s instructions or any diagrams you may have taken before disassembling the bunk beds to ensure proper alignment and attachment of all parts.
Using the Manufacturer’s Instructions
When reassembling your metal bunk beds, always rely on the manufacturer’s instructions and guidelines. Each bunk bed model may have specific instructions regarding the order of assembly and any special tools or techniques required. Follow these instructions carefully to ensure proper and secure assembly, preventing any potential hazards or structural issues. If you no longer have access to the manufacturer’s instructions, consider reaching out to the manufacturer or searching online for downloadable copies of the manual specific to your bunk bed model.
Ensuring Proper Curing
Proper curing is essential to ensure the durability and longevity of the paint job on your metal bunk beds. Allow the paint to cure for the recommended amount of time provided by the manufacturer. Curing times can vary, but a general guideline is to allow at least 24-48 hours for the paint to fully cure and harden. During this time, avoid exposing the bunk beds to excessive moisture, extreme temperatures, or any potential sources of scratches or damage. Being patient and allowing the paint to cure properly will result in a more resilient and long-lasting finish.
Understanding Drying Times
While paint may dry to the touch within a few hours, it’s important to note that drying and curing are two different processes. Drying refers to the evaporation of solvents from the paint, while curing is the complete hardening of the paint film. The drying time specified on the paint can typically refers to the time it takes for the paint to dry to the touch, but full curing can take much longer. Always refer to the manufacturer’s instructions for recommended drying and curing times, as they can vary depending on the type of paint, temperature, humidity levels, and other factors. It is crucial to allow sufficient time for the paint to cure fully before subjecting the bunk beds to regular use.
Cleaning Tips
Once your metal bunk beds are fully painted and reassembled, it’s important to follow proper maintenance and cleaning practices to keep them looking their best. To clean your painted bunk beds, use a mild detergent or all-purpose cleaner mixed with water. Apply the solution to a soft cloth or sponge and gently wipe down the surfaces, being careful not to scrub too hard or use abrasive cleaners that can damage the paint. Avoid using harsh chemicals, bleach, or abrasive cleaning tools that can scratch or dull the painted surface. Regular and gentle cleaning will help preserve the finish and extend the life of your painted metal bunk beds.
Preventing Scratches
To prevent scratches and damage to the painted surface of your metal bunk beds, take some precautionary measures. Use felt pads or adhesive rubber bumpers on furniture legs or any contact points to minimize friction and potential scratching. Avoid dragging or sliding objects on the bed frames, and encourage gentle use and handling of the bunk beds to prevent accidental scuffs or scrapes. Additionally, consider placing a protective barrier, such as a bedrail or bumper, to keep the painted surfaces safe from rough contact or damage caused by active sleepers.
Touching Up Paint
Over time, it’s normal for painted surfaces to experience wear and tear, including minor scratches or chips. To maintain the appearance of your metal bunk beds, you may need to touch up the paint periodically. Start by cleaning the area around the damaged spot with a mild detergent and water, then dry it thoroughly. Use a small brush or a paint touch-up pen to carefully apply a thin coat of paint to the affected area, blending it seamlessly with the surrounding painted surface. Allow the touch-up paint to dry and cure according to the manufacturer’s instructions before placing any bedding or accessories on the bunk beds.
By following these comprehensive steps, you can successfully spray paint your metal bunk beds, transforming their appearance and adding a fresh and vibrant touch to your bedroom or any other space where they are used. Remember to choose the right location, disassemble and prepare the bunk beds, select the appropriate primer and paint, master spray painting techniques, apply thin and even coats, and consider adding a clear coat for extra protection. With the proper preparation, application, and care, your painted bunk beds will not only look professional but also maintain their beauty and durability for years to come.


