Spray painting can be a convenient and efficient way to transform the look of your living space, but many people shy away from it due to the limited space and potential mess in an apartment setting. However, with the right techniques and precautions, you can successfully achieve a professional-looking paint job without causing damage or disturbing your neighbors. This article will guide you through the process of spray painting in an apartment, providing tips and tricks to ensure a smooth and hassle-free experience. From choosing the right paint and equipment to preparing the area and applying the paint, you’ll learn everything you need to know to master the art of spray painting in your apartment.
Planning and Preparation
Choosing the Right Spray Paint
When it comes to choosing the right spray paint for your project, it is essential to consider the surface you will be painting and the desired finish. Different paints are designed for specific materials such as wood, metal, or plastic. Additionally, there are different finishes available, including glossy, matte, and satin. Take the time to research and select a spray paint that is compatible with your surface and provides the desired results.
Selecting the Ideal Location
One crucial aspect of spray painting in an apartment is selecting the ideal location. Choose a well-ventilated area, preferably one with windows that can be opened to allow for proper airflow. If possible, consider painting outdoors on a calm day to minimize the risk of overspray and to ensure better ventilation.
Protecting the Area
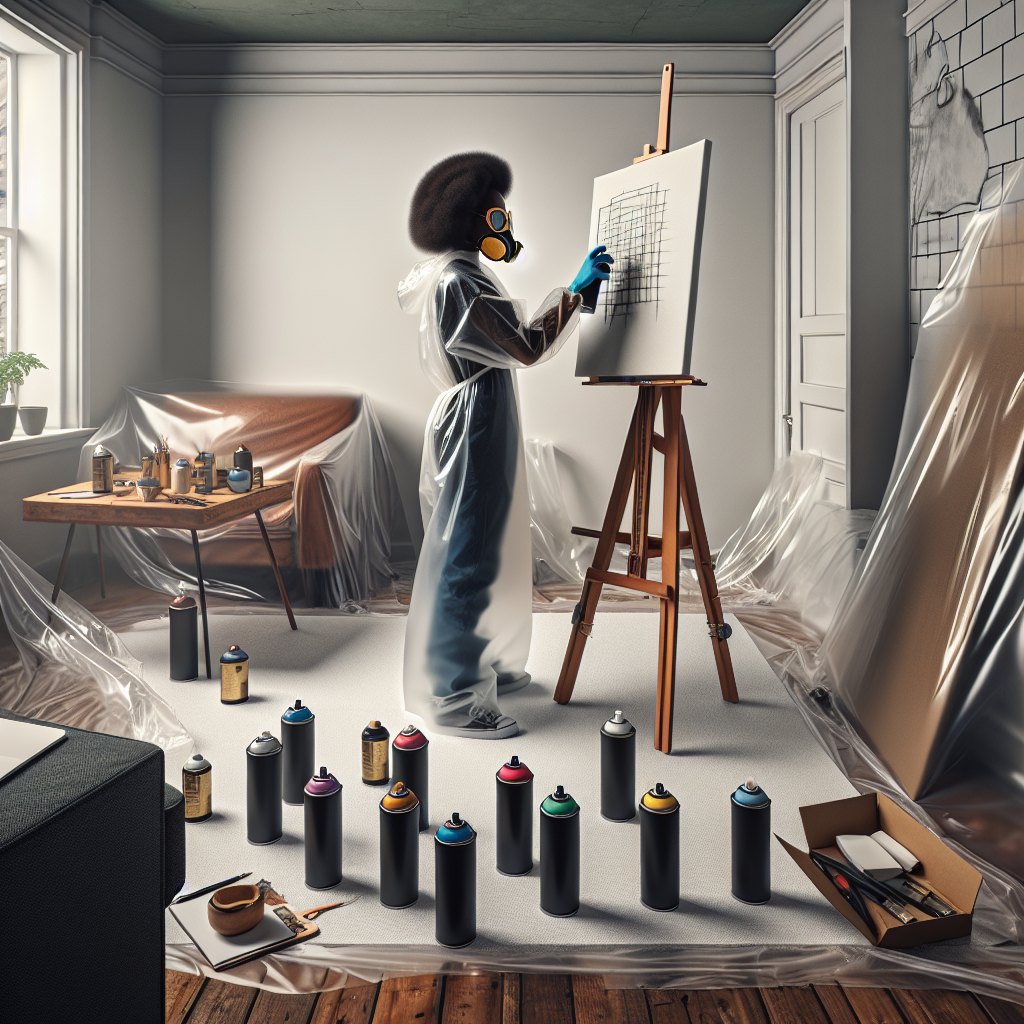
Before you start spray painting, it is crucial to protect the surrounding area. Lay down drop cloths or plastic sheets to cover the floor and any furniture nearby. This will prevent accidental overspray from damaging these surfaces. Additionally, using painter’s tape, cover any areas or objects that you do not want to be painted.
Setting Up the Work Area
Clearing the Space
Before you begin spray painting, ensure that the area is clear of any obstructions. Remove any furniture, décor, or other items from the space to avoid accidentally spraying them. Creating a clutter-free work area will allow you to move freely and reduce the risk of unintentional damage.
Covering Furniture and Surfaces
In addition to clearing the space, it is vital to cover any furniture or surfaces that you cannot remove from the area. Use drop cloths or plastic sheets to protect these items from accidental overspray. Make sure the coverings are secure and adequately positioned to avoid any paint seeping through.
Creating a Ventilation System
Proper ventilation is essential when spray painting in an apartment. Open windows and doors to allow fresh air to circulate. If the spray paint fumes become overwhelming, consider using fans or even setting up an exhaust fan to help remove the fumes from the area. Adequate ventilation will not only help eliminate strong odors but also promote faster drying times.

This image is property of images.unsplash.com.
Prepping the Surface
Cleaning the Area
Before applying spray paint, it is crucial to clean the surface thoroughly. Remove any dirt, dust, or grease that may be present. Use a mild cleaner or degreaser and a clean cloth to wipe down the surface. Cleaning the area will ensure proper adhesion and a smooth finish.
Sanding and Priming
For some surfaces, sanding may be necessary to create a better bonding surface for the spray paint. Use fine-grit sandpaper to smooth out any rough spots or imperfections. After sanding, it is recommended to apply a primer specifically formulated for spray painting. Priming helps to create an even base and enhances the longevity of the paint job.
Repairing Any Damage
Inspect the surface for any damage, such as dents, scratches, or holes. If any repairs are needed, patch them with an appropriate filler and allow it to dry thoroughly before proceeding. Repairing any damage before spray painting will ensure a seamless and professional-looking finish.
Spray Painting Techniques
Shake the Spray Can
Before using the spray can, it is essential to shake it vigorously. This helps mix the paint thoroughly and ensures consistent pigmentation throughout the project. Shake the can for at least one minute before starting to spray.
Practice on a Test Surface
If you are new to spray painting or using a specific type of spray paint, it is advisable to practice on a test surface before applying it to your intended project. This will allow you to familiarize yourself with the spray pattern and verify if the color and finish meet your expectations.
Maintaining Consistent Pressure
To achieve an even and consistent application of spray paint, it is crucial to maintain a steady pressure on the nozzle throughout the process. Sudden bursts or fluctuations in pressure can lead to uneven coverage or drips. Practice controlling the pressure to achieve the desired effect.

This image is property of images.unsplash.com.
Applying the Spray Paint
Start with a Light Coat
When applying the spray paint, begin with a light coat. Holding the can approximately 6-8 inches away from the surface, use quick and even strokes to create a thin layer of paint. This initial coat acts as a base and allows subsequent layers to adhere better.
Applying Multiple Thin Layers
Rather than applying one heavy coat, it is best to apply multiple thin layers of spray paint. This technique helps to achieve a smooth and professional finish and prevents the paint from dripping or running. Allow each layer to dry before applying the next, following the manufacturer’s recommended drying time.
Avoid Overlapping Strokes
To ensure even coverage and prevent overlapping strokes, it is crucial to maintain a consistent distance and speed while spraying. Start each stroke slightly before the previous one ends to create seamless coverage. Overlapping strokes can result in uneven application and visible lines or streaks.
Avoiding Overspray
Using a Cardboard Shield
To prevent overspray from reaching unwanted surfaces, create a cardboard shield. Cut a piece of cardboard slightly larger than the area you are spraying. Hold the cardboard shield between the surface being painted and nearby objects to act as a barrier. This will help direct the spray paint and minimize the risk of overspray.
Working with Small Sections
Rather than attempting to paint large areas at once, it is advisable to divide the surface into smaller sections. This approach allows you to maintain better control over the paint application, minimizing the chance of overspray. Work on one section at a time, ensuring adequate coverage before moving on to the next.
Controlling the Spray Nozzle
The way you hold and manipulate the spray nozzle can greatly impact the direction and spread of the paint. Hold the can perpendicular to the surface and keep the nozzle parallel to the surface for even distribution. Practice controlling the spray pattern to minimize overspray and achieve precise application.

This image is property of images.unsplash.com.
Drying and Curing
Allow Adequate Drying Time
After completing the spray painting process, it is essential to allow the painted surface adequate time to dry. This will vary depending on the type of spray paint used, as well as environmental factors such as temperature and humidity. Be sure to follow the manufacturer’s instructions for drying time to ensure the best results.
Ensuring Proper Ventilation
During the drying process, it is crucial to maintain proper ventilation in the area. Open windows or use fans to circulate fresh air. Adequate airflow will not only help speed up the drying process but also dissipate any lingering fumes. Be mindful of any potential fire hazards or safety concerns when using fans or ventilation systems.
Protecting the Painted Surface
Once the spray paint has dried, it is crucial to protect the painted surface from damage. Depending on the type of paint and finish, you may want to consider applying a clear protective coat, such as a varnish or a clear sealant. This will help enhance the durability of the paint and protect it from scratches and fading.
Cleaning Up
Disposing of Spray Cans Properly
Proper disposal of empty or partially used spray cans is essential for both safety and environmental reasons. Check with your local waste management authorities for specific guidelines on how to dispose of spray paint cans safely. It is crucial to follow these instructions to avoid any potential hazards and reduce environmental impact.
Cleaning Tools and Equipment
After completing your spray painting project, it is essential to clean your tools and equipment properly. Remove any excess paint from the spray can nozzle, wipe down any surfaces, and clean any brushes or other accessories. Properly cleaning and storing your tools will ensure they remain in good condition for future use.
Removing Paint from Skin or Clothing
Accidental paint splatters or spills can occur during the spray painting process. If you get paint on your skin or clothing, it is crucial to act quickly to remove it. Wash any affected skin with soap and water, using a soft cloth or sponge to gently scrub away the paint. For paint on clothing, carefully follow the manufacturer’s instructions for stain removal.

Common Mistakes to Avoid
Spraying Too Close
One common mistake when spray painting is holding the can too close to the surface. This can result in an excessive amount of paint being applied, leading to drips, uneven coverage, or a rough texture. It is crucial to maintain the recommended distance specified by the paint manufacturer to achieve the best results.
Not Shaking the Can Properly
Failing to shake the spray can thoroughly before use can lead to inconsistent pigmentation and poor results. The paint pigment may settle at the bottom of the can, resulting in uneven color distribution. To ensure an even and consistent finish, always spend an adequate amount of time shaking the can before spraying.
Using the Wrong Type of Paint
Using the wrong type of spray paint for your project can lead to unsatisfactory results. Different materials require specific types of paint formulated to adhere to their surface. Using the wrong paint may result in poor adhesion, chipping, or premature wear. Always read the labels and select a spray paint that is appropriate for your specific project.
Safety Precautions
Wearing Protective Gear
When spray painting, it is essential to prioritize your safety. Always wear protective gear such as goggles, gloves, and a mask. These items will help protect your eyes, skin, and respiratory system from potential harm caused by fumes or overspray.
Avoiding Inhalation
The fumes produced by spray paint can be harmful if inhaled in large quantities. To minimize the risk of inhalation, always work in a well-ventilated area and wear a mask specifically designed to filter out paint particles and fumes. If you experience dizziness, lightheadedness, or difficulty breathing, move to an area with fresh air immediately.
Keeping Children and Pets Away
Ensure that children and pets are kept away from the spray painting area. The chemicals in spray paint can be hazardous if ingested or if they come into contact with skin or eyes. Additionally, the noise and fumes produced during the spray painting process may cause anxiety or discomfort for children and pets. It is advisable to restrict access to the area until the project is complete and the space has been properly ventilated.


