? Which brush shape will give you the control and effect you need for your next painting?

Understanding Paint Brush Shapes: Filbert, Fan, Rigger & More Explained
You will learn how brush shapes influence mark-making, edge control, texture, and overall technique across media. This article explains the anatomy, common shapes, specific uses, maintenance, and selection strategies so you can choose the right brushes for your goals.
Why brush shape matters
You need to understand that brush shape affects how paint is delivered, how lines are formed, and what textures you can achieve. Shape influences everything from a broad wash to a razor-fine hairline, so the brush is as important as your choice of medium or surface.
Brush anatomy — what each part does
You should be familiar with the basic parts of a brush: the handle, ferrule, and bristles or filaments. Each component affects balance, durability, and how paint behaves on the brush, so your selection should consider all three.
Handle
The handle length and shape influence your control and posture. Longer handles are common for easel work and greater distance, while shorter handles favor tabletop or detail work.
Ferrule
The ferrule secures bristles to the handle and affects the brush’s durability. You should check for corrosion-resistant metals and a firm fit to avoid bristle loss and wobble.
Bristles / Filaments
Bristles can be natural hair, synthetic filaments, or blends, and they define spring, paint load capacity, and edge quality. You should match bristle type to your medium and desired effect.
Brush hair types and characteristics
Your choice of brush hair determines absorption, resilience, and edge behavior. Below is a concise comparison to guide you.
| Hair Type | Characteristics | Best For |
|---|---|---|
| Kolinsky Sable | Excellent spring and point, smooth paint release | Watercolor, fine detail |
| Sable Blend | Good spring with lower cost | Watercolor, mixed techniques |
| Synthetic (nylon, polyester) | Durable, less absorbent, often stiffer | Acrylics, heavy-bodied oils, varnishing |
| Hog Bristle | Stiff, holds large loads, responsive in oil | Oil painting, impasto, expressive strokes |
| Camel/Goat | Soft, highly absorbent | Washes, large watercolor areas |
| Badger/Soft Brush | Soft and flexible | Specialty washes, glazing |
You will need to consider absorbency for washes, stiffness for impasto, and point retention for detail work when selecting hair type.
How brush shape affects stroke and edge
Brush shape controls whether you lay down broad coverage, create clean edges, or form dynamic, textured marks. You should assess the edge type, amount of paint the brush can carry, and the spring or snap of the hair.
Edge types
Edges can be soft, hard, or a combination depending on shape and hair. You will see, for example, filberts create soft transitions while flats create sharp edges when used on their sides.
Paint load and release
Different shapes will load different volumes of paint and release it with varying smoothness. You should test how a new brush carries paint and how long it maintains a wet edge.
Common brush shapes and their uses
You will find a rundown of the most common brush shapes below, with practical guidance on when to use each one. Each entry includes an explanation and suggested applications.
Round
Round brushes taper to a point and offer versatility across line weights and detail. You should use rounds for controlled lines, small fills, and variable-width strokes—ideal for many styles and for both watercolor and acrylic detailing.
Flat
Flats have a broad, rectangular profile that creates strong edges and flat washes. You should use flats for blocking in areas, making long sweeping strokes, and creating controlled edges; they are excellent for angular shapes and bold, graphic marks.
Bright
Bright brushes are similar to flats but with shorter bristles for greater control and stiffer response. You can use brights for controlled, textured strokes and to push paint around without too much flex or sag.
Filbert
Filberts combine a flat base with rounded edges for a versatile, tapered stroke. You will use filberts to blend edges, create soft petal-like shapes, and transition between broad and detailed work. They are favored in portraiture and organic forms.
Angular (Angular Shader)
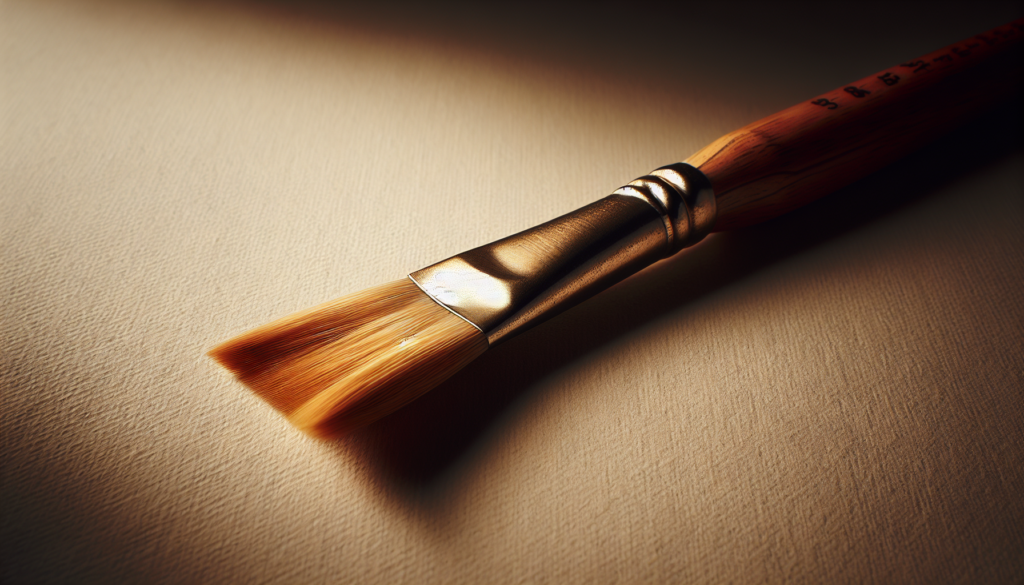
Angular brushes have a slanted edge that creates precise angled strokes and tight corners. You should choose an angular for controlled curves, crisp edges, and filling shapes where parallel sides meet — useful for decorative work and controlled shading.
Fan
Fan brushes spread bristles into a flat, fan-like arrangement for texture and soft blending. You can use fans to imply foliage, texture in hair, and soft feathering; they also help with blending and smoothing transitions.
Rigger / Liner
Riggers, or liners, are long, thin brushes designed for continuous, hair-like lines. You will use riggers for painting rigging on ships (their historical origin), long calligraphic lines, and delicate details like eyelashes or fine branches.
Mop
Mop brushes are large and rounded, designed to hold a lot of water or paint for broad, soft washes. You should use mops for large watercolor washes, wetting the paper, or applying glazes in large formats.
Wash
Wash brushes are broad and high-capacity for even large-area coverage. You will use wash brushes to lay down backgrounds, underpainting, or any situation where even saturation and speed are necessary.
Filigree, Script, and Spotters
Specialty brushes such as script liners, spotters, and filigree brushes are created for micro-detail and calligraphic marks. You should use these when you need the highest degree of control in miniatures, fine detail, or precise ornamentation.
Dagger and Knife-Tip
Dagger and knife-tip brushes have a sharp-edge profile for precise, tapered strokes. You can use them for petal shapes, pointed edges, and stylized marks often found in illustrative and decorative painting.
Oval, Mottler, and Stencil Brushes
Oval or mottler brushes are used for broad, smooth strokes with consistent edge; stencil brushes have firm bristles for controlled stippling when applying paint through stencils. You should use mottlers for large even fields and stencil brushes for texture and edge control through masking.
Table: Quick reference of brush shapes and primary uses
| Shape | Primary Uses | Edge / Stroke Characteristics |
|---|---|---|
| Round | Line work, detail, variable width | Pointed tip, variable line |
| Flat | Blocking, crisp edges, washes | Sharp edge, broad flat stroke |
| Bright | Controlled strokes, texture | Shorter bristles, less flex |
| Filbert | Blending, organic shapes | Rounded edge, tapered strokes |
| Angular | Corners, angled strokes | Slanted edge, precise control |
| Fan | Texture, blending, foliage | Fan spread, soft blending |
| Rigger/Liner | Long continuous lines, detail | Thin, long point |
| Mop | Large washes, wetting | Soft rounded large load |
| Wash | Large even coverage | Broad, generous load |
| Spotter/Script | Micro-detail, precision | Tiny, sharp point |
| Dagger | Petals, tapered lines | Sharp angled edge |
You will find this table useful when deciding which brush to reach for during different phases of a painting.
Choosing brushes by medium
Your brush needs vary by medium: watercolor, acrylic, and oil each place different demands on hair, handle, and shape. Choose brushes with the right balance of absorbency, stiffness, and durability appropriate to your medium.
Watercolor brushes
Watercolor brushes need excellent water retention, a fine point, and smooth paint release. You should prefer sable or high-quality synthetic sable for their ability to hold a lot of water while maintaining a precise tip.
Acrylic brushes
Acrylic dries faster and can be abrasive, so you should choose synthetic filaments that resist fraying and maintain spring. Flats, brights, and rounds in synthetic fibers are common choices for acrylic painters.
Oil brushes
Oil painting benefits from hog bristle and certain synthetic filaments that hold thicker paint and tolerate solvents. You should select stiffer bristles for impasto and softer filaments for glazing and blending.
Size selection: what the numbers mean
Brush sizes are indicated by numbers that vary by manufacturer and region, so you should focus on functional width rather than just number alone. Numbers usually increase with size, but the same number across brands may yield different actual widths.
Choosing by task
You will select larger sizes for blocking and washes, medium sizes for general work, and small sizes for detail. Keep a range of sizes available to match the scale of your work.
Maintenance and care for brush longevity
To protect your investment, you should clean and store brushes properly. Proper care extends life, maintains shape, and preserves the brush’s performance.
Cleaning
Use the appropriate cleaner for your medium: water for water-based paints and mild solvent or brush cleaner for oils. You should avoid letting paint dry in the bristles and use gentle motions to avoid splaying.
Drying and storage
Store brushes horizontally or bristle-up after reshaping the tip. You should never leave brushes soaking in solvent or water for long periods as this can loosen the ferrule and damage the handle.
Reshaping tips
After cleaning, gently reshape the bristles with your fingers into a point or the original shape while still damp. You should allow complete drying in the intended shape to maintain the brush’s edge.
Repair and recovery of brushes
You may encounter splayed or clogged brushes; some recovery methods can restore function. You should know gentle approaches like boiling for synthetic brushes, using brush soap, or trimming a frayed edge when necessary.
When to replace
If a brush consistently loses hairs, has a permanently misshapen tip, or a loose ferrule, you should replace it. Continuing to work with damaged brushes can harm your painting quality and potentially scratch surfaces.
Synthetic vs natural: performance comparison
Your choice between synthetic and natural hair should be based on handling, maintenance, ethical considerations, and budget. Each has strengths that suit certain techniques and mediums.
Advantages of natural hair
Natural hairs like sable and hog have superior water-holding capacity and spring for certain techniques. You should prefer natural hair for delicate watercolors and expressive oil work when point retention and flexibility are critical.
Advantages of synthetic filaments
Synthetic brushes often resist solvents, are less expensive, and can be engineered for specific stiffness. You should choose synthetic when working with acrylics, heavy-bodied media, or when durability and ease of cleaning are priorities.

How to select brushes for specific effects
You should think about the effect you want first, then select shape and hair to match. Consider line quality, blending needs, texture, and control before choosing a tool.
Creating soft transitions
To achieve soft transitions, use filbert, fan, or mop brushes with soft hairs. You should layer thin glazes and use gentle strokes or light blending motions to keep edges seamless.
Sharp edges and geometric shapes
Select flats, brights, or angular brushes for crisp edges and geometric forms. You should hold the brush on edge to create sharp lines and use the flat’s side for even, controlled strokes.
Textural marks and foliage
Fan brushes, stiff bristles, or short bright brushes are effective for foliage, hair, and texture. You should use a tapping or stippling motion to suggest detail without painting every element.
Long flowing lines
Use rigger or liner brushes for continuous, elegant lines. You should maintain a steady wrist and consistent paint load for uninterrupted strokes.
Working techniques by brush shape
You will benefit from technique suggestions that match each shape to common workflows. Below are practical approaches to get the most from each brush type.
Filbert techniques
Use a filbert for scalloped strokes, soft blending, and petal shapes. You should rotate the brush slightly while stroking to take advantage of the rounded edge and create a variety of marks.
Fan techniques
Use a fan for dry brushing, soft blending, and creating broken textures. You should gently drag or tap the fan across the surface for subtle variations and to avoid overloading paint.
Rigger/liner techniques
Keep your arm steady and the brush well-loaded with paint for continuous lines. You should practice long, single strokes to maintain the brush’s integrity and avoid stopping mid-line.
Flat and bright techniques
Use the edge of a flat to create razor-sharp lines and the broad face for washes. You should employ controlled wrist movement for precise edges and body rotation for longer strokes.
Buying advice: what to look for in a set or individual brush
When buying, you should consider intended use, quality of hair, ferrule construction, handle comfort, and price versus longevity. A few high-quality brushes for key tasks are often better than an extensive low-cost set.
Evaluating quality in-store or online
Inspect the tip for a fine point, the ferrule for secure attachment, and the handle for balanced weight. You should also check return policies and reviews for consistency across purchased brushes.
Budget strategies
You can allocate budget toward a few high-quality brushes for details and several mid-range brushes for broader tasks. You should prioritize a high-quality round (sable or sable-like) for detail and a robust hog or synthetic flat for heavier work.
Customizing and shaping brushes
You may want to customize a brush for a specific task by reshaping or trimming. You should perform any trimming carefully and only on non-essential brushes to avoid reducing their overall life.
Making a filbert from a flat
You can trim a flat to approximate a filbert profile, but you should do this sparingly. Trim incrementally, reshape, and test until you reach the desired edge.
Environmental and ethical considerations
You should consider sustainability and sourcing when selecting brushes. Many manufacturers now offer high-quality synthetic alternatives that reduce reliance on animal hair.
Cruelty-free and vegan options
High-quality synthetic brushes can approach the performance of natural hair and are preferred by artists who want cruelty-free materials. You should evaluate brands that transparently describe materials and manufacturing practices.
Storage, transport, and studio workflow
Organizing brushes by shape and medium helps maintain workflow and brush life. You should use brush rolls, jars, or holders to protect tips and separate brushes by wetness and medium.
Transporting brushes
For travel, use protective tubes or roll-up cases that keep bristles from being crushed. You should dry brushes fully before packing to avoid mildew and damage.
Common mistakes and how to avoid them
You should avoid practices that quickly degrade brushes, such as leaving them in solvent, using household cleaners, or scrubbing too aggressively. Use the right cleaner for your medium and be gentle during cleaning.
Overloading the brush
Avoid loading an excessive amount of paint, which leads to loss of control and inefficient paint use. You should practice loading the brush with moderate paint and topping up as needed to maintain consistent strokes.
Using the wrong brush for the medium
Using a soft watercolor brush for heavy acrylics will damage it. You should match stiffness and filament type to the intended medium.
Frequently asked questions (FAQs)
You will find answers to common questions below, clarifying practical concerns about lifespan, cleaning, and mixing shapes.
How long should a quality brush last?
A well cared-for brush can last years, but heavy-use studio brushes may require replacement more frequently. You should clean thoroughly, store properly, and avoid solvent soaking to maximize life.
Can you mix natural and synthetic brushes on one painting?
Yes, mixing is common and often beneficial. You should match each brush to the effect you need rather than limiting yourself to a single hair type.
Is a filbert necessary if I already have rounds and flats?
A filbert offers unique blending and tapered strokes that are not easily replicated by combining rounds and flats. You should consider at least one filbert if you work with organic shapes, portraiture, or soft transitions.
Practical checklist for building your starter brush kit
You should assemble a balanced kit that covers broad needs without overspending. Below is a recommended starter set and rationale.
- One round (size 2–6): for detail and control.
- One synthetic flat (size 8–12): for blocking and edges.
- One filbert (size 6–10): for blending and organic forms.
- One fan (medium): for texture and blending.
- One rigger/liner (small): for long lines and detail.
- One mop or wash brush (large): for large washes and wetting (watercolor) or underpainting.
You should expand the kit based on personal technique, medium, and the scale of your projects.
Final tips to refine your brush selection skills
You should practice with a variety of shapes to understand their mark-making potential. Regular experimentation and careful observation of how each brush behaves with your chosen medium will sharpen your ability to select the right tool quickly.
Practice regimen
Test each brush on scrap paper or canvas using exercises: long continuous lines, controlled edges, soft blends, and different paint loads. You should keep a simple swatch chart that records how each brush responds in different situations.
Evaluate and replace
Periodically review your brushes and replace those that no longer meet needs or shift the quality of work. You should reinvest in a few quality pieces rather than accumulating many low-quality options.
Conclusion
You should now be able to identify the major brush shapes, understand their functional differences, and make informed choices for your painting practice. Selecting the right brush is both a technical and artistic decision that will improve efficiency and outcomes in your work. Use the recommendations, tables, and techniques outlined here to build a purposeful, quality brush collection tailored to your medium and style.


