Have you ever wondered how to properly varnish an acrylic painting to enhance its longevity and appearance? Varnishing is an essential step in preserving and protecting your artwork, providing not only an additional layer of protection but also enhancing color vibrancy and sheen. Understanding the correct products and techniques to use can make a significant difference in the outcome of your varnishing process. In this article, you will learn the step-by-step process of varnishing an acrylic painting, along with the tools and materials needed to ensure your artwork receives the best possible finish.
Understanding the Purpose of Varnishing
Varnishing serves multiple functions for your acrylic paintings. Not only does it protect your artwork from dust, scratches, and UV rays that could cause fading, but it also enhances the visual appeal by providing a uniform finish. Whether you prefer a glossy, satin, or matte finish, varnishing can transform your painting’s look, ensuring it looks its best from every angle.
Protection from Environmental Damage
Acrylic paintings, like any artwork, are vulnerable to environmental factors. Dust, dirt, and pollutants can settle on the surface, deteriorating the painting over time. Additionally, UV rays from sunlight can cause colors to fade, diminishing the vibrancy of your artwork. A varnish acts as a barrier against these elements, allowing your painting to withstand the test of time.
Enhancing Aesthetic Appeal
The aesthetic value of your painting can significantly improve with a suitable varnish finish. Choosing between gloss, satin, or matte finishes depends on your personal preference and the effect you want to achieve. A glossy finish can enhance color depth and vibrancy, while a matte finish offers a classic, subdued look. A satin finish provides a balance between the two, giving your painting a sophisticated appearance.
Choosing the Right Varnish
Selecting the appropriate varnish is crucial for achieving the desired outcome. Acrylic varnishes come in several forms, each offering unique properties and advantages. Understanding these differences will help you make an informed choice.
Types of Varnish Finishes
- Gloss Varnish: Offers a shiny, reflective surface that enhances color vibrancy and depth. It is ideal for paintings with rich, bold colors that you want to pop.
- Matte Varnish: Provides a non-reflective finish, reducing glare and giving artwork a more traditional feel. This is suitable for paintings where subtlety and nuance are emphasized.
- Satin Varnish: Strikes a balance between gloss and matte, offering a gentle sheen that enhances the painting without being overly reflective.
Varnish Composition
Varnishes are typically available in two main compositions:
- Solvent-Based Varnish: Known for its clarity and durability, solvent-based varnishes are ideal for a long-lasting finish. However, they require proper ventilation during application due to their strong odor and potential health risks.
- Water-Based Varnish: Easier to handle and clean up, water-based varnishes are safer to use indoors. They offer less odor and are an eco-friendly option, though they may not be as durable as solvent-based alternatives.

Preparing Your Painting for Varnishing
Before you begin the varnishing process, ensure that your acrylic painting is adequately prepared. Proper preparation enhances the effectiveness of the varnish and ensures a professional finish.
Allowing Adequate Drying Time
It is crucial to let your painting completely dry before applying varnish. Acrylic paint should be left to dry for at least 48 to 72 hours to ensure all layers beneath the surface are fully dried. This waiting period prevents potential smudging or blending of colors during the varnishing process.
Cleaning the Painting Surface
Dust and debris can easily accumulate on the surface of a painting, interfering with the varnish’s ability to adhere correctly. Gently brush off any dust or particles using a soft, clean brush or cloth. Avoid using liquids that may affect the paint’s integrity beneath the varnish.
Tools and Materials You Will Need
To achieve a professional varnishing finish, gather the necessary tools and materials beforehand. Having the right equipment readily available simplifies the process and ensures you apply the varnish correctly.
Essential Tools
- Varnish Applicator: Choose between a flat, soft-bristled brush or a foam brush, depending on the varnish type and your personal preference.
- Palette or Mixing Tray: Useful for pouring varnish and loading applicators evenly.
- Masking Tape: For protecting the edges of the painting or the canvas if not all areas are to be varnished.
Protective Materials
- Gloves and Mask: When using solvent-based varnish, it is vital to protect your skin and lungs from harmful vapors by wearing gloves and a mask.
- Apron or Protective Clothing: To prevent any varnish from staining your clothes.
- Drop Cloth or Newspaper: Cover the working area to protect it from varnish splatters or spills.

Step-by-Step Process for Varnishing
With your painting, tools, and materials prepared, you can now proceed with the varnishing process. Follow these detailed steps to ensure a smooth and even application.
Step 1: Setting Up Your Workspace
Choose a well-ventilated area with minimal dust for applying varnish. This can be a room with windows that can open or an outdoor space protected from direct sunlight and wind. Lay down a drop cloth to protect your working surface.
Step 2: Testing the Varnish
Before applying varnish to your painting, it is wise to test the product on a sample piece. This ensures you are satisfied with the finish and that there are no unexpected reactions between the varnish and the paint.
Step 3: Mixing the Varnish
If using a varnish that requires mixing, stir it gently with a clean stick or palette knife to ensure an even consistency. Avoid shaking the varnish, as this can create bubbles that may transfer onto your painting.
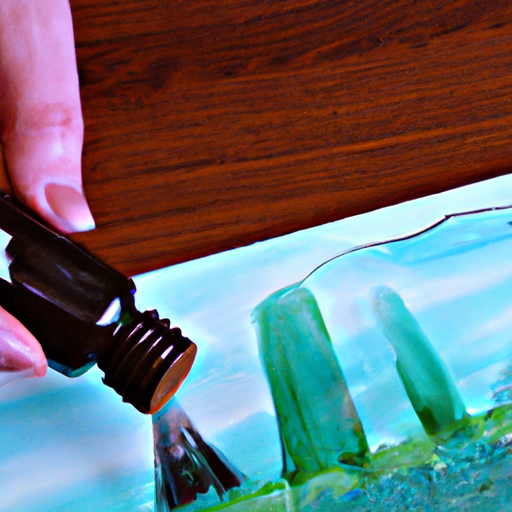
Step 4: Applying the First Coat
Load your brush or applicator with a moderate amount of varnish, ensuring it is not dripping excessively. Begin applying the varnish in even strokes, either horizontally or vertically, working systematically across the painting to cover all areas evenly.
Step 5: Letting the First Coat Dry
After applying the first coat, let it dry completely. This can take anywhere from 1 to 4 hours depending on humidity and temperature. Check the varnish instructions for specific drying times.
Step 6: Applying Additional Coats
For added protection and a smooth finish, apply additional coats of varnish. Allow each coat to dry thoroughly before applying the next. Two to three coats are typically sufficient for adequate coverage and protection.
Step 7: Final Drying and Curing
After applying the final coat, leave the painting to fully cure. This curing process can take several days, ensuring the varnish hardens and provides maximum protection.
Troubleshooting Common Varnishing Issues
Despite your best efforts, varnishing can occasionally present challenges. Being aware of potential issues enables you to address them promptly, ensuring a professional finish.
Dealing with Bubbles
Bubbles can occur if the varnish is too vigorously shaken or during application. To eliminate these, gently brush over the bubbles while the varnish is still wet. If dry, carefully sand them down and reapply a thin varnish coat.
Avoiding Streaks
Streaks can result from uneven application or using the wrong type of brush. Ensure you use a soft-bristled or foam brush and apply consistent, steady strokes for an even coat.
Correcting Gloss Variability
If your varnish finishes with unwanted gloss variability, ensure future layers are applied more evenly. Sometimes applying an additional thin coat can even the appearance.
Maintaining Your Varnished Painting
Once your painting is successfully varnished, maintaining it in optimal condition is essential. Proper care guarantees your artwork remains vibrant and intact over time.
Regular Cleaning
To keep your varnished painting looking its best, dust it regularly using a soft, dry cloth. Avoid using any cleaning products or moisture, as these can damage the varnish.
Proper Display Conditions
Protect your artwork by displaying it away from direct sunlight or harsh artificial light. Proper lighting prevents UV damage and minimizes glare, ensuring your painting’s colors remain vivid and eye-catching.
Re-varnishing Considerations
Over time, varnish can wear or discolor. Consider re-varnishing your painting every few years to maintain its protective quality and appearance. Always carefully remove the old varnish before applying a new layer.
In conclusion, mastering the art of varnishing an acrylic painting involves understanding the purpose, selecting the right products, and meticulously following a step-by-step process. With this knowledge, you can confidently enhance the beauty and longevity of your artwork, ensuring it remains a cherished piece for years to come.