In the world of watercolor painting, ensuring your paper remains perfectly flat and unmarred throughout the creative process is essential for producing professional-quality artwork. “How To Stretch Paper For Watercolor Painting” is an essential guide that meticulously walks you through each step of the paper stretching process. From selecting the right materials to understanding detailed techniques, this article equips you with the knowledge to prevent paper warping and ensure a smooth, resilient canvas for your watercolor masterpieces. Have you ever experienced the frustration of watercolor paper buckling and warping under the weight of your carefully applied washes and strokes? If so, you’re not alone. Many watercolor artists face this common challenge, but there’s a tried-and-true solution: stretching your watercolor paper. By taking the time to properly prepare your paper, you can avoid these unwelcome surprises and create a smooth, professional-grade surface for your artwork. This article will guide you through the step-by-step process of stretching watercolor paper, ensuring that you have the perfect foundation for your paintings.

What is Stretching Watercolor Paper?
Stretching watercolor paper is a preparatory step that ensures the paper remains flat and taut when wet media are applied. This helps prevent the buckling and warping that often occurs when using watercolor paints, ensuring a smooth, even surface for your artistic endeavors.
Why Stretch Watercolor Paper?
The primary reason for stretching watercolor paper is to prevent paper distortion due to moisture. Most watercolor techniques require significant amounts of water, and this can cause non-stretched paper to buckle or cockle, negatively affecting the appearance of your artwork. By stretching the paper beforehand, you secure it in place, allowing it to dry flat and taut.
Materials Needed for Stretching Watercolor Paper
Before you begin, gather the necessary materials:
| Material | Purpose |
|---|---|
| Watercolor paper | The surface you’ll be stretching |
| Large water container | For soaking the paper |
| Sponge or brush | For moistening the paper |
| Gummed tape | To secure the paper to the board |
| Drawing board | A sturdy surface to attach the paper |
| Paper towels/cloth | For blotting excess water |
| Stapler (optional) | An extra measure to secure the paper temporarily |
Each of these materials plays a crucial role in ensuring that the paper remains secure and dries properly.
Step-by-Step Guide to Stretching Watercolor Paper
Let’s break down the process into manageable steps to ensure clarity and ease of execution.
Step 1: Prepare Your Materials
Before you begin, make sure all your materials are easily accessible. This includes cutting your watercolor paper to the desired size and having your gummed tape, drawing board, and sponges or brushes ready.
Note: Always use water-resistant boards like plexiglass, masonite, or gator board to avoid damage and buckling.
Step 2: Soak the Paper
Fill your large water container with clean, lukewarm water. Submerge the watercolor paper completely in the container and allow it to soak for about 5 to 10 minutes. The soaking time can vary depending on the paper’s weight; lighter papers may only need a few minutes, while heavier papers could require up to 15 minutes.
Soaking the paper allows it to absorb enough water to stretch without tearing.
Step 3: Remove and Blot Excess Water
Carefully lift the paper from the water container. Be gentle, as soaked paper can be fragile. Place the paper on a flat, clean surface or lay it over a towel. Use paper towels or a clean cloth to blot away excess water from the paper’s surface. The paper should be damp but not dripping.
Blotting ensures that the paper is manageable and ready for stretching.
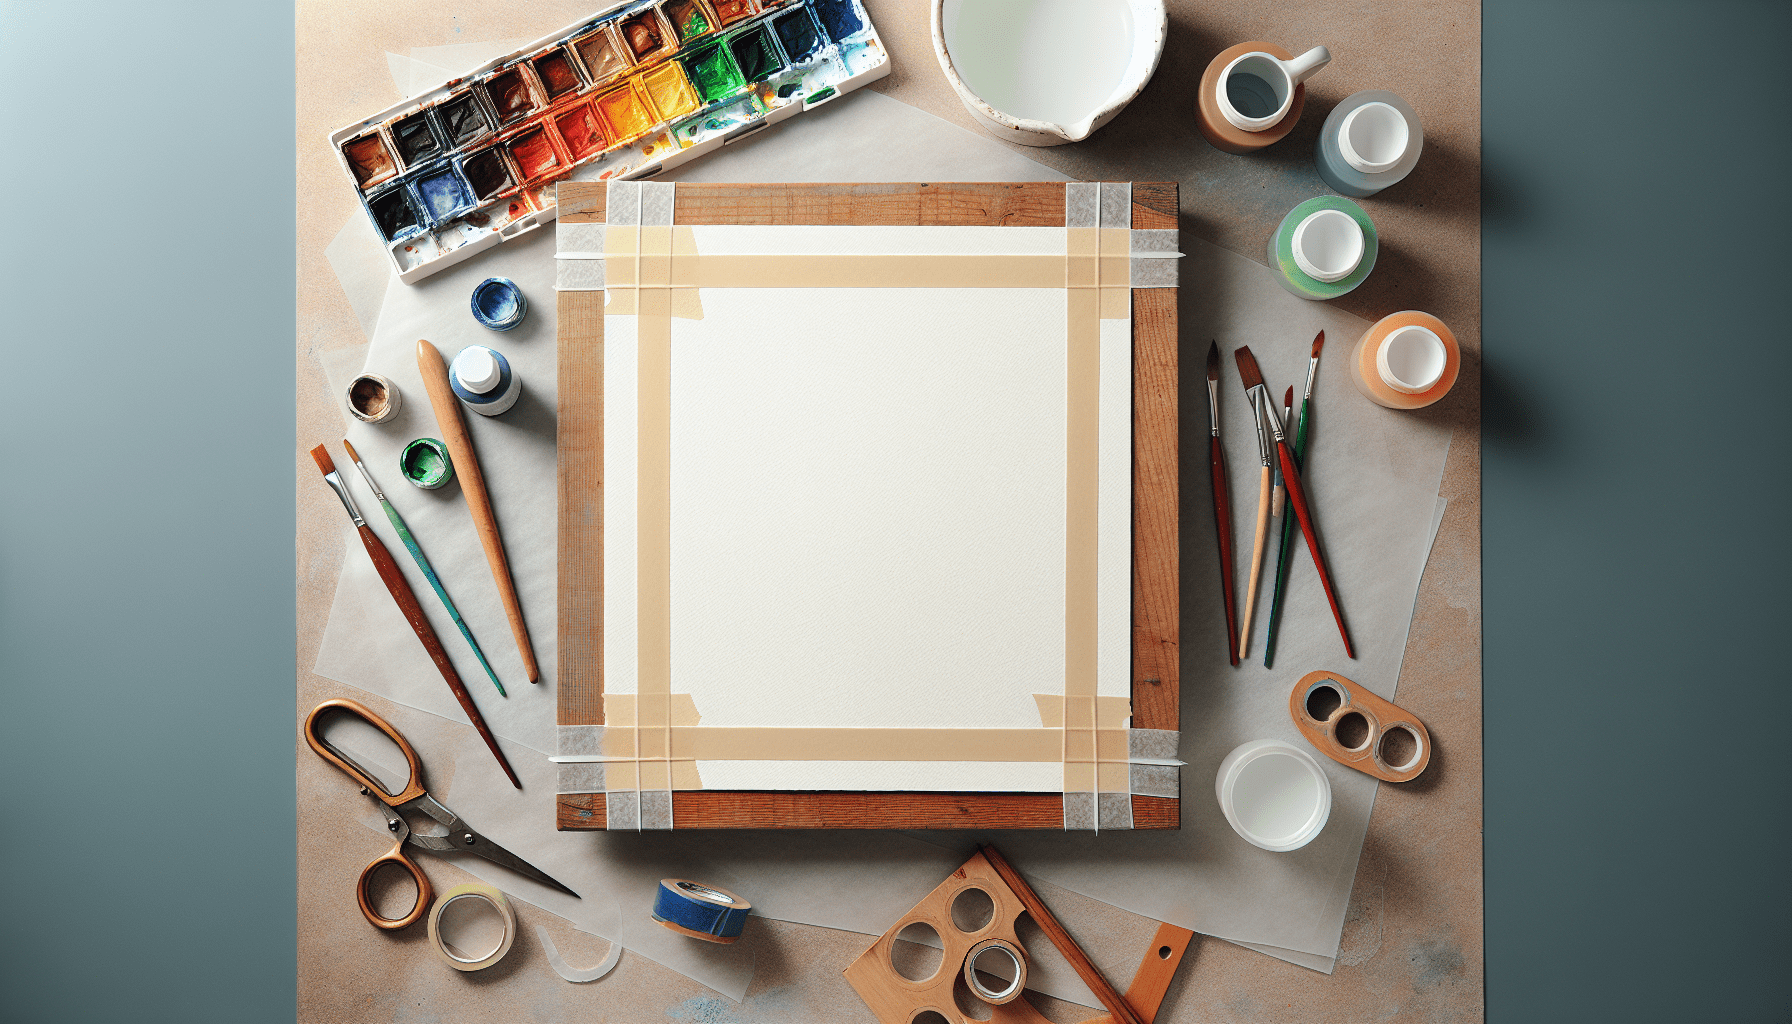
Step 4: Attach the Paper to the Drawing Board
Place the damp paper on your drawing board, ensuring it lays flat without any significant wrinkles. Smooth out any air bubbles by gently pressing from the center outward.
Method 1: Using Gummed Tape
- Wet the Tape: Cut strips of gummed tape slightly longer than each edge of the paper. Moisten the adhesive side by dipping it in water or using a sponge.
- Apply the Tape: Starting with one edge, apply the gummed tape half on the paper and half on the board. Press firmly to ensure a solid adhesion.
- Repeat: Repeat the process for the remaining edges, ensuring each strip overlaps at the corners.
Method 2: Using Stapler (Optional)
- Staple First: To provide additional security, you can initially staple the damp paper to the board around the edges, about 1 to 2 inches apart.
- Cover with Tape: Apply the gummed tape over the stapled areas as described above.
This dual method can provide extra assurance that your paper will stretch evenly and remain secure.
Step 5: Allow the Paper to Dry
Leave the paper undisturbed in a well-ventilated area. It is essential to let it dry naturally, which can take several hours to overnight depending on the environment. Ensure that the drying board remains horizontal to avoid uneven drying.
Note: Avoid using a hairdryer or any artificial heat source to speed up the drying process, as this could result in an uneven surface.
Step 6: Verify the Stretch
Once dry, check the paper to ensure it is evenly stretched and taut. It should have a firm, drum-like surface. If you notice any areas that are not completely flat, gently re-wet and re-stretch those sections.
Troubleshooting Common Issues
Even with careful preparation, you might encounter a few issues. Here’s how to handle them:
Wrinkles or Bubbles
- Cause: Inadequate adhesive or improper wetting of the gummed tape.
- Solution: Ensure the tape is adequately moistened and pressed firmly while applying. Smooth out bubbles from the center to the edges immediately after taping.
Loose Areas
- Cause: Uneven soaking or drying.
- Solution: Re-wet the loose area with a damp sponge, stretch it gently, and secure it with additional gummed tape or staples if necessary.
Tape Not Sticking
- Cause: The paper or tape was too wet or the tape was not fully activated.
- Solution: Use slightly less water on the tape and ensure it’s fully adhered by pressing down firmly.

Best Practices for Consistent Results
Achieving consistently flat and taut paper takes practice and a few useful techniques.
Choosing the Right Paper
The quality and weight of the watercolor paper are significant factors. Always opt for high-quality, 100% cotton paper with a weight of 140 lb (300 gsm) or more for best results. Heavier papers tend to withstand more water and are less prone to buckling.
Room Conditions
Ensure your working environment has stable humidity and temperature levels. Excessive heat or drafts can interfere with the drying process, leading to uneven results.
Advanced Techniques and Alternatives
For those looking to explore beyond the basic method, several advanced techniques can offer even greater control or convenience.
Pre-Stretching Blocks and Pads
Some manufacturers offer pre-stretched watercolor blocks or pads, where the paper is already adhered on all sides. These can save time and effort, though they tend to be more costly.
Canvas Stretching Methods
Certain artists prefer to stretch watercolor paper onto canvas frames much like how canvases are prepared for acrylic or oil painting. This method allows easier display and offers a different aesthetic.
Staple-Only Method
For a quick alternative, you can skip the gummed tape and rely solely on stapling. Use a sturdy staple gun and stretch the paper manually as you staple down along the edges.
Conclusion
Learning how to stretch watercolor paper is an invaluable skill for any artist serious about their craft. Properly stretched paper provides a stable foundation, ensuring your watercolors remain beautiful and undisturbed by paper deformations. The time and effort you invest in this preparatory step will be rewarded with smoother, flatter, and more professional results in your paintings.
By following the detailed steps outlined in this article and troubleshooting common issues, you’ll master the technique in no time, allowing you to focus on what you do best—creating stunning watercolor art. Happy painting!
This concludes the comprehensive guide on how to stretch paper for watercolor painting. Remember to practice regularly and adjust the process based on your specific materials and working environment for the best outcomes.


