So you’ve just finished painting your nails with acrylic paint and now you’re wondering how to make your masterpiece last longer? Look no further! In this article, we’ll show you the simple steps to seal acrylic paint on your nails, ensuring that your artwork stays vibrant and chip-free for days to come. From choosing the right top coat to proper application techniques, we’ve got you covered. Get ready to take your nail game to the next level!
Preparing the Nails
Clean and trim the nails
Before applying acrylic paint on your nails, it is crucial to start with clean and properly trimmed nails. Begin by soaking your nails in warm soapy water for a few minutes to soften the cuticles. Then, using a cuticle pusher, gently push back the cuticles to create a clean and even canvas. Next, trim your nails to your desired length and shape using a nail clipper or nail file. By properly cleaning and trimming your nails, you ensure that the acrylic paint adheres smoothly and evenly.
Buff the nails
After cleaning and trimming your nails, it is important to buff them to create a smooth surface for the acrylic paint. Use a nail buffer or a fine-grit nail file to gently buff the nails in a back-and-forth motion. This step removes any ridges or imperfections on the nail surface, allowing the acrylic paint to adhere better and last longer. Be careful not to buff too hard or for too long, as it can weaken the nails.
Apply a base coat
Once your nails are clean and buffed, it’s time to apply a base coat. A base coat acts as a primer, providing a smooth surface for the acrylic paint and increasing its longevity. Choose a base coat specifically designed for acrylic paint, as it will ensure better adhesion and prevent chipping. Apply a thin layer of base coat to each nail, making sure to cover the entire surface. Allow the base coat to dry completely before moving on to the next step.
Choosing the Right Acrylic Paint
Selecting a high-quality acrylic paint
When it comes to selecting acrylic paint for your nails, quality is key. Look for acrylic paints specifically formulated for nail art, as they are designed to adhere to the nails and withstand everyday use. High-quality acrylic paints are generally more pigmented, which means you’ll get vibrant and long-lasting results. Additionally, they tend to dry faster and have a smoother consistency, making them easier to work with. Investing in a good quality acrylic paint will ensure that your nail art looks beautiful and lasts longer.
Considering the color and finish
Aside from the quality of the acrylic paint, it’s also important to consider the color and finish you desire. Acrylic paints come in a wide range of colors, from bold and vibrant shades to more subtle and neutral hues. Choose a color that complements your skin tone and matches your outfit or mood. Additionally, consider the finish of the acrylic paint. Do you prefer a glossy or matte finish? Some acrylic paints have a built-in shine, while others may require a top coat to achieve the desired effect. Choose a finish that suits your personal style and preferences.

Applying Acrylic Paint on Nails
Using a thin brush
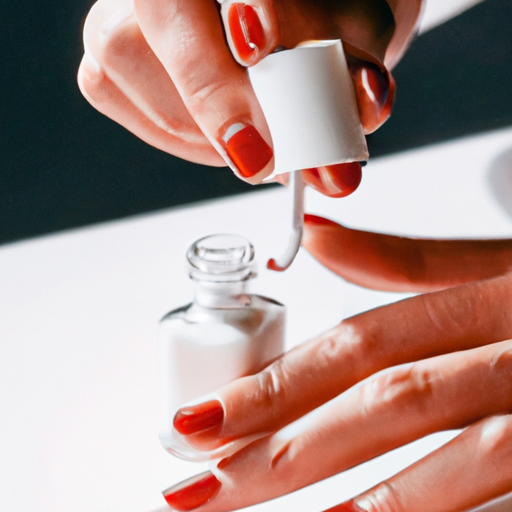
Once you have selected the acrylic paint and prepared your nails, it’s time to start applying the paint. To achieve precise and detailed nail art, it is recommended to use a thin brush specifically designed for nail art purposes. A thin brush allows you to have more control over the paint application, making it easier to create intricate designs and patterns. Dip the brush into the acrylic paint and gently wipe off any excess paint on the side of the bottle.
Creating a design or pattern
With a steady hand, start creating your desired design or pattern on your nails. Whether you want simple stripes, intricate flowers, or abstract shapes, the options for nail art are endless. Take your time and work slowly, using gentle strokes to apply the acrylic paint. If you make any mistakes, don’t worry! You can easily remove excess paint with a cotton swab dipped in nail polish remover. Experiment with different designs and patterns to find what suits your style best.
Allowing the paint to dry
After you have finished applying the acrylic paint on your nails, it is important to allow it to dry completely before moving on to the next step. acrylic paint typically dries relatively quickly, but it’s best to give it at least 10 to 15 minutes to ensure it is fully dry and won’t smudge or smear. You can use a fan or a quick-dry spray to speed up the drying process, but refrain from touching or applying pressure to the painted nails until they are completely dry.
Sealing Acrylic Paint
Gel top coat
Sealing the acrylic paint is crucial to ensure its longevity and to protect the design from chipping or fading. One popular option for sealing acrylic paint on nails is using a gel top coat. Gel top coats are cured under a UV or LED lamp, creating a glossy and durable finish. To seal your acrylic paint with a gel top coat, apply a thin layer of the gel evenly over the painted nails, making sure to cover the entire surface. Once applied, cure the gel top coat under a UV or LED lamp according to the manufacturer’s instructions.
Regular top coat
If you don’t have access to a UV or LED lamp, or prefer a simpler sealing method, you can use a regular top coat to seal the acrylic paint. Regular top coats come in various finishes, including glossy, matte, and satin. Choose a top coat that matches your desired finish. Apply a thin layer of the regular top coat over the painted nails, ensuring complete coverage. Wait for the top coat to dry completely before proceeding to the next step.
UV gel curing
UV gel curing is another method of sealing acrylic paint on nails, especially if you prefer a combination of durability and flexibility. UV gel is applied over the painted nails and then cured under a UV lamp, creating a strong and flexible protective layer. To seal your acrylic paint with UV gel, apply a thin layer of the gel evenly over the painted nails, making sure to cover the entire surface. Once applied, cure the UV gel under a UV lamp according to the manufacturer’s instructions.

Using Gel Top Coat
Applying a thin layer of gel top coat
To seal your acrylic paint with a gel top coat, start by applying a thin layer of gel top coat over the painted nails using the brush provided with the gel top coat. Begin at the base of the nail near the cuticle and gently stroke the brush toward the tip of the nail, ensuring even coverage. Be careful not to apply too much gel top coat, as it can result in a thick and uneven finish. Aim for a thin and smooth layer of gel top coat.
Curing the top coat with UV light
After applying the gel top coat, it’s time to cure it under a UV lamp. Place your painted nails under the UV lamp, following the manufacturer’s recommended curing time. UV lamps emit UV light, which activates the chemicals in the gel top coat and helps it harden and bond to the acrylic paint. The curing time can vary depending on the brand and strength of the UV lamp, so refer to the instructions provided with your specific lamp.
Wiping off the tacky layer
Once the gel top coat is fully cured, you may notice a tacky or sticky layer on the surface. This is completely normal and can be easily removed. To remove the tacky layer, simply wipe the painted nails with a lint-free wipe or cotton pad soaked in isopropyl alcohol or gel cleanser. Gently swipe the wipe or cotton pad across each nail, ensuring complete removal of the tacky layer. This reveals a glossy and durable finish, sealing the acrylic paint on your nails.
Using Regular Top Coat
Applying a thin layer of regular top coat
If you prefer using a regular top coat to seal your acrylic paint, start by applying a thin layer of the top coat over the painted nails using the brush provided with the top coat. Begin at the base of the nail near the cuticle and gently stroke the brush toward the tip of the nail, ensuring even coverage. Like with the gel top coat, avoid applying too much regular top coat to prevent a thick and uneven finish. Aim for a thin and smooth layer.
Allowing the top coat to dry
Once you have applied the regular top coat, allow it to dry completely before touching or applying any pressure to the painted nails. Regular top coats typically dry within 10 to 15 minutes, but it’s best to give it more time to ensure it is fully dry. Avoid exposing the freshly painted nails to any activities that may smudge or damage the top coat. Once dry, the regular top coat will provide a protective layer, sealing the acrylic paint and enhancing its longevity.

Curing with UV Gel
Applying a thin layer of UV gel
If you choose to seal your acrylic paint with UV gel, start by applying a thin layer of UV gel over the painted nails using a brush or a gel applicator. Begin at the base of the nail near the cuticle and gently stroke the gel toward the tip of the nail, ensuring complete coverage. Like with the top coats, it is important to apply a thin and even layer of UV gel to avoid a thick and uneven finish. Take your time and work carefully to achieve the desired result.
Curing the UV gel with a UV lamp
After applying the UV gel, it needs to be cured under a UV lamp to harden and bond to the acrylic paint. Place your painted nails under the UV lamp, following the manufacturer’s recommended curing time. UV lamps emit UV light, which activates the chemicals in the UV gel and assists in the curing process. The exact curing time may vary depending on the brand and strength of the UV lamp, so refer to the instructions provided with your specific lamp.
Applying Additional Layers
Adding additional layers for durability
For added durability and strength, you can apply additional layers of the chosen sealing method. Whether you opt for gel top coat, regular top coat, or UV gel, adding extra layers can provide extra protection to your acrylic paint. Apply additional layers using the same technique as before, ensuring each layer is thin and even. Multiple thin layers are preferable over one thick layer, as they will dry or cure more evenly and reduce the risk of smudging or chipping.
Curing or drying each layer before applying the next
After applying each additional layer, it’s crucial to cure or allow it to dry completely before applying the next layer. This ensures that each layer bonds properly and creates a smooth and durable finish. Follow the curing or drying instructions provided for the chosen sealing method, whether it’s using a UV lamp, allowing the top coat to air dry, or curing with a gel curing light. Patience and allowing sufficient time for each layer to dry or cure will result in a beautiful and long-lasting nail art.

Finishing Touches
Cleaning up any excess paint
Once you have completed applying the acrylic paint and sealing layers, it’s time to clean up any excess paint. Dip a small, fine brush into nail polish remover and gently clean around the edges of the nail to remove any stray paint or smudges. This step helps achieve a clean and professional-looking finish. Take your time and be gentle to avoid removing any of the acrylic paint or the sealing layers.
Adding decorative elements
If you want to enhance your acrylic paint nail art even further, consider adding decorative elements. You can use small nail art gems, glitters, or nail stickers to create unique and eye-catching designs. Apply the decorative elements while the top coat is still slightly tacky, gently pressing them onto the nails. Once the decorative elements are in place, seal them with an additional layer of top coat or the chosen sealing method to ensure they stay in place and are protected.
Applying a final layer of top coat
To provide an extra layer of protection to your acrylic paint nail art and to enhance its shine, apply a final layer of top coat. Whether you choose a gel top coat, regular top coat, or UV gel, apply a thin layer using the same technique as before. Ensure complete coverage and allow the final layer to dry or cure according to the instructions for the chosen sealing method. The final layer of top coat not only seals the acrylic paint but also leaves your nails with a glossy and long-lasting finish.
Tips and Tricks
Using a light touch with the brush
When applying acrylic paint to your nails, it is important to use a light touch with the brush. Pressing too hard or using too much pressure can result in uneven application and smudging. Instead, hold the brush lightly and glide it gently across the nail surface. This allows for better control and precision, especially when creating intricate designs or patterns.
Practicing on a surface before applying to nails
If you’re new to using acrylic paint for nail art, it can be helpful to practice your designs or patterns on a surface before applying them to your nails. This allows you to familiarize yourself with the consistency and flow of the acrylic paint, as well as test out different brush strokes and techniques. You can use a plastic sheet or a piece of wax paper as a practice surface. Once you feel confident, you can transfer your skills to your nails.
Keeping nail art tools clean and organized
To ensure optimal results and prolong the lifespan of your nail art tools, it is essential to keep them clean and organized. After each use, clean your brushes or applicators thoroughly with isopropyl alcohol or gel cleanser to remove any acrylic paint residue. Store your tools in a clean and dry container to prevent damage or contamination. Regularly inspect your brushes for any signs of wear or fraying, and replace them when necessary. By maintaining clean and organized nail art tools, you’ll be able to create beautiful and precise designs every time.
In conclusion, sealing acrylic paint on nails not only enhances its longevity but also adds a professional and shiny finish to your nail art. By following the steps outlined in this article, from preparing the nails to applying the acrylic paint and choosing the right sealing method, you can achieve stunning and long-lasting nail art. Remember to practice, be patient, and have fun with your creativity. With the right techniques and tools, you can create beautiful and personalized nail art that will make heads turn.