If you’ve ever tried painting on glazed ceramic and wondered how to make your artwork last, we’ve got you covered. This article provides a simple and effective method to seal acrylic paint on glazed ceramic, ensuring that your creations stay vibrant and durable over time. With just a few easy steps, you’ll be able to add a layer of protection to your painted ceramic pieces and enjoy them for years to come. Say goodbye to worry about your artwork fading or peeling, and say hello to beautifully preserved ceramic masterpieces.
Preparation
Before you start painting your glazed ceramic surface, it’s essential to make sure you have everything you need and prepare your workspace accordingly. This section will guide you through the necessary steps to ensure a successful painting project.
Cleaning the ceramic surface
The first step in preparing your glazed ceramic surface for acrylic paint is to clean it thoroughly. Any dirt, dust, or grease on the surface can affect the adhesion and durability of the paint. Use a mild soap or dish detergent and warm water to clean the ceramic surface. Scrub gently with a soft sponge or cloth to remove any grime. Rinse the surface with clean water and pat it dry with a towel. Ensure that the ceramic surface is completely clean and free from any residue before proceeding to the next step.
Choosing the right acrylic paint
Selecting the right acrylic paint for your ceramic project is crucial to achieve the desired results. Look for acrylic paints specifically designed for use on ceramics or porcelain. These paints are formulated to adhere to glazed surfaces and provide long-lasting results. Consider the colors you want to use and ensure they are compatible with the ceramic surface you will be painting. Acrylic paints come in a variety of finishes, such as glossy or matte, so choose one that suits your preferences and the overall look you wish to achieve.
Gathering necessary materials
To successfully seal acrylic paint on glazed ceramic, you will need a few additional materials. Here’s a list of items you should gather before starting your project:
- Acrylic paint
- Brushes or sponges for applying the paint
- Water-based sealer, spray sealer, or brush-on sealer (depending on your preference)
- Paint palette or disposable plates for mixing colors
- Paper towels or cloth for cleaning and drying brushes
- Masking tape or painter’s tape (if needed for creating clean edges)
- Protective gear, such as gloves and goggles (optional but recommended)
- Newspaper or drop cloth to protect your workspace from paint splatters
- Hairdryer or fan (optional for speeding up the drying process)
Ensure you have all these materials at hand before you start your ceramic painting project. Having everything prepared will make the process smoother and more enjoyable.
Techniques for Sealing Acrylic Paint
Sealing your acrylic paint on glazed ceramic is vital to protect your artwork and ensure its longevity. Different sealing techniques are available, each with its unique advantages and application methods. In this section, we will explore the water-based sealers, spray sealers, brush-on sealers, and the sponging technique.
Water-based Sealers
Water-based sealers are a popular choice for sealing acrylic paint on glazed ceramic. They provide a clear protective layer that helps prevent the paint from chipping, fading, or peeling. Water-based sealers are typically applied using a brush or sponge, making them easy to use for both beginners and experienced artists.
Spray Sealers
Spray sealers offer a convenient and efficient way to seal acrylic paint on glazed ceramic surfaces. They come in aerosol cans, allowing for an even and consistent application. Spray sealers generally dry faster than other sealing methods, saving you time and reducing the risk of smudging your artwork. They are especially suitable for large or intricate ceramic pieces.
Brush-on Sealers
If you prefer a more traditional approach, brush-on sealers are an excellent option. They come in liquid form and are applied using a brush, allowing for greater control over the application process. Brush-on sealers can be brushed on evenly across the surface, ensuring complete coverage and protection. They are ideal for smaller ceramic pieces or when you want a more precise application.
Sponging Technique
The sponging technique offers a unique and textured effect when sealing acrylic paint on glazed ceramic. This technique involves using a sponge to dab or stipple the sealer onto the painted surface. It creates a variegated and mottled appearance, adding depth and visual interest to your ceramic artwork. The sponging technique is often used in combination with other sealing methods for added dimension.

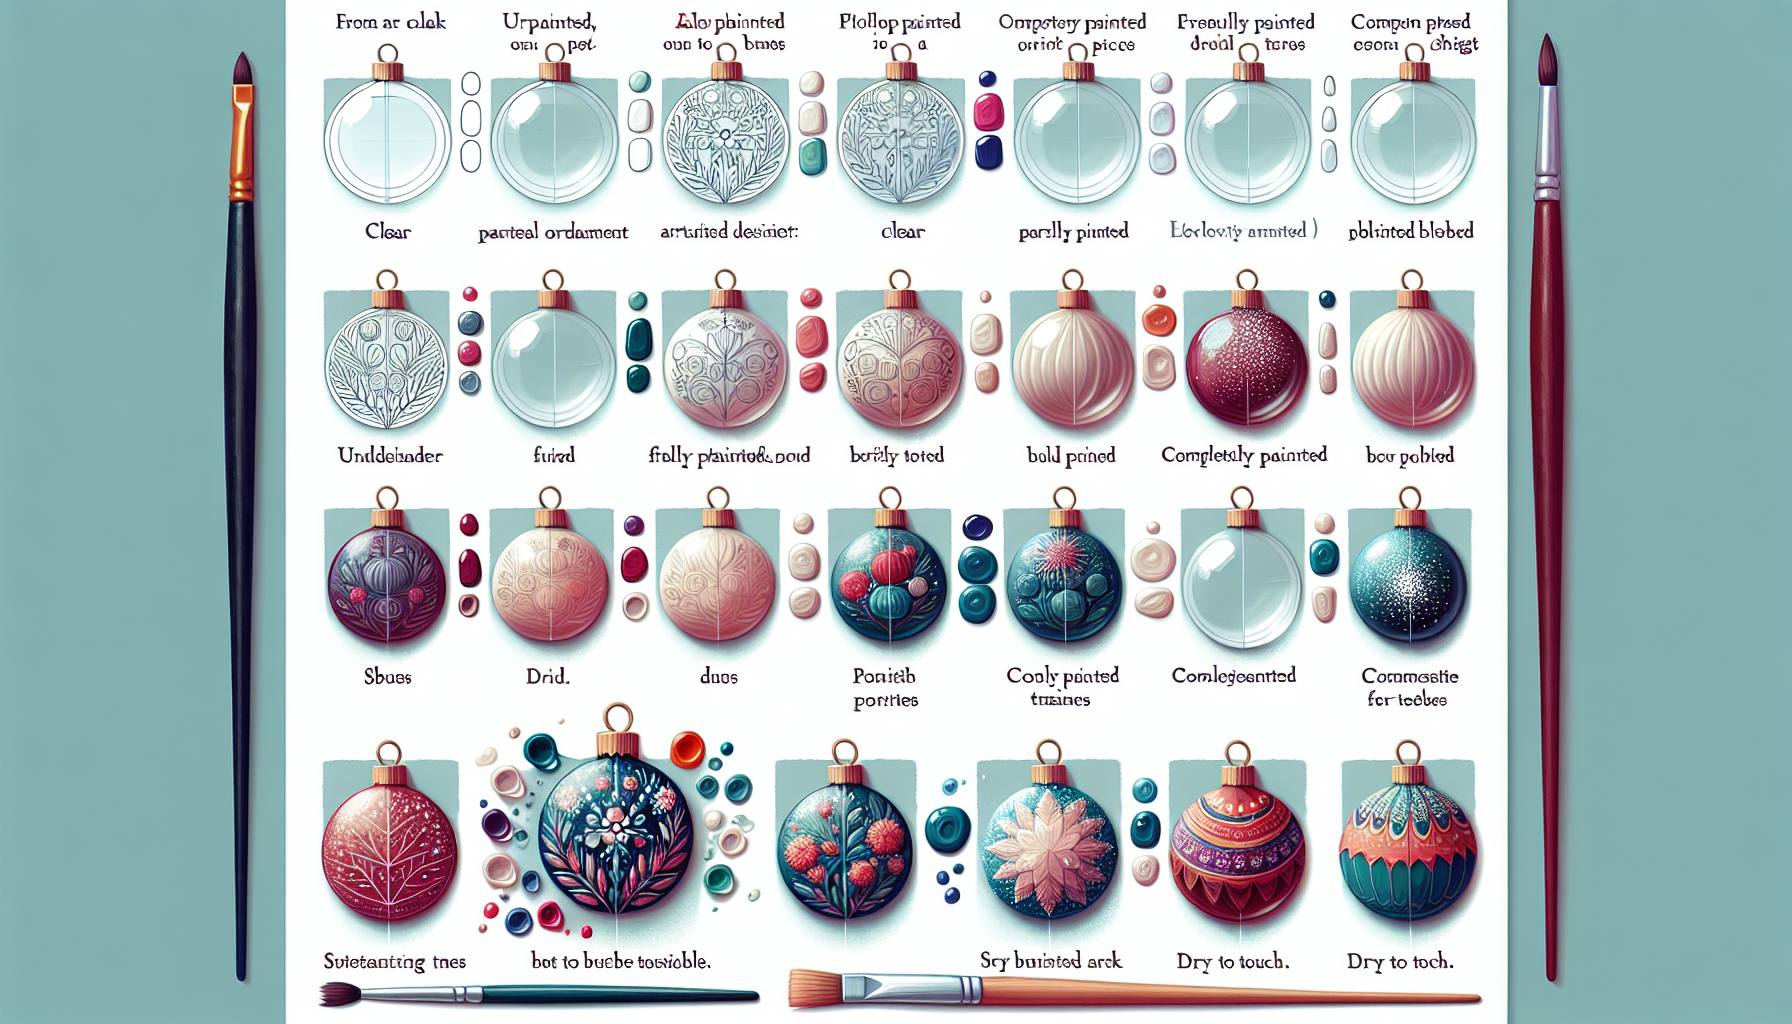
Step-by-Step Process
Now that you have prepared your workspace, cleaned the ceramic surface, chosen the right acrylic paint, and familiarized yourself with different sealing techniques, let’s dive into the step-by-step process of sealing acrylic paint on glazed ceramic.
Step 1: Prepare your workspace
Begin by selecting a clean and well-ventilated area to work in. Lay down newspaper or a drop cloth to protect your work surface from any accidental spills or splatters. Ensure that you have enough space to comfortably paint and allow the paint and sealer to dry.
Step 2: Clean the ceramic surface
Before applying the acrylic paint, ensure that the ceramic surface is thoroughly clean. Follow the cleaning steps mentioned in the “Cleaning the ceramic surface” section above. Once the surface is clean, dry it completely before proceeding.
Step 3: Apply the acrylic paint
Using your chosen brushes or sponges, start applying the acrylic paint to the ceramic surface. Use smooth and even strokes, ensuring that the paint is evenly distributed. Depending on the desired finish and coverage, you may need to apply multiple coats of paint. Allow each coat to dry completely before applying the next one.
Step 4: Allow the paint to dry
Once you have achieved the desired level of coverage, it’s essential to allow the paint to dry completely. This will ensure that it sets properly and forms a solid bond with the ceramic surface. Depending on the type and thickness of the paint, drying time can vary. It’s recommended to wait at least 24 hours to ensure the paint is completely dry before proceeding to the next step.
Step 5: Select and apply the sealer
Now it’s time to choose the sealer that best suits your preferences and follow the application method specific to the chosen sealer. Refer to the respective sections on water-based sealers, spray sealers, brush-on sealers, or the sponging technique for detailed instructions on applying each type of sealer.
Step 6: Cure and finish the project
After applying the sealer, it’s crucial to allow it to cure fully before using the ceramic item or exposing it to external elements. Curing times can vary depending on the type of sealer and manufacturer’s instructions. Once cured, your sealed acrylic paint on glazed ceramic is ready to be displayed, used, or gifted!
Water-based Sealers
Water-based sealers are a popular choice for sealing acrylic paint on glazed ceramic due to their ease of use and effectiveness. Here’s an overview of water-based sealers and the process of applying them.
Overview of water-based sealers
Water-based sealers are transparent or clear coatings that provide a protective barrier over the acrylic paint. They help to prevent the paint from fading, cracking, or peeling over time. Water-based sealers are generally non-toxic and odorless, making them safe to use in various settings. They are available in matte, satin, or glossy finishes, allowing you to choose the level of sheen that best complements your ceramic artwork.
Water-based sealer application process
To apply a water-based sealer, follow these steps:
- Ensure that the acrylic paint on the ceramic surface is completely dry.
- Stir the water-based sealer well to ensure an even consistency.
- Using a brush or sponge, apply an even layer of sealer over the painted surface. Be careful not to apply the sealer too thickly, as it may result in a cloudy or uneven finish.
- Allow the sealer to dry completely according to the manufacturer’s instructions.
- If desired, apply an additional coat of sealer for added protection and durability.
- Allow the final coat to dry and cure fully before using or displaying the ceramic item.
Water-based sealers provide a reliable and straightforward method for sealing acrylic paint on glazed ceramic. Experiment with different finishes and application techniques to achieve the desired look for your ceramic artwork.

Spray Sealers
Spray sealers offer a convenient and efficient option for sealing acrylic paint on glazed ceramic surfaces. Let’s explore the benefits of spray sealers, how to choose the right one, and the application process.
Benefits of spray sealers
Spray sealers offer several advantages when it comes to sealing acrylic paint on ceramic surfaces:
- Even application: Spray sealers provide a fine and consistent mist of sealer, ensuring an even and uniform coating across the entire surface.
- Quick drying: Spray sealers dry faster than other sealing methods, reducing the risk of smudging or dust settling on the painted surface during the drying process.
- Time-saving: They are particularly useful for sealing larger or intricate ceramic pieces, as the aerosol spray covers a larger area in less time.
- Versatility: Spray sealers are available in various finishes, including matte, satin, and glossy, allowing you to choose the desired level of sheen for your ceramic artwork.
Choosing the right spray sealer
When selecting a spray sealer for your ceramic project, consider the following factors:
- Compatibility: Ensure that the spray sealer is suitable for use on acrylic paint and glazed ceramic surfaces.
- Finish: Decide on the desired finish (matte, satin, or glossy) based on your personal preference and the overall aesthetic you want to achieve.
- Durability: Look for a spray sealer that provides long-lasting protection against UV rays, moisture, and everyday wear and tear.
- Non-yellowing: Choose a spray sealer that is specifically formulated to resist yellowing over time, ensuring that your ceramic artwork retains its vibrant colors.
Spray sealer application process
To apply a spray sealer to your ceramic artwork, follow these steps:
- Shake the aerosol can of spray sealer vigorously for about a minute to ensure proper mixing.
- Hold the can approximately 6-10 inches away from the ceramic surface to avoid excessive pooling or dripping.
- In a smooth and continuous motion, spray an even layer of sealer over the entire painted surface. Start spraying slightly before the ceramic item and continue spraying slightly beyond it to ensure complete coverage.
- Avoid over-applying the sealer, as it may cause drips or an uneven finish. It’s better to apply multiple thin coats rather than one thick coat.
- Allow the sealer to dry completely between coats, following the manufacturer’s recommended drying time.
- Once you have achieved the desired level of protection, allow the final coat to dry and cure fully before handling or displaying the ceramic item.
Spray sealers provide a hassle-free and effective way to seal acrylic paint on glazed ceramic. Follow the instructions provided by the manufacturer for the best results.
Brush-on Sealers
Brush-on sealers offer a more traditional approach to sealing acrylic paint on glazed ceramic surfaces. Learn about the benefits of using brush-on sealers, how to choose the right one, and the application process.
Benefits of brush-on sealers
Brush-on sealers offer several advantages when it comes to sealing acrylic paint on ceramic surfaces:
- Control and precision: Using a brush allows for greater control over the application process, ensuring complete coverage and protection.
- Varied finishes: Brush-on sealers come in various finishes, such as matte, satin, or glossy, allowing you to choose the desired level of sheen for your ceramic artwork.
- Versatility: They can be used on both small and large ceramic pieces, making them suitable for a wide range of projects.
- Reusable brushes: Unlike disposable sponge applicators, brushes can be cleaned and reused, reducing waste and saving money in the long run.
Choosing the right brush-on sealer
Consider the following factors when selecting a brush-on sealer for your ceramic project:
- Compatibility: Ensure that the brush-on sealer is suitable for use on acrylic paint and glazed ceramic surfaces.
- Finish: Choose a sealer that provides the desired level of sheen for your ceramic artwork, whether it’s matte, satin, or glossy.
- Durability: Look for a brush-on sealer that offers long-lasting protection against UV rays, moisture, and general wear and tear.
- Application ease: Some brush-on sealers are self-leveling, which means they naturally even out during the drying process, resulting in a smoother finish. Consider this option if you prefer a more seamless appearance.
Brush-on sealer application process
To apply a brush-on sealer to your ceramic artwork, follow these steps:
- Stir the brush-on sealer well to ensure an even consistency.
- Dip the brush into the sealer and remove any excess by tapping it against the side of the container or wiping it lightly on a paper towel.
- Apply a thin and even layer of sealer over the painted ceramic surface. Work in small sections, using smooth and deliberate strokes.
- Ensure complete coverage and avoid leaving any marks or ridges. If necessary, use a clean brush to even out the sealer by lightly brushing over the surface.
- Allow the sealer to dry completely according to the manufacturer’s instructions.
- If desired, apply additional coats of sealer for added protection and durability. Allow each coat to dry fully before applying the next one.
- Once you have achieved the desired level of protection, allow the final coat to dry and cure fully before handling or displaying the ceramic item.
Brush-on sealers offer a traditional and reliable method for sealing acrylic paint on glazed ceramic surfaces. Experiment with different brush techniques and finishes to achieve the desired result for your ceramic artwork.

Sponging Technique
The sponging technique is an excellent way to add texture and visual interest when sealing acrylic paint on glazed ceramic. Let’s explore an overview of this technique, the materials required, and the application process.
Overview of sponging technique
The sponging technique involves using a sponge to dab or stipple the sealer onto the painted ceramic surface. This creates a variegated and mottled effect, adding depth and dimension to your artwork. The sponging technique is often used in combination with other sealing methods to enhance the overall aesthetic of the ceramic piece.
Materials required for sponging technique
To apply the sponging technique, gather the following materials:
- Natural sea sponge or synthetic sponge: Choose a sponge with a texture that suits your desired effect. Natural sea sponges tend to create a more organic and unique pattern, while synthetic sponges offer consistency.
- Water-based or brush-on sealer: Select the appropriate sealer based on your preferences.
- Brush or palette knife: These tools can be used to apply the sealer onto the sponge.
Application process of sponging technique
Follow these steps to apply the sponging technique to your ceramic artwork:
- Ensure that the acrylic paint on the ceramic surface is completely dry.
- Pour a small amount of the chosen sealer onto a palette or disposable plate.
- Dip the sponge into the sealer, ensuring that it absorbs the sealer without becoming overly saturated.
- Lightly dab or stipple the sponge onto the painted ceramic surface. Start with a small area and gradually expand, working in a random and organic pattern.
- Vary the pressure and angle of the sponge to create different textures and patterns. Experiment with different techniques to achieve your desired effect.
- If necessary, reapply the sealer to the sponge for additional coverage. Ensure that the sealer is evenly distributed on the sponge to avoid clumps or excess sealer on the surface.
- Allow the sealer to dry completely according to the manufacturer’s instructions.
- If desired, apply additional coats of sealer using the same sponging technique for added protection and visual appeal.
- Once the final coat is dry and cured, your ceramic artwork is ready to be displayed and admired.
The sponging technique offers a fun and creative way to add texture and depth to your sealed acrylic paint on glazed ceramic. Experiment with different sponge textures and sealer colors for unique and stunning results.
Additional Tips and Considerations
As you embark on your journey of sealing acrylic paint on glazed ceramic, consider the following tips and factors to ensure the best possible outcome:
Testing the sealant
Before applying the sealer to your entire ceramic piece, it’s advisable to test it on a small and inconspicuous area. This will allow you to see the final result and ensure compatibility with the acrylic paint and glazed surface. Let the test area dry and observe it for any undesirable effects, such as color changes, streaks, or uneven finish. If the test results are satisfactory, proceed with sealing the rest of the ceramic item.
Multiple layers for added durability
Applying multiple layers of sealer can provide added protection and durability to your ceramic artwork. Allow each layer to dry and cure fully before applying the next one. Multiple layers of sealer can also enhance the overall appearance, making the colors more vibrant and the finish more lustrous or matte, depending on your chosen sealer.
Maintaining and cleaning the sealed surface
Once your ceramic artwork is sealed, it’s important to maintain and clean the sealed surface properly. Avoid using harsh or abrasive cleaners that may damage the sealer or scratch the surface. Instead, opt for mild soaps or dish detergents and a soft cloth or sponge. Gently wipe the sealed surface and rinse it with clean water. Avoid soaking the ceramic piece for extended periods, as this may compromise the integrity of the sealer. With regular and gentle cleaning, your sealed acrylic paint on glazed ceramic will stay vibrant and protected for years to come.

FAQs
Can I use any type of acrylic paint on ceramic?
Not all acrylic paints are suitable for use on ceramic surfaces. Look for acrylic paints specifically formulated for use on ceramics or porcelain. These paints are designed to adhere to glazed surfaces and provide long-lasting results. Using the appropriate type of acrylic paint will ensure better adhesion, durability, and overall quality of your ceramic artwork.
How long does it take for the paint to dry?
The drying time of acrylic paint on glazed ceramic can vary depending on several factors, such as the brand of paint, the thickness of the applied coats, temperature, humidity, and ventilation. In general, it’s recommended to wait at least 24 hours for the initial layers of paint to dry. Thicker or multiple layers may take longer to dry completely. To ensure proper drying, it’s best to wait until the paint feels dry to the touch before proceeding with sealing.
Can I use a hairdryer to speed up the drying process?
Using a hairdryer or a fan on a low setting can help speed up the drying process of acrylic paint on glazed ceramic. However, exercise caution and avoid applying excessive heat, as it can cause the paint to become tacky or bubble. Use the hairdryer or fan sparingly and maintain a safe distance to prevent any unwanted effects. It’s essential to allow the paint to dry naturally for the best and most stable results.
Conclusion
Sealing your acrylic paint on glazed ceramic is crucial for enhancing its longevity and appearance. By following the step-by-step process outlined in this article and choosing the appropriate sealer for your ceramic artwork, you can ensure that your painted creations remain vibrant and protected for years to come. Whether you opt for water-based sealers, spray sealers, brush-on sealers, or the sponging technique, each method offers its unique benefits and application process. Remember to prepare your workspace, clean the ceramic surface, choose the right acrylic paint, and gather all necessary materials before starting your ceramic painting project. With the right techniques and a touch of creativity, you can transform your glazed ceramic items into stunning works of art. Enjoy the process and happy painting!