In the article “How To Rinse Oil Paint Brushes,” you will learn a comprehensive and methodical approach to maintaining your art tools effectively. This guide outlines the crucial steps needed to properly clean and preserve oil paint brushes, ensuring their longevity and optimal performance. From selecting the appropriate solvents to practicing thorough rinsing techniques, every aspect is designed to help you maintain the integrity of your brushes. By following these precise instructions, you safeguard your investment and enhance your painting experience. Have you ever felt the frustration of seeing a stiff, ruined paintbrush after using it with oil paints? Maintaining the condition of your oil painting tools is crucial for both the longevity of the brushes and the quality of your artwork. In this article, we will delve into the comprehensive process of how to rinse oil paint brushes effectively. This guide offers detailed instructions to ensure your brushes remain in excellent condition for future use.
Understanding The Importance of Proper Brush Cleaning
Maintaining your brushes is integral to your painting practice. Properly cleaned brushes not only last longer but also provide better performance during use. Without effective cleaning, paint can harden around the bristles, making them less responsive and ultimately leading to a diminished painting experience.
The Impact on Brush Longevity
Using improper cleaning techniques can shorten the lifespan of your brushes. Regularly cleaning and conditioning your brushes allows you to save money in the long-term, as it reduces the need to frequently purchase new ones.
Effects on Artwork Quality
A clean brush ensures that the colors applied to your canvas remain consistent and pure, without unintended mixing or contamination from residual paint. This means you can achieve cleaner lines, more accurate color representation, and an overall higher-quality finish on your artwork.
Materials You’ll Need
Before diving into the cleaning process, gather the necessary materials. Having everything prepared will streamline the procedure and enhance efficiency.
Brush Cleaning Supplies
Here’s a table listing the essential supplies needed to rinse oil paint brushes effectively:
| Material | Purpose |
|---|---|
| Odorless Mineral Spirits | Used to dissolve oil paint and clean brushes |
| Soap or Brush Cleaner | Essential for removing any residual oils and conditioning the bristles |
| Two Glass Jars | One for the initial rinse, and one for the second rinse |
| Paper Towels or Rags | For wiping off excess paint and liquid from the brushes |
| Brush Comb | Helps detangle bristles and remove paint trapped at the base |
| Protective Gloves | Protects your hands from harsh chemicals and pigments |
Optional Supplies
While the above items are essential, some additional tools and materials can make the cleaning process easier:
| Optional Material | Purpose |
|---|---|
| Silicon Brush Cleaning Mat | Offers a textured surface for more effective brush scrubbing |
| Drip Tray or Stand | Keeps brushes suspended and prevents them from resting on their bristles |
| Conditioning Balm | Conditions and softens brush bristles, maintaining their efficacy |

Step-By-Step Guide
Now that you have gathered your supplies, let’s go through the detailed step-by-step process of rinsing oil paint brushes.
Step 1: Wipe Off Excess Paint
Before you start rinsing, it’s crucial to remove as much excess paint as possible. Use a paper towel or a rag to wipe off the paint from the bristles. Firm but gentle strokes will ensure you don’t damage the bristles while removing the bulk of the paint.
Pro Tip
Squeeze the bristles gently with the paper towel, starting from the ferrule (the metal part connecting the bristles to the handle) and working towards the tip of the brush. Repeat until no more paint comes off.
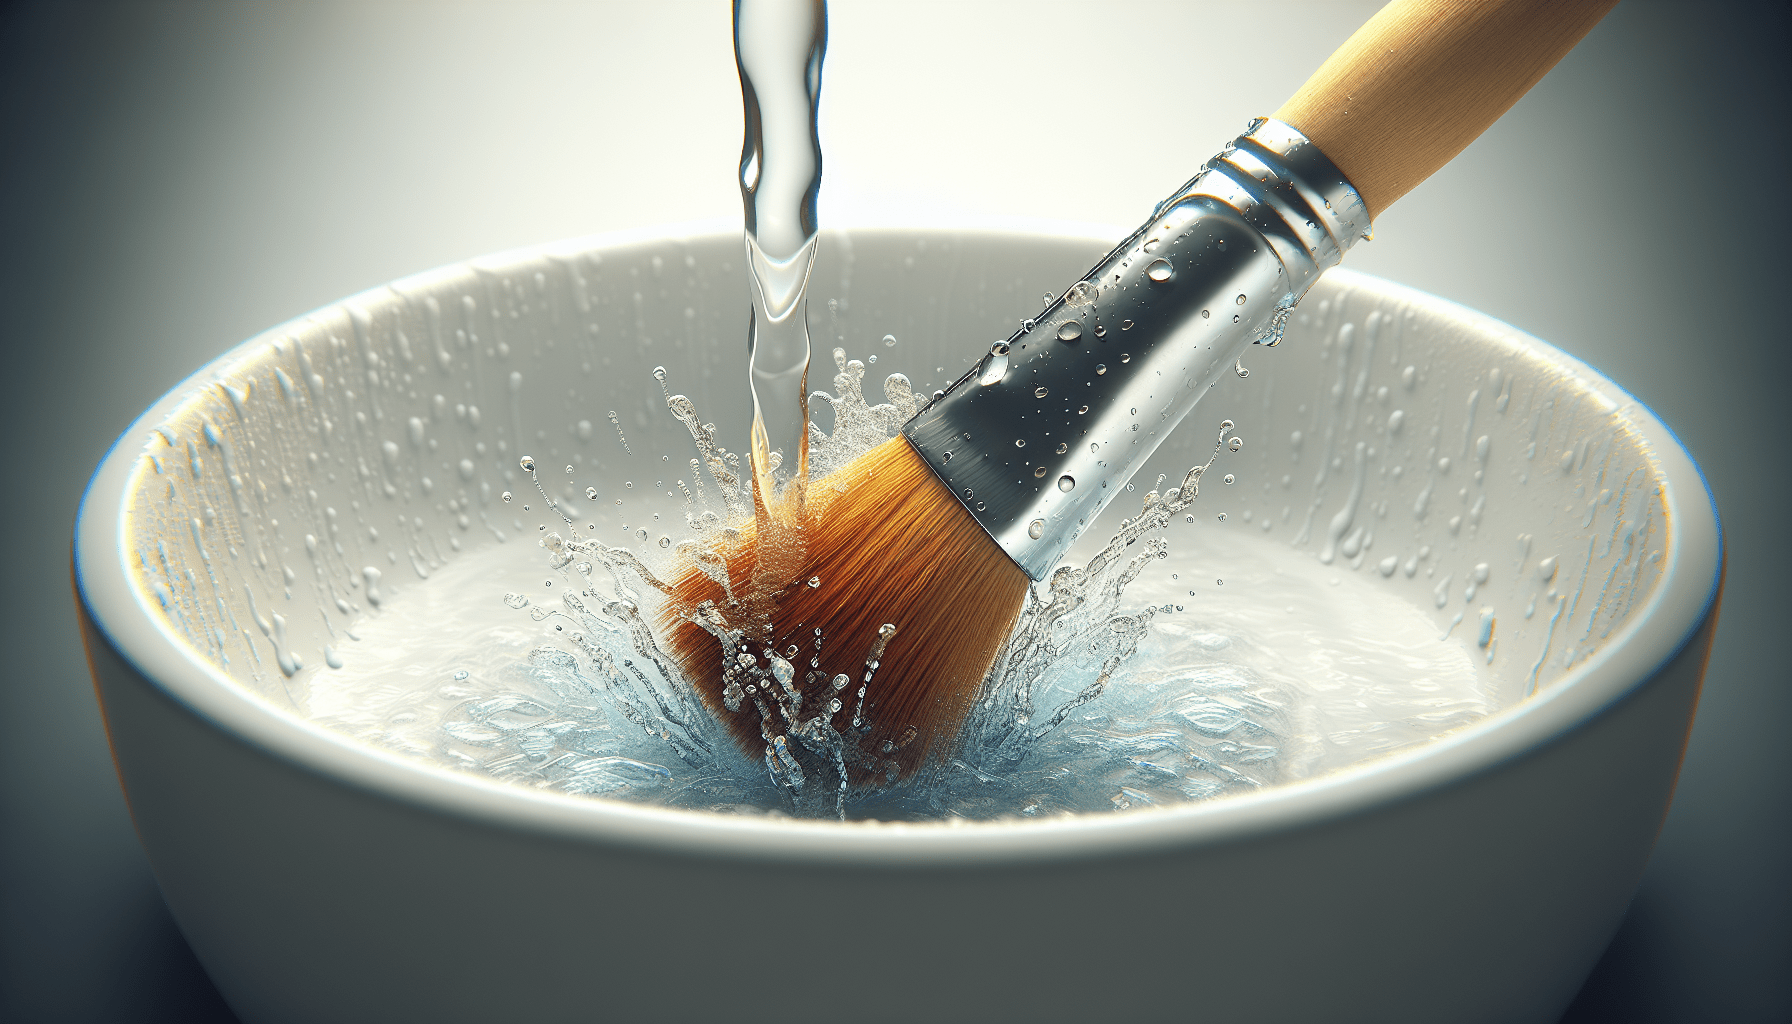
Step 2: First Rinse with Mineral Spirits
Fill one of the glass jars with odorless mineral spirits. Submerge the bristles in the jar and swirl them around, allowing the solvent to dissolve and lift the oil paint.
Proper Technique
Ensure the entire bristle length is submerged, but avoid immersing the ferrule in the mineral spirits, as this can loosen the glue holding the bristles in place. Use a brush comb to gentle comb through the bristles, helping to dislodge any stubborn paint.
Step 3: Second Rinse
After the initial rinse, transfer the brush to a second jar filled with clean mineral spirits. This ensures that any remaining paint or particles are removed from the bristles. Repeat the swirling action for about a minute.
Multiple Brushes
If cleaning multiple brushes, avoid using the same jar of mineral spirits for all the brushes. Instead, replace the fluid between rinses to prevent contamination, ensuring each brush is as clean as possible.
Step 4: Soap Cleanse
With the majority of the paint removed, the next step involves cleansing the brush with soap or a specialized brush cleaner. Work the cleaner into the bristles under lukewarm water, gently massaging to remove any residual oil and solvent.
Using a Cleaning Mat
A silicon brush cleaning mat can be particularly useful here. Run the brush against the textured surface of the mat to help further work out any remaining paint and oils.
Step 5: Final Rinse
Rinse the brush thoroughly under running lukewarm water until the water runs clear. This step is crucial to remove any remaining soap or cleaner.
Step 6: Drying Process
Proper drying is essential to maintain the shape and quality of your brushes.
Gently Remove Excess Water
Gently squeeze water from the bristles using a clean, dry paper towel. Pat the brush down from ferrule to tip to help reshape the bristles.
Hanging Technique
Allow the brush to dry completely by either hanging it with the bristles pointing downwards or laying it flat on a horizontal surface with the bristles hanging off the edge. This ensures air circulates around the bristles, preventing the growth of mold or mildew and avoiding a flat side forming on the brush.
Step 7: Conditioning Bristles
To keep your brushes soft and pliable, apply a conditioner or brush balm to the bristles after they are dry. Work a small amount into the bristles and gently massage. This step enhances the longevity of your brushes and ensures they remain supple.
Common Mistakes To Avoid
Understanding what not to do is just as important as understanding the correct cleaning method. Here are some common mistakes to avoid:
Using Harsh Solvents
Avoid using solvents stronger than odorless mineral spirits, such as turpentine or acetone, as these can damage the brush bristles over time.
Submerging the Entire Brush
Never submerge the entire brush in the cleaner or water. Always keep the ferrule dry to preserve the glue and prevent the bristles from loosening.
Aggressive Scrubbing
While it may be tempting to scrub your brush aggressively to remove paint, this can damage the bristles. Always use gentle, firm strokes to remove paint.

Frequency of Cleanings
Depending on how often you use your brushes, you might need to clean them more or less frequently. However, as a general rule, thorough cleaning after each painting session is recommended.
Daily Users
If you paint daily, a quick rinse and wipe down after each session followed by a thorough cleaning at the week’s end can be effective.
Occasional Users
For those who paint less frequently, aim for a complete cleaning process after each painting session. This prevents paint from hardening on the bristles between uses.
Storing Your Clean Brushes
Proper storage is as crucial as proper cleaning. Ensuring your brushes are stored correctly can prevent damage and maintain their usability.
Upright Storage
Store brushes upright in a container, with the bristles facing upward. This prevents them from bending and maintains their shape.
Protective Case
Using a protective brush case can safeguard the bristles from dust and damage, particularly if you travel with your brushes.
Avoiding Direct Sunlight
Store your brushes in a cool, dry place, away from direct sunlight. Prolonged exposure to sunlight can weaken the bristles and alter their integrity.
Environmental Considerations
Cleaning oil paint brushes involves using chemicals that can be harmful to the environment. Here are some tips to minimize the environmental impact of your brush cleaning routine.
Proper Disposal of Solvents
Never pour used mineral spirits or other solvents down the drain. Instead, collect and store them in a sealed container and dispose of them at a hazardous waste disposal facility.
Reusing Solvents
Mineral spirits can be reused multiple times if allowed to settle in a sealed container. Simply pour the clean solvent off the top, leaving the settled paint residue at the bottom, which can then be safely disposed of.
Eco-friendly Alternatives
Consider using eco-friendly brush cleaners available in the market. These cleaners are less harmful to the environment and can often provide similar cleaning results.
Troubleshooting Brush Issues
Over time, you may encounter specific problems with your brushes. Here are common issues and their potential solutions:
Hardened Bristles
If you find your brush bristles have hardened, try soaking them in a brush cleaner or mild solvent for an extended period. Gently work the bristles with your fingers to loosen the hardened paint.
Frayed Bristles
Frayed bristles can occur from improper storage or aggressive cleaning. To remedy this, lightly trim the frayed edges with scissors and condition the bristles to restore their shape.
Loose Ferrule
A loose ferrule can render a brush almost useless. If this occurs, reapply a strong adhesive to secure the ferrule back to the handle and allow it to dry completely before use.
Conclusion
Properly rinsing and maintaining your oil paint brushes is essential for extending their lifespan and ensuring the quality of your artwork. By following the detailed steps outlined in this guide, you can keep your brushes in optimal condition, avoid common mistakes, and address any issues that might arise. In the long run, this will save you time and money, allowing you to focus on creating beautiful art.
Thank you for taking the time to invest in the care of your tools. Your dedication to maintaining your brushes will not only enhance your painting experience but also reflect in the excellence of your artwork. Happy painting!