In this article, you will discover a comprehensive guide on how to paint captivating and lifelike portraits using gouache. Gouache, a versatile and vibrant medium, offers artists the opportunity to create stunning and expressive works of art. Whether you’re a beginner or an experienced artist looking to explore a new technique, this article will provide you with the essential steps and techniques necessary to create stunning portraits that truly capture the essence of your subject. Get ready to unlock your artistic potential and master the art of painting portraits with gouache.

This image is property of images.unsplash.com.
Materials
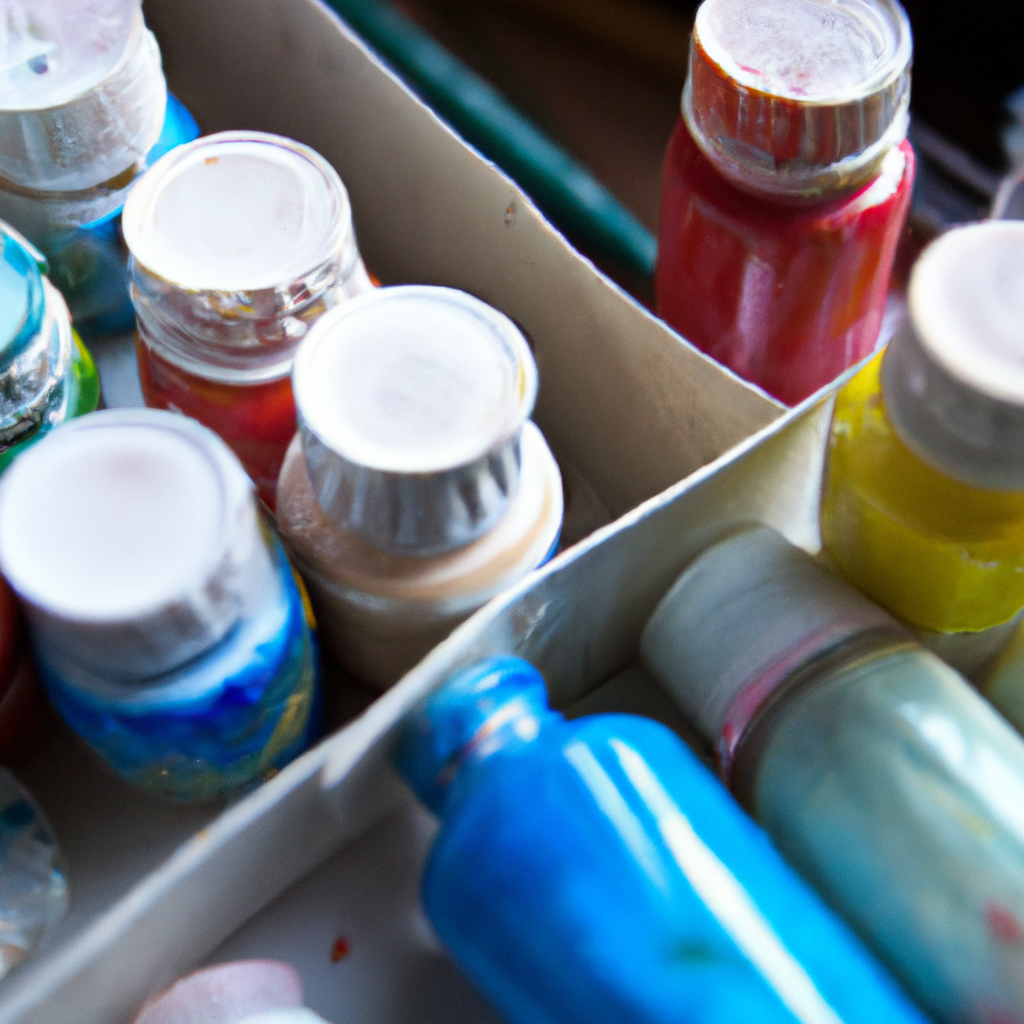
Gouache paints
Gouache paints are a popular choice for painting portraits due to their opaque nature and ability to create vibrant colors. They are made with a pigment mixed with a binding agent, usually gum arabic. Gouache paints are available in tubes or pans and come in a wide range of colors. It’s important to invest in high-quality gouache paints to ensure the best results in your portrait painting.
Brushes
Choosing the right brushes is crucial for achieving fine details and smooth color blending in portrait painting. Opt for synthetic or natural hair brushes with different brush sizes. You’ll need a variety of brushes, including flats for broader strokes and rounds for more intricate details. Experimenting with different brush sizes and shapes will allow you to achieve different effects and textures in your portrait.
Palette
A palette is essential for mixing and blending colors. Choose a palette with wells or compartments to keep your paints separated and organized. Porcelain or plastic palettes are commonly used for gouache painting, as they are easy to clean and maintain. Make sure to have a palette knife or spatula to mix your colors effectively.
Water container
A water container is necessary to clean your brushes and dilute the gouache paint. It’s important to have clean water throughout your painting process to prevent color contamination. A container with a wide opening is ideal, as it allows ample space for rinsing your brushes.
Watercolor paper
Choosing the right paper is crucial for achieving a good result in your portrait painting. Opt for high-quality watercolor paper that is heavy enough to withstand the moisture of the gouache paint. Cold-pressed or hot-pressed paper are suitable options, with cold-pressed providing a slightly textured surface and hot-pressed offering a smoother finish.
Pencil
A pencil is essential for sketching the portrait before applying the gouache paint. Choose a pencil with a medium hardness (such as HB or 2B) to achieve accurate and easily erasable sketches.
Eraser
An eraser is necessary to correct any mistakes or refine your initial sketch. Choose a soft eraser that won’t damage the paper.
Reference photo
Having a reference photo is crucial for capturing the likeness and features of the subject. Choose a high-resolution photo with good lighting and clear details. It’s important to have the reference photo at eye level or slightly above your working area to ensure accurate proportions.
Masking tape
Masking tape is useful for securing the edges of your watercolor paper to prevent it from curling or moving during painting. It allows for clean edges and easy removal once the painting is complete.
Paper towels
Paper towels are essential for cleaning brushes, blotting excess water or paint, and wiping off any mistakes or smudges during the painting process. Make sure to have plenty of paper towels within reach for convenience.
Setting Up
Choosing a workspace
Select a well-lit and comfortable workspace to ensure you can concentrate on your portrait painting. Natural light is ideal, but if that’s not possible, use a combination of warm and cool artificial lights to achieve a balanced lighting environment.
Preparing the paper
Before starting your portrait, it’s important to prepare the watercolor paper. Secure the edges of the paper with masking tape to prevent it from moving or curling during painting. This will ensure a clean and professional finish to your artwork.
Setting up the reference photo
Position the reference photo near your working area, ensuring it is visible and at eye level or slightly above. You can use a stand or prop the photo up against a solid surface. Make sure to have proper lighting on the reference photo to accurately capture the subject’s features and skin tones.
Sketching the Portrait
Transferring the reference
To transfer the reference photo onto your watercolor paper, use one of the following methods: grid method, tracing paper, or transfer paper. Choose the method that works best for you depending on your skill level and comfort with drawing freehand.
Preliminary sketching
Start by lightly sketching the basic shapes and proportions of the face and features. Begin with an oval shape for the head and lightly draw guidelines for the eyes, nose, and mouth. Pay attention to the placement and angles of the features to ensure accuracy in your portrait.
Refining the features
Once the basic shapes are in place, gradually refine the features by adding more details and definition. Pay close attention to the subtle changes in shape and the specific characteristics of the subject. Take your time to achieve a likeness and capture the unique features of the individual.
Adding shading
Shading is essential for creating depth and dimension in your portrait. Start by identifying the light source in your reference photo and determine where the shadows fall. Use a light touch and build up layers of shaded areas gradually, paying attention to the gradual transition from light to dark. Remember to observe and capture the individual’s unique bone structure and facial contours.
Color Mixing
Understanding color theory
Before diving into color mixing, it’s important to have a basic understanding of color theory. Familiarize yourself with the color wheel and the relationships between primary, secondary, and tertiary colors. Understanding complementary colors, warm and cool tones, and color intensity will greatly enhance your portrait painting skills.
Basic color mixing
Start by mixing primary colors (red, blue, and yellow) to create a range of secondary colors (green, purple, and orange). Experiment with different ratios to achieve various shades and tones. Use a palette knife or spatula to mix the colors thoroughly and achieve smooth, consistent results.
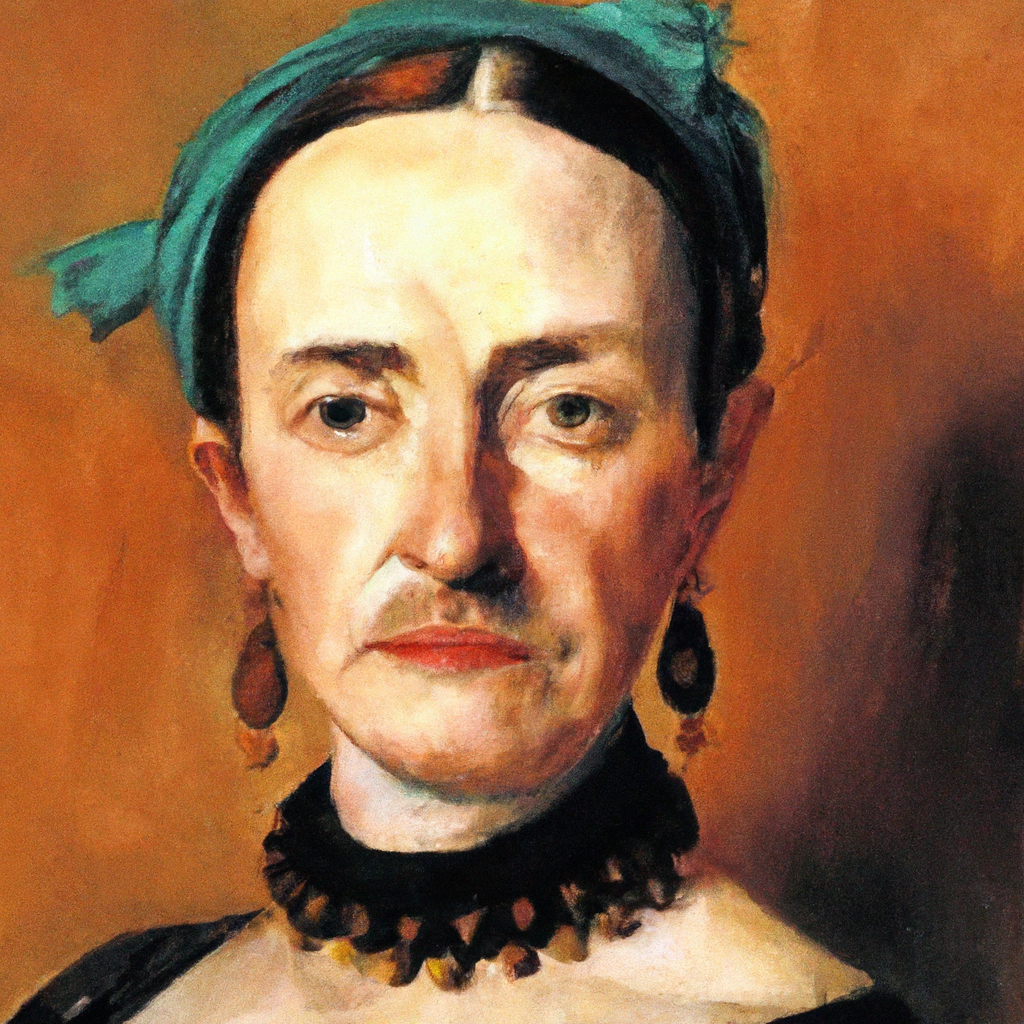
Skin tone variations
Skin tones vary greatly depending on factors such as lighting, ethnicity, and personal characteristics. Experiment with different color combinations to achieve the desired skin tone. Start with a base color and gradually add other colors to achieve the desired warmth, coolness, or undertones.
Creating shadows and highlights
Understanding how shadows and highlights affect the appearance of skin is crucial in portrait painting. Shadows can be created by mixing complementary colors or adding a small amount of black or gray to the base color. Highlights can be achieved by adding small amounts of white or a lighter shade of the base color. Gradually build up the layers to create realistic shadows and highlights that give depth and dimension to the portrait.

This image is property of images.unsplash.com.
Layering Techniques
Starting with light washes
Begin your portrait painting by applying light washes of color, gradually building up the layers. Start with diluted colors and gradually increase the intensity and opacity as you progress. Light washes establish the overall tone and provide a base on which to add more layers and details.
Building up layers
Building up layers allows for greater depth and richness in your portrait. Apply subsequent layers, allowing the lower layers to dry completely before adding more paint. This prevents the colors from mixing and muddying. Use a combination of thin and thick paint to create texture and add interest to your portrait.
Creating smooth transitions
Smooth transitions between different areas of color are essential for achieving a realistic and well-blended portrait. Use techniques such as feathering, blending, and cross-hatching to create smooth transitions. Experiment with different brush sizes and strokes to achieve the desired effect.
Using dry brush technique
The dry brush technique involves using a dry brush with a small amount of paint to create texture or add fine details. This technique is particularly useful for hair, clothing, and textured surfaces. It allows for greater control and precision in adding details without overloading the painting with too much moisture.
Working with Values
Establishing mid-tones
Mid-tones form the foundation of your portrait painting. They provide the base color and value on which to build the shadows and highlights. Use a combination of base colors and shading to establish the mid-tones. Remember to observe the reference photo closely to capture the variations in skin tone and values.
Adding dark values
Dark values create depth and contrast in your portrait. Determine the areas of the face or features that appear darker in the reference photo and gradually build up layers of dark values. Pay close attention to the subtle variations in the shadows to achieve a realistic effect.
Enhancing highlights
Highlights add brightness and luminosity to your portrait. Identify the areas of the face or features that are catching the most light and add highlights accordingly. Use a lighter shade of the base color or a small amount of white to create the highlights. Pay attention to the intensity and placement of the highlights to achieve a natural and dimensional effect.
Creating a sense of depth
To create a sense of depth in your portrait, it’s important to understand the principles of foreground, middle ground, and background. Use a combination of colors, values, and shading techniques to establish the different planes of the face and features. Gradually build up the layers and pay attention to the transitions between the different planes.

This image is property of images.unsplash.com.
Adding Details
Focusing on facial features
Facial features are the focal point of a portrait. Pay close attention to the details of the eyes, nose, and mouth to capture the likeness and expression of the subject. Use a smaller brush size and add details gradually, paying attention to the proportions and individual characteristics.
Working on hair
Hair can be challenging to paint, but with practice and attention to detail, you can achieve realistic and textured hair in your portrait. Start by establishing the overall shape and flow of the hair, then gradually add individual strands and volume. Use a combination of light and dark values to create depth and dimension in the hair.
Refining clothing and accessories
If your portrait includes clothing and accessories, take the time to refine and add details to these elements. Pay attention to the fabric texture, folds, and patterns. Use a combination of shading, highlighting, and dry brush technique to achieve realistic and tactile clothing and accessories.
Adding textures and patterns
Textures and patterns can add visual interest and dimension to your portrait. If the subject’s skin has freckles, wrinkles, or other textures, carefully observe and replicate these textures in your painting. Similarly, if the clothing or accessories have patterns, take the time to add them accurately and realistically.
Working with Highlights
Preserving white areas
Preserving white areas in your portrait adds contrast and enhances the overall impact of the painting. Before starting with the gouache paint, use masking fluid or tape to cover the areas you want to keep white. This will ensure crisp and bright highlights in your final artwork.
Using gouache to create highlights
Gouache is well-suited for creating highlights due to its opacity. Use a small brush size and a lighter shade of the base color to add highlights strategically. Apply the gouache paint sparingly and gradually build up the intensity as needed. Be mindful of blending the highlights seamlessly into the surrounding areas to achieve a natural and luminous effect.
Enhancing existing highlights
If your reference photo includes existing highlights, use the gouache paint to enhance and emphasize them. Add small touches of a lighter shade or pure white to make the highlights stand out. Be careful not to overdo it, as subtle highlights often create a more realistic effect.
Creating a luminous effect
To create a luminous effect in your portrait, use gouache paint sparingly and strategically. Apply thin layers of translucent paint over areas that catch the light, such as the cheekbones, forehead, or shoulders. Gradually build up the layers to achieve a radiant and glowing effect.

Blending and Smoothing
Blending wet gouache
Blending wet gouache involves applying two or more colors directly onto the paper and using a wet brush to blend them together. Start with a light touch and gradually build up the layers and intensity. Blend the colors smoothly to create gradual transitions and soft edges. Take care not to overblend, as it can result in muddy colors.
Blending with dry brush technique
The dry brush technique can also be used for blending colors in gouache painting. Load a dry brush with a small amount of paint and use light strokes to create soft transitions and blend colors together. This technique is particularly effective for creating texture and adding dimension to your portrait.
Smoothing transitions
Smooth transitions between different colors and values are crucial for achieving a realistic and well-blended portrait. Use techniques such as feathering, cross-hatching, or stippling to blend the colors seamlessly. Take your time and observe the reference photo closely to capture the subtle transitions and variations in tones.
Avoiding overblending
While blending is important for achieving smooth transitions, it’s also important to avoid overblending, as it can result in a loss of texture and vibrancy in your portrait. Allow some areas of the painting to have distinct brushstrokes and texture to create visual interest and depth.
Final Touches
Adjusting color balance
After completing the main elements of your portrait, take a step back and assess the overall color balance. Adjust the colors as necessary to achieve the desired effect. Make minor tweaks to the skin tones, shadows, highlights, and background to create a harmonious and visually pleasing composition.
Fine-tuning details
Spend some time fine-tuning the details in your portrait. Use a small brush size and add tiny touches to enhance facial features, hair, clothing, or accessories. Pay attention to the smallest details, as they can greatly contribute to the overall realism and accuracy of the portrait.
Adding final highlights
Before considering your portrait complete, carefully observe the reference photo for any additional highlights that need to be added. Use a light hand and a small brush size to add these final touches. Ensure that the highlights blend seamlessly with the existing colors and create a sense of dimension and luminosity.
Signing the artwork
To finalize your portrait, sign your artwork with a small, discreet signature. Use a pen or brush with a contrasting color to the background or surrounding area. Sign your name in a legible and professional manner, ensuring it does not detract from the overall composition of the portrait.
In conclusion, painting portraits with gouache requires a combination of technical skills, attention to detail, and a solid understanding of color theory. By following the outlined materials and step-by-step process, you can create realistic and captivating portraits that capture the essence and likeness of your subjects. Experiment with different techniques, practice regularly, and don’t be afraid to make mistakes. With time and dedication, your gouache portrait painting skills will continue to grow and flourish.