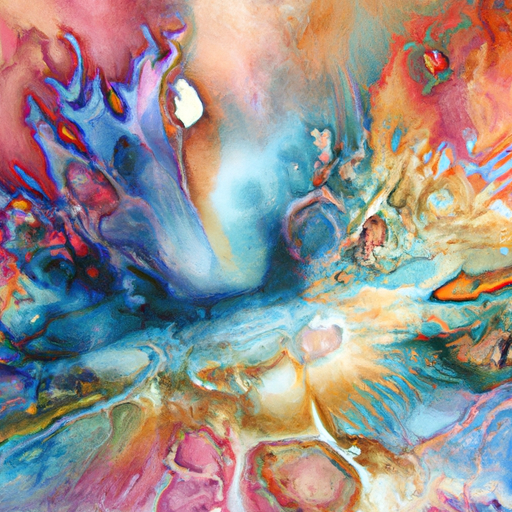
Have you ever wanted to create a bold and vibrant neon effect in your acrylic paintings? Look no further! In this article, you will discover the step-by-step process to achieve stunning neon effects in your artwork. From choosing the right colors to creating dynamic brush strokes, you will learn all the techniques necessary to bring your paintings to life with a captivating neon glow. Get ready to unlock your creativity and add a touch of electrifying brilliance to your acrylic masterpieces!
Choosing the Right Paint and Supplies
Selecting Neon Acrylic Paints
When it comes to creating a neon effect with acrylic paints, selecting the right colors is crucial. Neon acrylic paints are vibrant and highly pigmented, making them ideal for achieving that bold and eye-catching effect. Look for paints that are specifically labeled as “neon” or “fluorescent” to ensure that you get the desired intensity and brightness.
Preparing the Surface for Painting
Before you start painting, it’s important to prepare the surface properly to ensure the best adhesion and longevity of your neon effect. Regardless of whether you’re working on canvas, wood, or another type of substrate, you’ll want to make sure it’s clean, smooth, and free from any dust or particles. Use a gentle cleanser or mild soap to clean the surface, and then sand it lightly to create a slightly textured surface that will help the paint adhere better.
Gathering Necessary Painting Supplies
To create a stunning neon effect, you’ll need a few essential painting supplies. Here’s a list of supplies you’ll want to have on hand:
- Neon acrylic paints
- Primers
- Brushes (various sizes and shapes)
- Palette or palette paper
- Water container for cleaning brushes
- Mixing palette or tray
- Masking tape or painter’s tape
- Drop cloth or plastic sheeting to protect your workspace
- Varnish or sealant for finishing the painting
Make sure you have all these supplies readily available before you begin your painting journey.
Preparing the Workspace
Selecting a Suitable Work Area
When painting with neon acrylics, it’s important to have a well-lit and well-ventilated workspace. Choose an area with plenty of natural light or use artificial lighting that mimics natural daylight. This will enable you to see the true colors of the neon paints and make more accurate decisions.
Additionally, ensure that your work area is spacious enough to accommodate your canvas or chosen substrate comfortably. Having enough room to maneuver and step back to view your work will greatly enhance your painting experience.
Covering and Protecting the Work Surface
Neon acrylic paints can be quite vibrant and may stain or damage your work surface if not properly protected. Before you begin painting, cover your work surface with a drop cloth, plastic sheeting, or old newspapers. This will prevent any accidental spills or drips from ruining your workspace.
If you’re working on a table or countertop, you can also use masking tape or painter’s tape along the edges to create a barrier and protect the surface from any accidental paint smears.
Organizing Your Materials
Having a well-organized workspace will not only make the painting process more enjoyable, but it will also save you time and frustration. Arrange your brushes, paints, palette, and any other supplies you’ll be using in an easily accessible manner. This will allow you to focus more on your creative process without constantly searching for the right tool or color.
Consider investing in a brush holder or a caddy to keep your brushes organized and within reach. You can also use small containers or trays to hold your paints, making it easier to mix colors and keep your palette clean.

Creating a Base Layer
Applying a Primer Coat
To ensure the best results and adhesion for your neon acrylic painting, it’s a good idea to apply a primer coat to your chosen surface. A primer creates a smooth and consistent base for the paint to adhere to, enhancing the longevity of your artwork and preventing any color bleeding.
Choose a white or light-colored primer to make the neon colors truly pop. Apply the primer evenly using a brush or roller, following the manufacturer’s instructions for drying time and additional coats if necessary.
Choosing and Applying a Base Color
After applying the primer, it’s time to choose a base color that will serve as the background for your neon effect. Consider selecting a color that complements the neon palette you plan to use. A darker base color can create more contrast, making the neon colors appear even brighter.
Apply the chosen base color evenly, allowing it to dry completely before moving on to the next step. Make sure the base color is fully dry to avoid any smudging or blending of colors during the neon effect application.
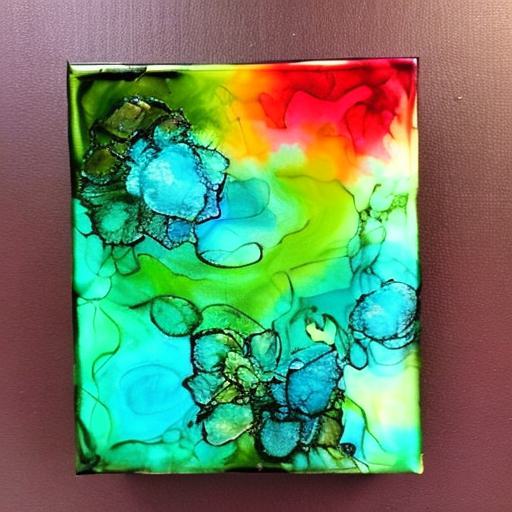
Creating the Neon Effect
Deciding on the Neon Color Scheme
Now comes the exciting part – deciding on your neon color scheme! Neon acrylic paints come in a variety of vibrant hues, so take some time to explore and experiment with different color combinations. Consider the mood or theme you want to convey through your artwork and choose neon colors that evoke those emotions.
You can opt for a monochromatic scheme, using different shades of a single neon color, or go for a more dynamic and contrasting palette by combining multiple neon colors. Remember to take into account the base color you chose earlier to ensure a cohesive and harmonious neon effect.
Mixing the Neon Acrylic Paints
Once you have your neon colors selected, it’s time to mix them to achieve the desired shades and intensity. Use a clean palette or tray to create your custom mixes. Start with a small amount of each color and gradually add more until you achieve the desired neon effect.
Experiment with different ratios and combinations to create unique shades and gradients. Keep in mind that neon acrylic paints are highly pigmented, so a little goes a long way. Add a small amount of white to the mix to create lighter tones if needed.
Applying the Neon Layers
Using a clean and dry brush, start applying your first layer of neon paint to the canvas or substrate. Work in small sections, ensuring even coverage. Let each layer dry before applying additional coats to achieve maximum vibrancy.
If you’re going for a more translucent effect, you can dilute the neon acrylic paint with water or a glaze medium before applying it. This will create a more ethereal and subtle glow. Experiment with different application techniques, such as brush strokes, stippling, or even splattering, to create various textures and visual interest.

Adding Texture and Depth
Using Various Painting Techniques
To enhance the overall visual impact of your neon effect acrylic painting, consider using various painting techniques to add texture and depth. Experiment with brush strokes, palette knife techniques, sponge effects, or even finger painting to create interesting and unique surfaces.
Each technique will yield different results, so don’t be afraid to try out different approaches to achieve the desired effect. Use a combination of techniques to create depth and dimension within your artwork.
Experimenting with Blending and Texturizing
Blending is a fantastic technique to create smooth transitions between colors and to achieve gradients within your neon effect. Use a clean, soft brush or a blending brush to gently merge the edges of different neon colors. Blend while the paint is still wet to ensure a seamless transition.
To add texture, you can also experiment with texturizing agents such as modeling paste or gel medium. Apply these products to specific areas of your painting, using brushes or palette knives to create interesting patterns and textures. Let them dry before continuing with the painting process.
Building Up Layers
To create depth and dimension in your neon effect acrylic painting, consider building up multiple layers of paint. Apply thin and transparent layers of neon colors on top of each other, allowing the lower layers to peek through. This will add complexity and richness to your artwork, giving it a sense of depth and luminosity.
As you build up layers, be mindful of the drying time between each application. Allow the paint to dry fully before proceeding to the next layer to prevent smearing or mixing of colors.
Creating Highlights and Shadows
Identifying Light Sources
To make your neon effect truly realistic and captivating, it’s essential to determine the direction and intensity of the light sources in your artwork. This will help you create highlights and shadows in the right places, adding depth and dimension to your neon effect.
Consider the angle and strength of the light source relative to your subject matter. Play with the placement of highlights and shadows to enhance the illusion of three-dimensionality.
Adding Highlights with White Paint
Highlights are areas that are directly illuminated by the light source and appear brighter than the surrounding colors. One way to achieve this effect is by adding white paint to the neon colors you’re using. Select a fine brush or a detail brush and carefully apply touches of white paint to the areas you want to highlight.
Start with a small amount of white paint and gradually build up the intensity. Remember to blend the highlight color with the surrounding colors to maintain a seamless transition.
Creating Shadows with Darker Tones
Shadows are areas that are shielded from direct light and appear darker than the rest of the painting. To create shadows in your neon effect acrylic painting, mix darker tones of the neon colors you’re using. You can add a small amount of black or a complementary hue to achieve the desired shadow color.
Using a fine brush, apply the darker tones to the areas where shadows would naturally fall. Be aware of the direction of the light source and the subject’s form to ensure the shadows appear realistic and add depth to your artwork.

Adding Details and Accents
Using Fine Brushes for Fine Details
Now that the foundation of your neon effect acrylic painting is complete, it’s time to add fine details to enhance the overall visual impact. Switch to smaller, fine brushes to achieve intricate details and precise lines.
Consider adding details such as highlights on reflective surfaces, text, intricate patterns, or fine lines. Pay close attention to the subject matter of your artwork and add details that will bring it to life.
Incorporating Contrasting Colors
To create a dynamic and visually appealing neon effect, incorporate contrasting colors into your artwork. Consider using complementary colors – those that are opposite each other on the color wheel – to make certain areas stand out.
For example, if your neon palette consists of mainly warm colors like pink and orange, add touches of blue or green as accents to create a striking contrast. Experiment with limited areas of contrasting colors to make them pop and draw the viewer’s eye.
Painting Accents with Metallic or Glow-in-the-Dark Paints
To make certain elements of your neon effect acrylic painting even more eye-catching, consider using metallic or glow-in-the-dark paints as accents. Metallic paints can add a touch of shimmer and metallic sheen to specific areas, enhancing the visual interest.
Similarly, glow-in-the-dark paints can create a captivating effect when used strategically. Apply these special paints to areas that you want to stand out even in low light or dark environments. This can create a stunning and unexpected visual experience for viewers.
Sealing and Finishing the Painting
Choosing the Right Varnish or Sealant
Once you’re satisfied with your neon effect acrylic painting, it’s important to protect it and enhance its longevity. To do this, you’ll need to apply a varnish or sealant. Look for a varnish specifically designed for acrylic paintings, preferably non-yellowing and with UV protection.
Choose a finish that suits your desired outcome. A gloss finish will intensify the neon effect and add a shiny appearance, while a matte finish will provide a more subdued and contemporary look. It’s a matter of personal preference and the atmosphere you want to create.
Applying the Varnish or Sealant
Before applying the varnish or sealant, make sure your painting has fully dried. This usually takes a minimum of 24 hours, but refer to the instructions on the paint tubes for specific drying times.
Use a clean and wide brush or a foam brush to apply the varnish or sealant evenly. Work in thin, even coats, and allow each coat to dry completely before applying the next one. Follow the manufacturer’s instructions for the recommended number of coats and drying times.
Allowing Sufficient Drying Time
After applying the final coat of varnish or sealant, it’s crucial to allow sufficient drying time before handling or displaying your neon effect acrylic painting. The drying time will vary depending on the product and conditions, so refer to the manufacturer’s instructions for specific guidelines.
Avoid touching the painting or exposing it to dust or direct sunlight during the drying process, as this can compromise the finish. Once the painting is fully dry, you can move on to the exciting step of displaying your artwork.

Displaying and Caring for Neon Effect Acrylic Paintings
Choosing a Suitable Display Method
After all the hard work and creativity you’ve put into your neon effect acrylic painting, it’s time to showcase it proudly. Consider various display methods to find the one that best suits your artwork and complements the overall aesthetic. Here are a few options:
- Traditional framing: This classic display method involves mounting your painting in a frame that matches your style and preferences.
- Floating frame: Instead of covering the edges of your painting, a floating frame leaves them exposed, adding a modern and contemporary touch.
- Gallery wrap: This method involves stretching the canvas tightly over a wooden frame, leaving the sides visible. It’s perfect for a sleek and contemporary look.
- Wall-mounted without frame: For a bold and statement-making approach, you can display your painting directly on the wall using hooks or hanging systems.
Protecting the Painting from UV Light
To ensure the longevity and vibrancy of your neon effect acrylic painting, it’s crucial to protect it from damaging UV light. Direct sunlight and even indoor lighting can cause fading and discoloration over time. To prevent this, consider the following protective measures:
- Display your painting in an area away from direct sunlight or UV light sources.
- Install UV-filtering film on windows or use curtains or blinds to minimize exposure to sunlight.
- Use UV-blocking glass or plexiglass if your artwork is framed.
By taking these precautions, you can enjoy your neon effect acrylic painting without worrying about premature fading or deterioration.
Cleaning and Maintenance Tips
Regular cleaning and maintenance will help keep your neon effect acrylic painting looking its best and protect it from dust or dirt buildup. Here are some tips to keep in mind:
- Use a dry, soft brush or a clean, lint-free cloth to gently dust the surface of the painting. Avoid using any abrasive or harsh materials that can scratch or damage the paint.
- If necessary, lightly dampen a clean cloth with water and gently wipe the surface in a circular motion. Be cautious not to use excessive moisture, as this can lead to paint damage or color bleeding.
- Avoid using any chemical cleaners or solvents unless specifically recommended by the manufacturer or a professional conservator.
By incorporating these simple cleaning practices into your routine, you can ensure that your neon effect acrylic painting remains vibrant and visually appealing for years to come.
Exploring Advanced Techniques
Creating Gradient Neon Effects
If you want to take your neon effect acrylic painting to the next level, consider creating gradient neon effects. Gradients add a sense of depth and dimension, as well as a smooth transition between colors. Here’s how you can achieve this effect:
- Start with the lightest neon color and apply it to the desired area.
- While the paint is still wet, blend in the next shade, gradually transitioning from light to dark.
- Use a clean brush or a soft blending brush to create a smooth gradient effect.
Experiment with different color combinations and angles to create stunning gradient neon effects that will captivate viewers.
Incorporating Neon Designs or Patterns
To make your neon effect acrylic painting truly unique and personalized, consider incorporating designs or patterns into your artwork. This can add visual interest, complexity, and a sense of movement. Here are a few ideas to get you started:
- Use stencils or masks to create repeating patterns on different areas of the painting.
- Incorporate neon lines or shapes to create geometric or abstract designs.
- Experiment with freehand brushwork to create organic or flowing patterns.
Be open to experimentation and let your creativity guide you. Feel free to combine different techniques and styles to achieve the desired effect.
Experimenting with Different Substrates
While canvas is a popular choice for acrylic paintings, don’t be afraid to experiment with different substrates to create your neon effect. Consider using wood, metal, glass, or even unconventional materials such as plastic or fabric. Each substrate will offer unique textures and characteristics that can enhance your neon effect.
Before painting on a different substrate, make sure it’s properly prepared and primed according to the manufacturer’s instructions. Experimenting with different substrates can open up new possibilities and create truly remarkable neon effect acrylic paintings.
In conclusion, painting a neon effect with acrylics requires careful consideration of the right paint and supplies, proper surface preparation, and a well-organized workspace. By following the steps outlined in this article, you can create stunning neon effect acrylic paintings that are vibrant, eye-catching, and full of depth. Remember to explore various techniques, experiment with different color combinations, and let your creativity shine. With practice and patience, you’ll be able to master the art of painting neon effects and create artworks that mesmerize viewers.