In the sphere of creative craft works, understanding “How To Paint Flat Acrylic Ornaments” could be a game-changer for you. This article is a comprehensive guide, adeptly designed to enlighten you on the step-by-step process of transforming simple flat acrylic ornaments into exquisite, masterfully painted pieces. Chock-full of skilled tips and innovative techniques, it offers foolproof strategies to help you enhance your painting dexterity.
Materials Needed
Before you embark on the rewarding journey of painting flat acrylic ornaments, ensure you have gathered all the necessary materials. The core material is acrylic paint, which is favored for its quick-drying and easy mixing properties. You will also require a variety of paintbrushes, ranging from larger brushes for broad strokes to smaller, fine-tipped brushes for detailing.
Next, you will need flat acrylic ornaments on which you will paint. A palette or plate will come in handy for mixing your paints. To aid in the mixing, you may find a palette knife useful. It’s also advised to have a water cup nearby for cleaning brushes, along with paper towels or rags for wiping off excess paint or accidental spills. While optional, a paint sealer can protect your finished work from chipping or peeling, and finally, gather some ribbon or string for hanging your painted ornaments.
Preparing the Ornaments
As with any painting project, the proper preparation of your canvas—in this case, flat acrylic ornaments—is crucial. Start by cleaning the ornaments thoroughly to remove oils and residue that may prevent the paint from adhering correctly. Optionally, you may choose to sand the surface of the ornaments lightly. This process creates a rougher texture, giving the paint more grip.
Again, this isn’t entirely necessary but if you’re looking for lasting results, consider priming your ornaments with a thin layer of acrylic gesso or primer. This step will create a more receptive surface for your acrylic paints. Lastly, sealing the ornaments using a clear acrylic sealer will lock in your base color. This measure, although optional, may increase the longevity of your ornaments.

Choosing Colors and Design
One of the most crucial and creative aspects involves choosing the color scheme and design for your project. As you select your color scheme, remember that certain colors evoke specific moods. Thus, your choices should reflect the emotion or theme you want to portray. The design of your ornaments should also mirror your artistic direction.
A color wheel can guide you in blending and mixing colors effectively. By observing the relationships between various hues, tints, and shades, you will be able to generate a harmonious and visually appealing color scheme.
Preparing the Work Area
The next step is preparing your work area. It’s important to protect your work surface to prevent unnecessary paint stains or damage. Plastic covers, old newspapers, or drop cloths are commonly used for this purpose. Another vital aspect is setting up your work area in a well-ventilated space to safeguard against potential fumes that might emanate from your acrylic paints or sealants.
When laying out your work materials and tools, it is best to arrange them within easy reach for efficiency and preventing unintentional accidents, which can happen when tools are not well-arranged.

Mixing Paint
After your work area is set, you can move on to mixing your paints. Squeeze out small amounts of acrylic paint onto your palette or plate. Using your palette knife, begin mixing your chosen colors. Be sure to blend thoroughly to ensure that the colors are well-combined.
It’s always recommended to test your mixed color on a scrap piece of paper or cardboard. This step allows you to see how the color appears when applied, giving you a clear preview before painting on your ornaments.
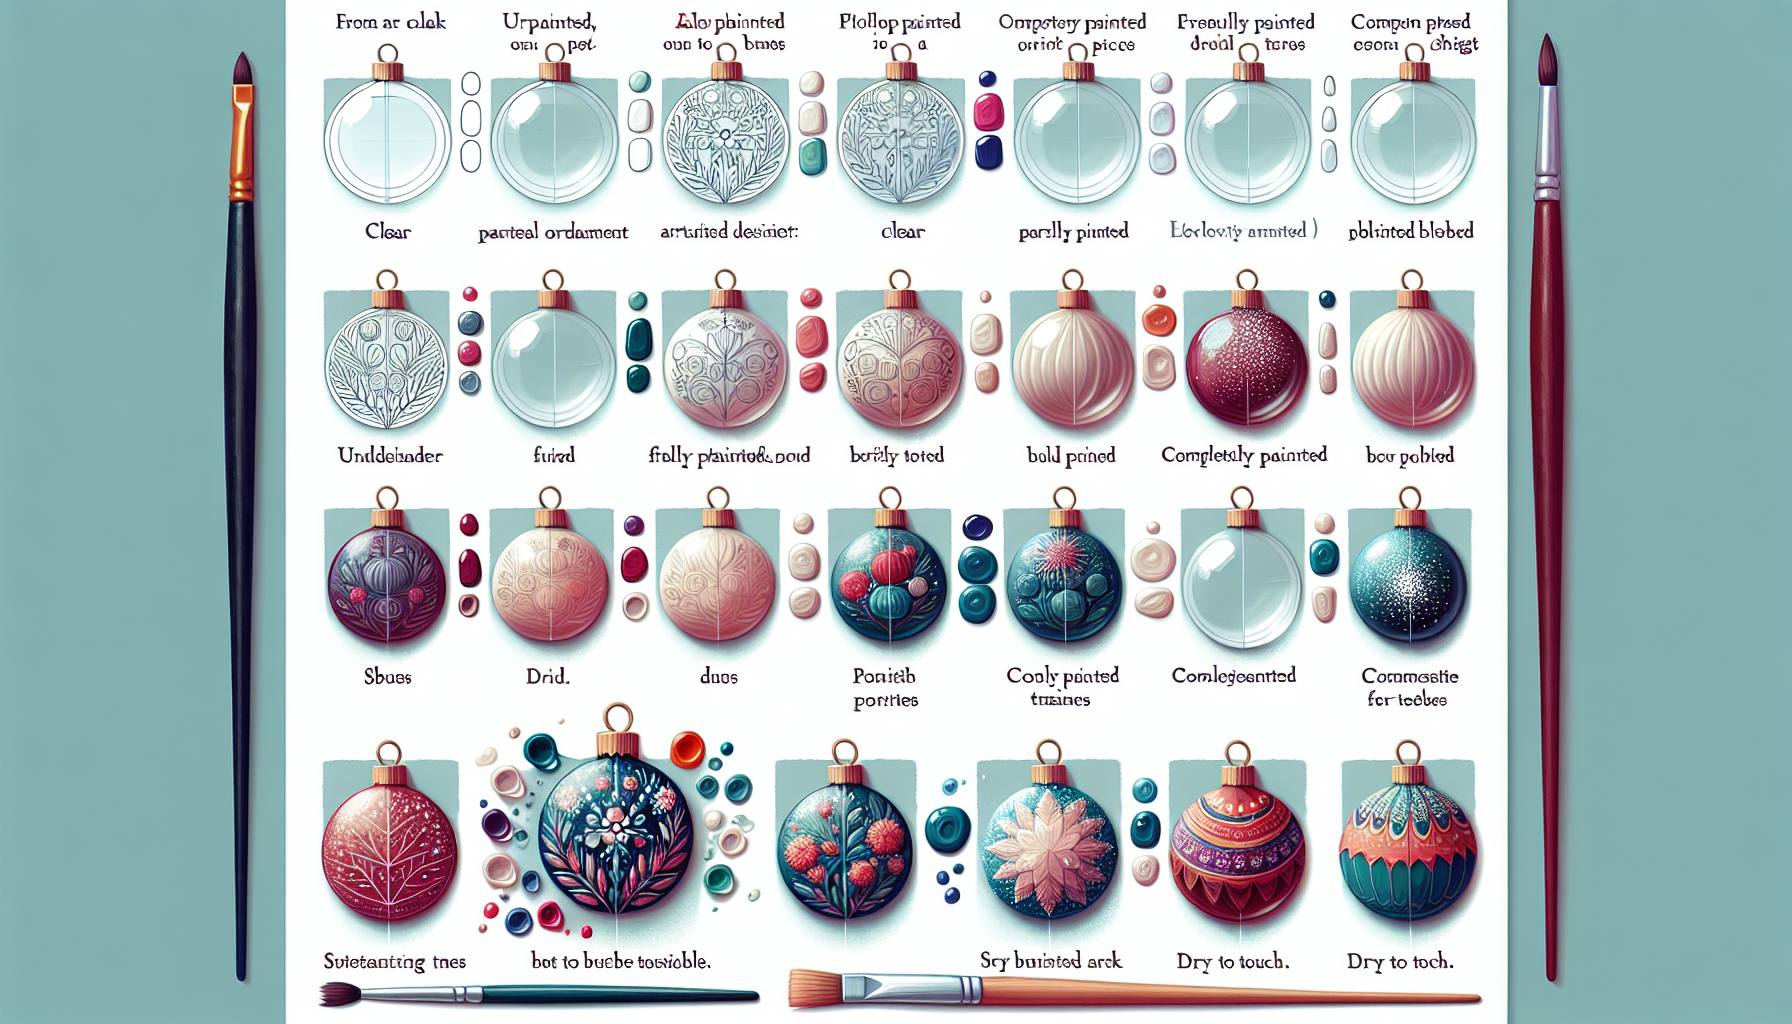
Painting Techniques
There are multiple techniques that can be applied when painting with acrylics on flat ornaments. The brush technique is the most common, which varies from thick, broad strokes to fine lines, depending on the brush size.
The dabbing or stippling technique imbues the art with a texture that can add an extra layer of visual interest. Layering is another technique you can explore, where you apply multiple thin coats of paint to achieve depth and richness in color.
Blending colors directly on the ornament allows seamless color transitions, perfect for creating gradients or atmospheric effects. The use of different tools such as brushes or sponges can also aid in creating a range of textures on your ornaments.
Painting the Ornaments
When you start painting, it’s recommended to begin with the background color. Working from background to foreground allows each layer of detail to be added on top of the previous one, fostering a sense of depth and dimension. It is essential to apply thin, even coats to maintain the flat surface of the ornaments.
Patience is key. Allow each layer to dry completely before adding more detail. This process will prevent the colors from unintentionally blending and muddying your design.
Adding Details
Details are what bring your painted ornaments to life. Using smaller brushes, you can add intricate patterns, fine lines, or highlights. By creating contrasts between light and dark, you give your ornaments a three-dimensional effect.
Feel free to further personalize your ornaments by adding accents or embellishments in the form of dots, swirls, or any other designs nimble brushes can create.
Allowing the Paint to Dry
Once you are satisfied with your painted ornament, allow the paint to thoroughly dry in a dust-free environment to prevent particles from adhering to the drying paint.
Check to see if additional layers are needed or if there are places where the paint has thinned. If so, apply necessary touch-ups. Adequate drying time is crucial before adding any protective sealant, if applicable.
Finishing Touches
After your ornaments are completely dry, attach a ribbon or string for hanging purposes. Trim any excess ribbon. Inspect your ornaments one last time for any touch-ups.
And finally, store your ornaments in a safe place where they will be protected from dust and other potentials forms of damage until you are ready to display them.
In conclusion, painting flat acrylic ornaments is a rewarding and creative holiday, or even year-long, endeavor that anyone can enjoy. Whether your design is whimsically playful or classically elegant, let your artistic spirit shine through. Remember, there are no mistakes in art, only unique creations.