In this article, you will discover a comprehensive guide on how to transform your countertops using epoxy paint. The process of painting countertops with epoxy offers a cost-efficient and aesthetically pleasing solution for updating your kitchen or bathroom. By following the step-by-step instructions provided, you will gain valuable insights into the materials needed, preparation techniques, and the actual application of epoxy paint to achieve professional-looking results. Embark on this DIY project and unlock the potential of your countertops with a stunning and durable epoxy finish.
Preparing the Countertops
Clean the countertops
Before you begin the epoxy painting process, it is crucial to clean your countertops thoroughly. Use a mild dish soap or countertop cleaner and warm water to remove any dirt, grease, or stains. Make sure to rinse the countertops with clean water and dry them completely before moving on to the next step.
Sand the countertops
To ensure proper adhesion of the epoxy, it is essential to sand the countertops. Start by using a medium-grit sandpaper to remove any existing coatings or roughen the surface. Use circular motions and apply even pressure while sanding. Afterward, switch to a fine-grit sandpaper to create a smooth and even surface for the epoxy application. Remember to clean any dust or debris after sanding.
Repair any damages
Inspect your countertops for any damages such as chips, cracks, or dents. If you find any, use a quality epoxy-based filler to repair them. Follow the manufacturer’s instructions for the filler and allow it to cure completely. After the repairs have dried, sand them down to ensure they are level with the rest of the countertop surface.
Mask off surrounding areas
To protect the surrounding areas from accidental spills or drips, it is essential to mask off the countertop edges and any other adjacent surfaces. Use painter’s tape and plastic sheets to cover cabinets, walls, and appliances. Take your time to ensure a tight seal and avoid any leakage during the epoxy painting process.
Priming the Countertops
Choose the right primer
Selecting the appropriate primer for your countertops is crucial to achieve a durable and long-lasting finish. Look for a high-quality primer specifically designed for use with epoxy coatings. Consider factors such as countertop material, texture, and the type of epoxy you will be using. Consult with a professional or refer to the manufacturer’s guidelines for the best primer choice.
Apply primer to the countertops
Once you have chosen the right primer, it’s time to apply it to your countertops. Use a high-quality brush or roller to evenly distribute the primer over the entire surface. Ensure that you cover all areas, including edges and corners. Apply a thin, uniform coat and allow it to dry according to the manufacturer’s instructions. This step will enhance adhesion and promote a smoother epoxy finish.
Allow primer to dry
After applying the primer, it is crucial to allow it sufficient time to dry before proceeding with the epoxy application. Follow the manufacturer’s recommended drying time, as different primers may have varying drying times. Avoid rushing this step, as inadequate drying can affect the final outcome and durability of the epoxy coating.

Mixing the Epoxy
Gather the necessary materials
Before mixing the epoxy, gather all the materials required for the process. These may include epoxy resin, hardener, measuring cups, mixing container, stirring sticks, and protective gloves. Having everything ready beforehand will ensure a smooth and uninterrupted epoxy mixing process.
Read and follow instructions
Carefully read and follow the instructions provided by the epoxy manufacturer. Different epoxy products may have specific guidelines for mixing ratios and stirring times. It is crucial to adhere to these instructions to achieve the desired results.
Measure the epoxy and hardener
Using the provided measuring cups or a digital scale, measure the appropriate amounts of epoxy resin and hardener as directed by the manufacturer. Maintaining the correct ratio is crucial for the epoxy to cure properly. Pour both components into a clean mixing container, making sure to scrape the sides and bottom of the containers to ensure accurate measurements.
Mix epoxy and hardener thoroughly
Thoroughly mix the measured epoxy resin and hardener together using a stirring stick or a mixer at low speed. Make sure to mix them for the recommended duration specified by the manufacturer. Pay close attention to fully combining the two components, as incomplete mixing can result in uneven curing and potentially compromised durability.
Applying the Epoxy
Apply a thin coat of epoxy
Using a quality brush or roller, apply a thin coat of mixed epoxy to the primed countertops. Start from the edges and work your way toward the center, ensuring even coverage throughout. Avoid applying excessive epoxy, as it can lead to drips, uneven curing, or an overly thick final finish.
Spread the epoxy evenly
After applying the initial thin coat, use a brush or roller to spread the epoxy evenly across the entire countertop surface. Continue working in a methodical manner, making sure to cover any missed areas or streaks from the initial application. The goal is to achieve a smooth and uniform coating that will serve as the foundation for the marble or metallic effect.
Use a brush or roller to remove air bubbles
As you apply the epoxy, air bubbles may form in the mixture. To avoid these bubbles trapping in the coating, use a brush or roller to gently sweep over the epoxy surface. This action will help release the air bubbles and create a more professional and flawless appearance. Repeat this process throughout the curing time as necessary.

Creating a Marble Effect
Choose marble colors
When creating a marble effect with epoxy, choose the colors that closely resemble natural marble patterns. Opt for a base color and contrasting colors that will serve as veins in the final finish. Consider the aesthetic you want to achieve and select colors that complement your overall design theme.
Apply base coat
Start by applying the base color epoxy over the previously spread epoxy layer. Use a brush or roller to evenly distribute the base coat across the countertop surface. Ensure complete coverage and smooth out any streaks or uneven areas. The base coat will serve as the background canvas for the marble veins.
Apply contrasting color veins
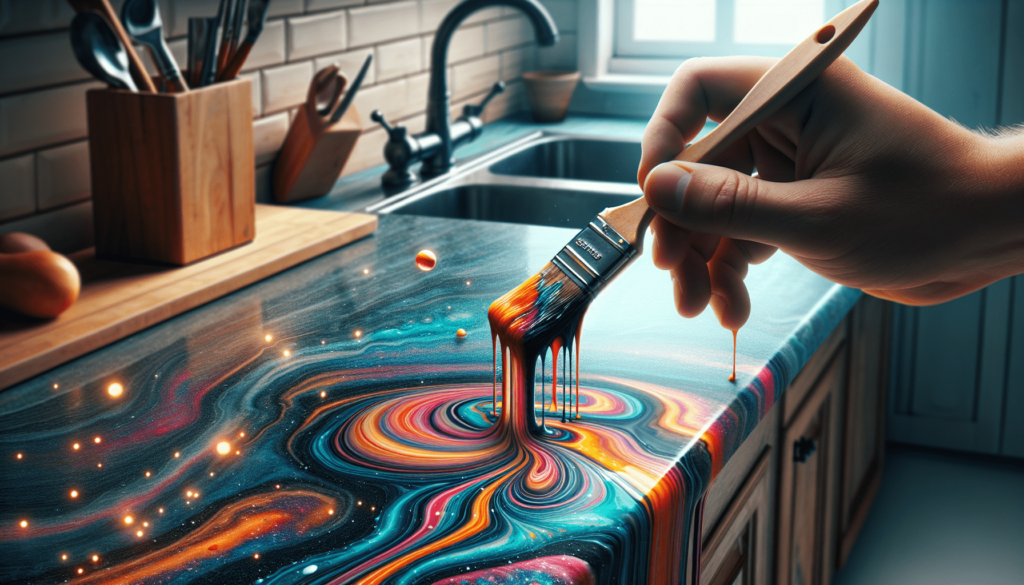
Once the base coat is applied, use the chosen contrasting color epoxy to create the veins of the marble effect. Carefully pour or drip the contrasting color epoxy onto the base coat in a random pattern that mimics natural marble veins. Be artistic and create variations in thickness, length, and direction to achieve a more authentic marble appearance.
Use a feather or toothpick to create marble veins
To enhance the marble effect, use a feather or toothpick to pull and manipulate the contrasting color veins gently. Drag them through the base coat to create the distinctive and intricate marble veins. Experiment with different techniques and find the balance between realistic-looking marble and your desired aesthetic.
Blend the colors
To achieve a seamless and cohesive marble effect, gently blend the base color and contrasting color veins using a brush or roller. Use gentle strokes and a light touch to soften the edges and create a natural flow between the colors. Take your time during this process, as the blending can significantly enhance the overall appearance of the marble effect.
Adding a Metallic Look
Choose metallic colors
When aiming to create a metallic look on your epoxy countertops, choose metallic epoxy colors that complement your design vision. Consider the desired color scheme and select metallic shades that will blend harmoniously with the decor of your space.
Apply base coat
Start by applying the base color metallic epoxy evenly across the countertop surface. Use a brush or roller to ensure complete coverage and a consistent layer throughout. The base coat will serve as the foundation for the metallic color effects and textures.
Apply metallic color effects
Once the base coat is applied, it’s time to add the metallic color effects to create depth and visual interest. Pour or drip the metallic epoxy colors onto the base coat, allowing them to naturally blend and interact with each other. Experiment with different pouring techniques and patterns to achieve a unique and captivating metallic finish.
Blend and create textures
To enhance the metallic look, use various tools such as brushes, rollers, or even a heat gun to create textures and patterns with the metallic epoxy. Experiment with different techniques like dragging, stippling, or swirling to achieve your desired effect. This step allows you to add dimension and movement to the metallic finish.
Allowing the Epoxy to Cure
Follow recommended curing time
After applying the epoxy and creating the desired effect, it is crucial to follow the recommended curing time provided by the manufacturer. Curing times may vary depending on the epoxy brand and environmental conditions. Allow the epoxy sufficient time to cure and harden before proceeding to the next steps.
Keep the area clean and free from dust
While the epoxy is curing, make sure to keep the area clean and free from dust or debris. Any foreign particles can mar the final finish. Regularly inspect the curing epoxy and remove any potential contaminants to ensure a smooth and flawless result.
Avoid using the countertops until fully cured
To prevent any mishaps or damage to the epoxy finish, avoid using the countertops until the epoxy is fully cured. Premature use can result in scratches, dents, or other imperfections. Refer to the manufacturer’s guidelines for the recommended curing time, as it may take several days for the epoxy to reach its maximum hardness and durability.
Finishing and Sealing the Countertops
Sand the cured epoxy surface
Once the epoxy is fully cured, lightly sand the surface using a fine-grit sandpaper. This step will remove any imperfections or irregularities in the epoxy surface. Be cautious not to sand too aggressively, as it can damage the finish. After sanding, clean the surface thoroughly to remove any dust or debris.
Remove any dust
Before sealing the countertops, ensure that the surface is entirely free from dust or particles. Use a vacuum or a lint-free cloth to remove any loose debris that may affect the final finish. A clean surface will ensure proper adhesion of the sealer and give your countertops a polished look.
Apply a clear coat sealer
To protect the epoxy finish and enhance its gloss and durability, apply a clear coat sealer specifically designed for epoxy surfaces. Use a brush or roller to evenly distribute the sealer over the entire countertop surface. Be careful not to create bubbles or streaks during the application process. Follow the manufacturer’s instructions for drying and curing times.
Allow the sealer to dry and cure
After applying the clear coat sealer, allow it sufficient time to dry and cure. Follow the sealer manufacturer’s guidelines for the recommended drying and curing time. Keep the area clean and avoid using the countertops until the sealer is fully cured. This final step will provide added protection and longevity for your epoxy-painted countertops.
Cleaning and Maintaining Epoxy Countertops
Clean with gentle soap and water
To clean your epoxy countertops, use a mild dish soap or gentle surface cleaner and warm water. Avoid using abrasive cleaners or scrubbers that may scratch the epoxy surface. Gently wipe the countertops with a soft cloth or sponge, ensuring a thorough clean without damaging the epoxy finish.
Avoid using abrasive cleaners or scrubbers
When cleaning your epoxy countertops, always avoid using abrasive cleaners or scrubbers. These harsh cleaners can scratch the epoxy surface and dull its shine. Stick to mild cleaners and soft materials to protect the integrity and beauty of your epoxy-painted countertops.
Avoid direct heat exposure
Although epoxy is a durable and heat-resistant material, it is best to avoid direct heat exposure on your countertops. Prolonged exposure to hot cookware or appliances can potentially damage the epoxy finish. Always use trivets or hot pads to protect the surface from direct heat and prevent any unwanted discoloration or warping.
Use cutting boards and trivets for protection
To prevent scratches and cuts on your epoxy countertops, always use cutting boards and trivets. This simple precautionary measure will help maintain the integrity of the epoxy finish and prolong its lifespan. Avoid directly cutting or placing hot pots and pans on the epoxy surface to ensure its longevity.
Troubleshooting and Tips
Fixing drips or imperfections
If you notice any drips or imperfections in the epoxy during the application process, don’t panic. You can easily fix them by lightly sanding the dried epoxy surface and applying another thin coat of epoxy. Sand the repaired area after curing and follow the steps for finishing and sealing to achieve a seamless and flawless result.
Dealing with air bubbles
Air bubbles can sometimes appear in the epoxy during the application process. To remove them, use a heat gun or a handheld torch to gently heat the surface. This will cause the air bubbles to rise to the top. Pop them with a toothpick or a pin, and use a brush or roller to smooth out the surface afterward.
Ensuring proper ventilation
When working with epoxy, it is crucial to ensure proper ventilation in the workspace. Epoxy fumes can be strong and potentially harmful if inhaled in large quantities. Open windows or doors, use fans, and if necessary, wear a respirator to protect yourself during the painting process.
Wear appropriate safety gear
Always prioritize your safety when working with epoxy. Wear protective gloves, goggles, and a mask to safeguard your skin, eyes, and respiratory system. Follow the manufacturer’s guidelines for the recommended safety equipment and precautions. Taking these necessary precautions will minimize the risk of any adverse effects from epoxy exposure.
In conclusion, painting countertops with epoxy is a detailed process that requires careful preparation, precise application, and proper curing to achieve professional and long-lasting results. By following the outlined steps and incorporating the troubleshooting tips, you can transform your countertops into stunning works of art. Remember to practice patience, attention to detail, and proper maintenance to enjoy the beauty and functionality of your epoxy-painted countertops for years to come.


