In this article, you will find valuable insights on painting cars using gouache, a versatile medium known for its vibrant colors and opaque finish. Whether you are a seasoned artist looking to add a new technique to your repertoire or a beginner eager to explore the world of automotive art, this guide will provide you with step-by-step instructions and essential tips to help you achieve stunning results. From selecting the right materials to mastering different painting techniques, you will gain the necessary knowledge and skills to bring cars to life on your canvas. So, let’s delve into the art of painting cars with gouache and unlock your creativity in this dynamic and exciting realm.

This image is property of images.unsplash.com.
Choosing the Right Materials
Gouache paint is a popular choice for painting cars due to its opaque and versatile nature. When selecting gouache paint, it is important to consider factors such as color range, quality, and lightfastness. Look for a brand that offers a wide variety of colors, including those commonly used for car painting such as metallics and shades of chrome. High quality gouache paints will have a smooth texture and vibrant pigments. Additionally, ensure that the paint you choose is lightfast, meaning it resists fading over time.
Choosing the right brushes is essential for achieving the desired effects in your car painting. Look for brushes that are specifically designed for gouache painting, as they will have the appropriate stiffness and flexibility. Flat brushes are ideal for large areas, while round brushes are more suitable for detailed work. Experiment with different brush sizes and shapes to find the ones that suit your painting style and preferences.
Preparing the surface is a crucial step in ensuring a smooth and long-lasting car painting. Start by cleaning the car thoroughly to remove any dirt, grease, or debris. Use a mild detergent and water solution to gently scrub the surface. After cleaning, sanding the surface will help create a smooth and even base for the paint to adhere to. Use a fine-grit sandpaper and sand in circular motions to remove any imperfections. Once the surface is smooth, applying a primer will further enhance the paint’s adhesion and durability.
Sketching and Outlining
Before diving into the painting process, it is essential to create a rough sketch of the car to establish the composition and placement of the different elements. This initial sketch will serve as a guide throughout the painting process. Use light, loose strokes to outline the basic shape of the car, paying attention to proportions and perspective. Take your time with this step, as an accurate sketch will make it easier to achieve a realistic final result.
Once the rough sketch is complete, it is time to outline the car shape more precisely. Use a finer brush or a pen to define the edges of the car and add details such as doors, windows, and wheels. Focus on capturing the specific characteristics of the car you are painting, paying attention to curves, angles, and proportions. This step requires patience and precision, as it will set the foundation for the rest of the painting.
Adding details is where the car painting comes to life. Take your time to carefully observe and replicate the various components of the car, such as headlights, grilles, and logos. Use different brushes to achieve the desired level of detail and texture. Experiment with various techniques, such as dry brushing or stippling, to create realistic effects. Pay attention to light and shadow, as these elements will further enhance the three-dimensional appearance of your painting.
Mixing Colors
Understanding color theory is crucial when working with gouache paint. Gouache is a versatile medium that allows for easy color mixing and blending. Familiarize yourself with the color wheel and how different colors interact with each other. This knowledge will help you mix the right shades for your car painting.
To create a wide range of colors, start by mixing primary colors such as red, blue, and yellow. Experiment with different ratios to achieve the desired hues. Keep a separate palette or mixing tray to test and adjust the colors as needed. It is helpful to have a reference photo of the car you are painting to guide you in matching the colors accurately.
Creating shadows and highlights is essential in achieving a realistic and dimensional car painting. Experiment with adding darker shades to specific areas of the car that are not directly hit by light. Similarly, use lighter shades to create highlights on areas that catch the light. Observing the play of light and shadow in your reference photo will guide you in determining where to add these details.
Applying the Base Paint
When applying the base paint, it is important to work in thin layers to build up the colors gradually. This approach allows for more control and prevents the paint from becoming too thick and clumpy. Start with a light layer of the base color and gradually add more layers to deepen the shade and achieve a smooth and even finish.
Building up the colors involves layering different shades of paint to create depth and dimension. Gradually layer darker shades in areas that require more depth, such as the crevices, while keeping the lighter shades in the highlighted areas. Use a soft brush to blend the colors together, creating seamless transitions between the different shades. Take your time with this step, as it is essential for achieving a realistic and lifelike appearance.
Blending and smoothing the paint is crucial for achieving a polished and professional-looking car painting. Use a clean, damp brush to blend the colors together, ensuring a smooth transition between each shade. Gentle, circular motions will help soften any harsh lines or edges. Be mindful of the drying time of the gouache paint, as it dries quickly. Work efficiently and have a spray bottle of water nearby to keep the paint moist and malleable.

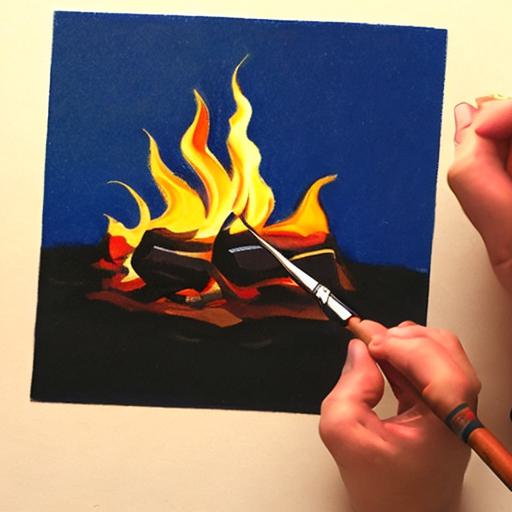
This image is property of images.unsplash.com.
Adding Details and Textures
Creating reflections is an important aspect of painting cars, as they add depth and realism to the artwork. Observe the reference photo to identify areas of the car that reflect light, such as the windows, mirrors, and shiny surfaces. Use a fine brush to carefully paint these reflections, capturing the subtle changes in color and intensity. Take your time and work gradually to achieve a convincing reflection effect.
Painting car parts requires attention to detail and accuracy. Focus on capturing the specific characteristics of each component, such as the grill, headlights, and windshield wipers. Use smaller brushes and work with precision to replicate the intricate details. It may be helpful to zoom in on the reference photo or use a magnifying glass for added accuracy.
Adding textures is an optional step that can enhance the overall realism of the car painting. Consider the different materials that make up the car, such as metal, plastic, or glass, and replicate their textures accordingly. Experiment with techniques such as dry brushing or stippling to create texture and depth. Use a light touch and build up the textures gradually to avoid overwhelming the painting.
Adding Shadows and Highlights
Defining the light source is crucial in creating realistic shadows and highlights. Analyze the reference photo to identify the direction of the light and use this as a guide for where to add shadows and highlights. Shadows should be darker and more intense in areas that are further away from the light source, while highlights should be brightest in areas directly hit by the light.
Applying shadows involves using darker shades of the base color to create depth and dimension. Focus on areas that receive less light, such as the undersides of the car or the areas covered by other car parts. Use a smaller brush and a light touch to gradually build up the shadows, ensuring a gradual transition between the different shades.
Adding highlights is the counterpart to shadows, bringing attention to areas that catch the light. Use lighter shades of the base color or even add a touch of white to create bright highlights. Focus on areas such as the edges of the car, the reflective surfaces, or the parts that directly face the light source. Be mindful of the intensity and placement of the highlights, as they can make or break the realistic appearance of the painting.

This image is property of images.unsplash.com.
Final Touches
Detailing the windows and mirrors is an important step to bring realism to your car painting. Pay close attention to capturing the reflections and transparency of the glass surfaces. Use a fine brush and thin layers of paint to create the desired effects. Experiment with glazing techniques to achieve a transparent and shiny appearance.
Adding background elements is an optional step that can enhance the overall composition of the painting. Consider adding a simple background that complements the car, such as a scenic landscape or an urban cityscape. Keep the background subtle to ensure that the focus remains on the car itself. Take your time to carefully blend the background with the car painting, ensuring a cohesive and balanced final result.
Signing and sealing the painting is the final step in the car painting process. Use a fine brush and a contrasting color to sign your name or add a personal touch to the artwork. Once the paint is completely dry, apply a layer of varnish or sealant to protect the painting and enhance its longevity. Follow the manufacturer’s instructions for the specific product you are using, ensuring proper application and drying time.
Common Mistakes to Avoid
Using too much water when working with gouache paint can result in a diluted and inconsistent color. Use water sparingly and only add small amounts at a time to achieve the desired consistency. It is better to start with less water and gradually add more if needed.
Overworking the paint can lead to a muddy and overmixed appearance. Gouache paint dries quickly, so it is important to work efficiently and avoid excessive layering or blending. Take breaks and step back from your painting to assess the progress and make intentional decisions.
Ignoring reference photos can result in inaccuracies and inconsistencies in your car painting. Use reference photos as a guide for proportions, colors, and details. Take your time to study the reference photo and apply the observed elements to your painting.

Tips and Tricks
Experimenting with different techniques is a great way to develop your skills and find your own artistic style. Try out various brush strokes, blending techniques, and textures to discover what works best for you. Don’t be afraid to push the boundaries and take risks in your painting process.
Using masking fluid can be helpful when working on intricate details or clean lines. Apply the masking fluid with a fine brush to areas that you want to protect from paint. Once the painting is complete, carefully remove the masking fluid to reveal the crisp lines or untouched areas.
Layering paint for depth is an effective technique in creating a three-dimensional appearance. By building up layers of paint, you can achieve a sense of depth and dimension. Start with lighter colors and gradually add darker shades to create the illusion of depth. Allow each layer to dry before adding the next to avoid smudging or blending unintended areas.
With these comprehensive steps, you are ready to embark on your journey to paint cars with gouache. Remember to practice regularly, experiment with different techniques, and stay patient throughout the process. With time and dedication, you will refine your skills and create stunning car paintings that showcase your artistic talent. Happy painting!
Word count: 1,485