Have you ever wanted to create your own vibrant and unique alcohol ink? Look no further – this article will show you how to make alcohol ink using acrylic paint! By following a simple process, you can transform your acrylic paint into a versatile and colorful medium that can be used for various art projects. Whether you are a seasoned artist or a beginner looking to experiment, this easy-to-follow guide will provide you with all the essential steps to create your own alcohol ink. Let’s get started and unlock your creativity with this exciting technique!
Materials Needed
To make alcohol ink with acrylic paint, you will need the following materials:
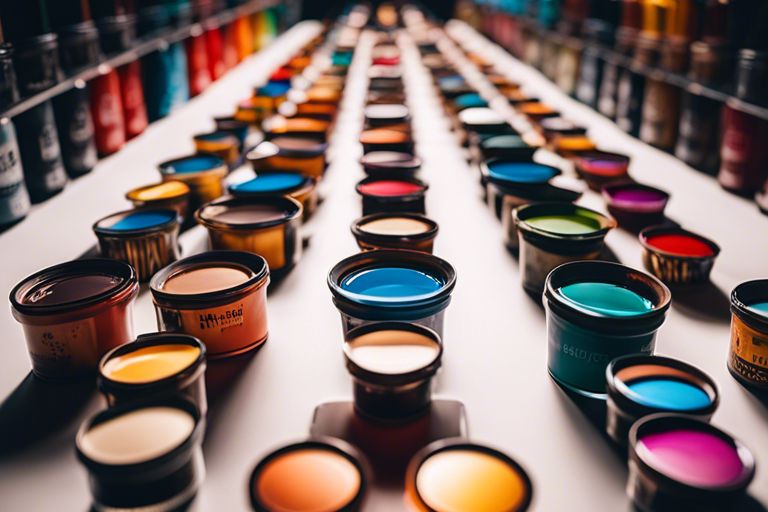
Acrylic Paint
Acrylic paint comes in a wide range of vibrant colors and will be the base for your alcohol ink. Choose colors that you love and that work well together.
Isopropyl Alcohol
Isopropyl alcohol is the main ingredient that will transform your acrylic paint into alcohol ink. You’ll need a high percentage of alcohol, preferably 91% or higher, for best results.
Glass Containers
Glass containers will be used to mix and store your alcohol ink. It’s important to use glass instead of plastic to prevent any chemical reactions with the alcohol.
Stirring Sticks
Stirring sticks are needed to thoroughly mix the acrylic paint and alcohol together. You can use wooden popsicle sticks or disposable plastic stirrers.
Dropper Bottles
Dropper bottles are useful for transferring the alcohol ink into smaller and more precise quantities. You can find empty dropper bottles at art supply stores or repurpose ones you already have.
Protective Gloves
Since you’ll be working with alcohol and paint, it’s important to protect your hands. Wear protective gloves to keep your skin safe from any potential irritation or staining.
Protective Eyewear
While creating alcohol ink, it’s a good idea to wear protective eyewear to shield your eyes from any accidental splashes or fumes.
Painter’s Tape
Painter’s tape will come in handy when you want to create clean and defined edges or sections in your alcohol ink art. It will prevent the ink from bleeding onto unwanted areas.
Disposable Plastic Cups
Disposable plastic cups are useful for mixing larger quantities of alcohol ink. They allow for easy cleanup and can be disposed of once you’re done.
Paper Towels
Having paper towels nearby is essential for cleaning up any spills or to quickly wipe off excess ink from your tools or surfaces.
Preparing the Paint
Before you start creating alcohol ink art, you need to prepare your paint mixture. Follow these steps:
Choose Your Acrylic Paint Colors
Select the acrylic paint colors you want to use for your alcohol ink. You can choose a few complementary colors or create a vibrant rainbow effect.
Prep Your Glass Containers
Clean your glass containers thoroughly to ensure that there are no impurities or leftover residues that may affect the final result of your alcohol ink.
Squeeze Out the Acrylic Paint
Squeeze out a small amount of each acrylic paint color into separate compartments of the glass containers. Start with smaller amounts, as a little goes a long way.
Mixing the Paint with Alcohol
Now it’s time to combine the acrylic paint with isopropyl alcohol. Add a few drops of alcohol to each section of paint and mix well using a stirring stick. The ratio of paint to alcohol depends on the desired intensity and consistency of your alcohol ink.
Adjusting the Consistency
If the mixture is too thick, add a few more drops of alcohol and stir until you achieve a smoother consistency. If it’s too thin, add a small amount of acrylic paint and mix again.
Stirring and Straining
Continue stirring the paint and alcohol mixture until it is well blended and smooth. If you notice any clumps or undissolved particles, strain the mixture through a fine-mesh sieve or a coffee filter to remove them.

Creating Alcohol Ink Art
Once you have prepared your alcohol ink, it’s time to explore your creativity through various techniques and create stunning alcohol ink art.
Choosing a Non-Porous Surface
Alcohol ink works best on non-porous surfaces such as ceramic tiles, Yupo paper, or synthetic papers. These materials prevent the ink from seeping into the surface and allow it to spread more easily.
Prepping the Surface
Before applying alcohol ink, ensure that the surface is clean and free from any dust or oils. Use a mild soap and water solution to gently clean the surface and let it dry completely before proceeding.
Applying the Alcohol Ink
Using a dropper bottle or a small brush, apply the alcohol ink onto the chosen surface. Start with a small amount and experiment with different techniques to achieve the desired effect.
Applying Layers and Blending
Alcohol ink allows for layering and blending, so don’t be afraid to apply multiple colors on top of each other. Let each layer dry before adding another to avoid muddying the colors.
Creating Different Effects
Alcohol ink art offers endless possibilities for creativity. Play with techniques such as blowing through a straw to create interesting textures or using an airbrush for a more controlled and even application.
Working with Stencils
Stencils can add intricate patterns and designs to your alcohol ink art. Secure the stencil onto the surface with painter’s tape and apply the alcohol ink over it. Lift the stencil carefully to reveal the design.
Experimenting with Techniques
Don’t be afraid to try different techniques and explore the possibilities of alcohol ink. Dip a brush into the alcohol ink and flick it onto the surface for a splatter effect or use a palette knife to create unique textures.
Using Alcohol Ink in Other Projects
Alcohol ink is not limited to creating standalone art pieces. Here are a few other projects where you can incorporate alcohol ink:
Alcohol Ink Coasters
Transform plain coasters into stunning pieces of functional art by applying alcohol ink to their surface. Create unique patterns and designs that will brighten up any home.
Alcohol Ink Jewelry
Use alcohol ink to create one-of-a-kind jewelry pieces. Apply alcohol ink to glass or metal pendants, beads, or other jewelry components to add vibrant colors and interesting patterns.
Alcohol Ink Glassware
Spruce up plain glassware by applying alcohol ink to the surface. Create beautiful gradients or abstract designs on glasses, vases, or wine bottles to add a touch of artistic flair to your home decor.
Alcohol Ink Paintings
Take your alcohol ink art to the next level by incorporating it into larger-scale paintings. Combine alcohol ink with other mediums, such as acrylic or watercolor, to create mixed media pieces that are full of depth and texture.
Tips and Tricks
Here are some helpful tips and tricks to make the most of your alcohol ink creations:
Start with Small Amounts
It’s better to start with small amounts of alcohol ink and gradually build up layers. This allows you to have better control over the colors and prevents over-saturation.
Mixing Ratios
Experiment with different ratios of paint to alcohol to achieve the desired opacity and vibrancy in your alcohol ink. Keep track of the ratios that work well for you to recreate your favorite colors.
Test on a Scrap Surface
Before applying alcohol ink to your chosen surface, test the colors and techniques on a scrap piece of the same material. This allows you to make adjustments and see how the colors interact before committing to your final piece.
Explore Color Combinations
Don’t be afraid to mix and blend different colors together. Explore various color combinations to create unique and interesting effects in your alcohol ink art.
Layering and Drying Time
Allow each layer of alcohol ink to dry before adding more colors on top. This prevents the colors from bleeding together and creates distinct layers and depth in your artwork.
Cleaning and Maintaining Tools
Clean your brushes, stirring sticks, and dropper bottles thoroughly after each use to prevent the alcohol ink from drying and clogging them. Rinse them with isopropyl alcohol and wipe them dry with a paper towel.
Safety Precautions
Always work in a well-ventilated area to prevent inhaling the fumes of alcohol and paint. Wear protective gloves and eyewear to protect your skin and eyes. Additionally, avoid ingesting or consuming alcohol ink, as it is toxic.
Troubleshooting
If you encounter any issues while working with alcohol ink, here are some common troubleshooting tips:
Colors Appearing Dull or Muted
If your colors appear dull or muted, try using more concentrated alcohol ink or layer the colors multiple times to intensify their vibrancy.
Ink Not Spreading Properly
If the ink isn’t spreading on your chosen surface, it may be due to the surface being too porous. Consider using a non-porous material that allows the ink to flow and spread more freely.
Bleeding and Overlapping
To prevent colors from bleeding or overlapping, allow each layer to dry completely before adding another. This creates a barrier between colors and ensures that they remain separate.
Paint Drying Too Fast
If your alcohol ink is drying too quickly, try using a blending solution or extender to increase its working time.
Ink Not Sticking to Surface
Ensure that the surface is properly prepped and clean before applying alcohol ink. If the ink still doesn’t adhere, you may need to use an alcohol ink primer or sealant specifically designed for that surface.
Accidental Spills and Stains
Clean up any spills or stains immediately with a paper towel soaked in isopropyl alcohol. Act quickly to prevent the ink from drying and permanently staining your working area.

Sealing and Preserving Alcohol Ink Art
To protect and preserve your alcohol ink art, consider the following steps:
Using a Fixative Spray
Once your alcohol ink has dried completely, apply a fixative spray to protect the colors from fading and smudging. Follow the manufacturer’s instructions for best results.
Varnishing the Artwork
For a glossy finish and added protection, you can varnish your alcohol ink art with an acrylic varnish. Use a soft brush to apply a thin and even layer of varnish, allowing each coat to dry before applying the next.
Framing and Displaying
Consider framing your alcohol ink art to showcase it in the best possible way. Choose a frame that complements your artwork and protects it from dust and environmental damage.
Inspiration and Ideas
If you’re looking for inspiration for your alcohol ink art, consider these ideas:
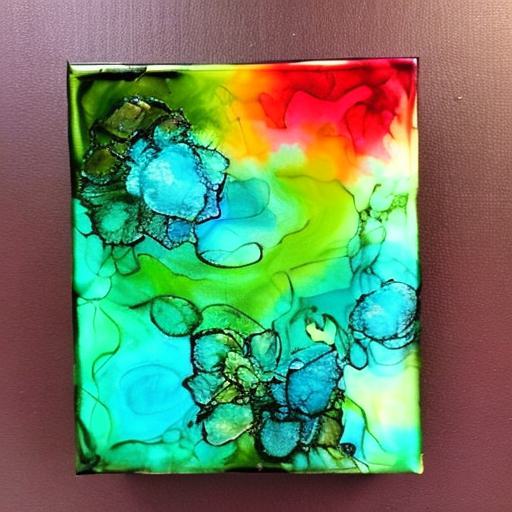
Abstract Alcohol Ink Art
Create vibrant and expressive abstract pieces by allowing the alcohol ink to flow and blend freely. Embrace the unpredictable nature of the medium and let your creativity guide you.
Nature-Inspired Alcohol Ink
Take inspiration from nature and create alcohol ink art that reflects the beauty of landscapes, flowers, or animals. Experiment with various techniques to achieve organic and natural effects.
Alcohol Ink Landscapes
Use alcohol ink to create stunning landscapes with vivid colors and dreamy textures. Blend different shades of blues for serene ocean scenes or vibrant greens for lush forests.
Geode-inspired Alcohol Ink
Capture the mesmerizing beauty of geodes in your alcohol ink art. Use metallic or iridescent inks to mimic the shimmering crystals found within geodes.
Alcohol Ink in Mixed Media
Combine alcohol ink with other mediums, such as acrylic paint or collage elements, to create mixed media artworks with a unique and eclectic feel.
Advanced Techniques
Once you’ve mastered the basics of alcohol ink, you can venture into more advanced techniques:
Alcohol Ink Resists
Create intricate designs by using a resist medium, such as rubber cement or fine-line masking fluid, before applying alcohol ink. The resist will prevent the ink from adhering to certain areas, creating interesting contrasts.
Alcohol Lift-Ink Technique
Experiment with the alcohol lift-ink technique by covering a surface with alcohol ink, allowing it to dry, and then reactivating it with rubbing alcohol. This technique creates beautiful textures and effects.
Alcohol Ink Marbling
Create mesmerizing marbled patterns by using a water bath and dropping alcohol ink onto the surface. Swirl the colors together using a toothpick or an improvised tool, and carefully place your chosen material onto the bath to transfer the marbled design.
Alcohol Ink Dripping
For an abstract and free-flowing effect, try the alcohol ink dripping technique. Allow the ink to drip or pour onto a tilted surface, letting gravity guide the colors as they blend and create unique patterns.
Alcohol Ink Textures
Experiment with different textures by adding texture mediums or creating texture with textured tools or stamps. These techniques add depth and interest to your alcohol ink art.
Conclusion
Making alcohol ink with acrylic paint opens up a world of creativity and the opportunity to create stunning and unique artworks. By following the steps outlined in this article, you’ll be well on your way to creating beautiful alcohol ink art. Remember to have fun, experiment with different techniques, and let your creativity shine through. Cheers to your alcohol ink journey!