Have you ever wanted to create mesmerizing art pieces but thought you lacked the skills necessary to do so? acrylic pour painting might be just what you need to unleash your creative potential. This popular painting technique allows you to create stunning abstracts without requiring the precision of a traditional artist. With the right tools, paints, and a bit of guidance, you can craft beautiful works of art using just a few simple materials.

What is Acrylic Pour Painting?
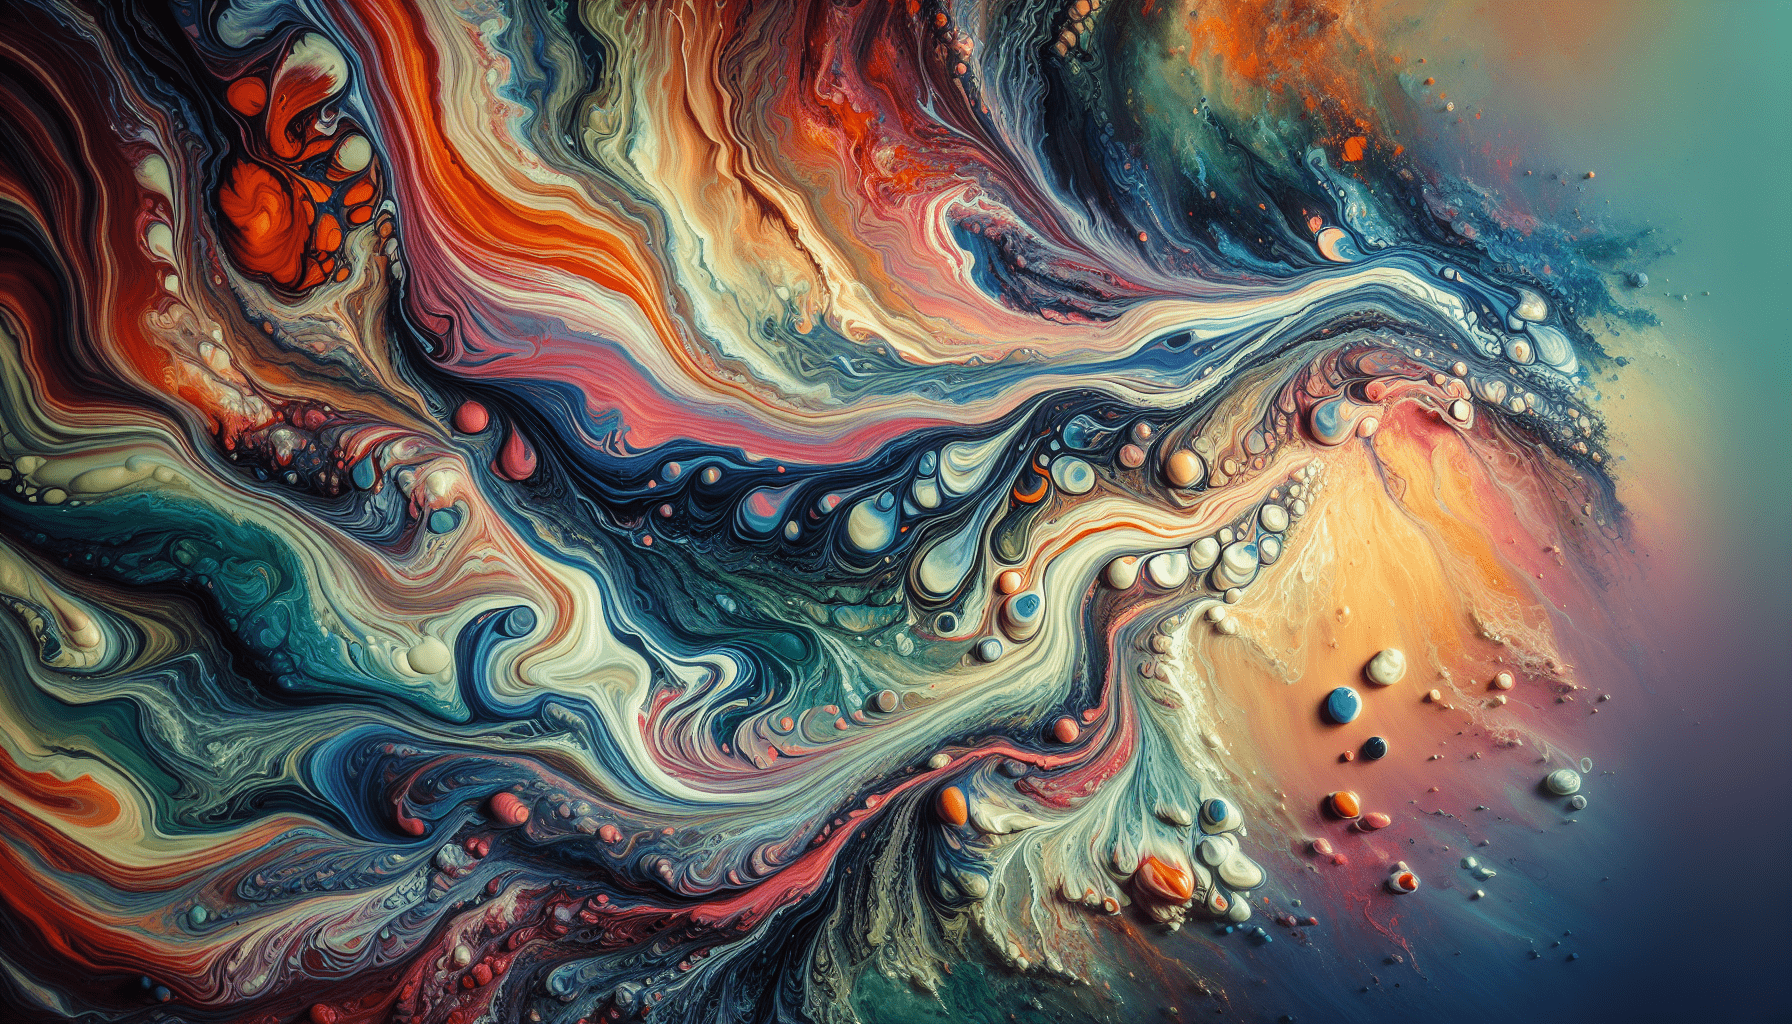
Acrylic pour painting is a contemporary art form that involves pouring fluid acrylic paint on a surface to create art. By manipulating the flow and movement of the paint, you can create intricate designs and stunning patterns. This technique doesn’t require prior painting skills, making it accessible for both beginners and seasoned artists alike. The unpredictability and fluidity of this art form ensure that each piece is unique.
The Origins of Acrylic Pour Painting
Acrylic pour painting has its roots in techniques that date back to the 1930s when artists began experimenting with the fluidity of paints. However, it has gained significant popularity in the past decade due to social media platforms that have amplified its reach. The beauty of this technique lies in its spontaneity, allowing artists to engage with their canvas in an organic and unstructured way.
Materials Needed for Acrylic Pour Painting
Before you begin, ensure you have all the necessary materials at hand. While being creative, an organized approach can enhance your experience and the final outcome of your artwork.
Basic Materials
- Acrylic Paint: Choose high-quality acrylic paints as they provide better pigmentation and viscosity.
- Pouring Medium: This medium helps in thinning the paint for smooth pouring while maintaining its pigmentation.
- Canvas or Surface: Standard canvases work well, but you can also use wooden panels or ceramic tiles.
- Mixing Cups: Use plastic cups or containers for mixing your paint and pouring medium.
- Stir Sticks: Wooden or plastic sticks to mix your paint thoroughly.
- Protective Gear: Gloves and aprons are essential to protect your hands and clothing from spills.
- Plastic Sheet or Drop Cloth: This is crucial for protecting your workspace from drips and splashes.
Optional Supplies
- Torch: A butane torch can remove air bubbles and create interesting effects when applied to the wet paint.
- Silicone Oil: Adding a few drops of silicone oil to the paint can create cells, adding depth to your artwork.
- Palette Knife or Spatula: Useful for spreading paint and creating texture or other effects.
- Varnish: Seal your finished painting with a varnish for a shiny, protective layer.
Preparing Your Work Area
A well-prepped workspace can make the creation process smoother and more enjoyable. Consider the flowing nature of acrylic pouring and ensure your work area accommodates this.
Setting Up Your Space
Find a well-ventilated area with enough room to move around freely. Lay down your protective covering to shield the floor and workspace surfaces.
- Ensure your canvas is elevated to allow paint to drip off the edges.
- Keep all your materials within reach to facilitate seamless transitions between steps.
- Consider lighting arrangements that allow you to see color contrasts and nuances clearly.
Protecting Your Workspace
Cover any nearby furniture or objects, as the paint can splatter. If you intend to work on multiple pieces, designate drying areas where finished canvases can settle without interference.
Mixing Your Paint
Understanding how to mix paint properly is crucial. This process determines the texture, flow, and finish of your pour.
Creating the Right Consistency
The consistency of your paint mix is key to achieving desired results. Here’s a basic mix ratio guideline:
| Material | Ratio |
|---|---|
| Acrylic Paint | 1 part |
| Pouring Medium | 1.5 parts |
| Water (if needed) | A few drops |
- Thin Consistency: Achieved by adding more medium and water. Results in a more fluid pour.
- Thick Consistency: Less medium and water, suitable for more control over the design.
Color Selection
Consider the final appearance of your piece when selecting colors. Complementary colors generally create contrasts and harmony, while analogous colors blend seamlessly. Experimenting with color variations will enhance the depth and interest of your painting.

Pouring Techniques
Each pouring method results in distinct patterns. Understanding these methods allows you to choose or combine techniques to achieve your desired artistic effect.
Dirty Pour
A dirty pour involves combining all your colors into a single cup and pouring them onto the canvas in one go. This technique typically results in a marbled or swirled effect.
- Carefully layer each color into your cup. Avoid stirring them together.
- Pour the contents onto the canvas and tilt the canvas in various directions to move the paint.
Flip Cup
For a flip cup pour, you fill your cup just like in a dirty pour, but you place the canvas over the cup and flip it upside down. Lift the cup to let the paint flow freely onto the canvas.
- Expect to see bubbles. Use a torch or heat gun to pop them and encourage cell formation.
Puddle Pour
Pour separate puddles of color directly onto the canvas. Use tools like a spatula or palette knife to sway the colors into each other, creating blended designs.
- Focus on the center for a blossom effect or experiment with placements for a varied look.
Swipe Technique
The swipe technique involves pouring multiple lines or puddles of color and then using a tool to drag them across the canvas. This creates a blended, gradient-like effect.
- Use a damp paper towel or palette knife for the best results.
Enhancing Designs with Cells
Cells add an intricate network of designs within your painting. They often look like colorful bubbles and can be achieved through various methods.
Creating Cells with Silicone
Add drops of silicone oil to the painting mixture to introduce cells into your artwork. When the paint is disturbed, the oil reacts by creating circular shapes.
- After adding silicone, stir gently. Too much stirring can reduce the cell effect.
Using Heat
Applying heat after laying the paint on the canvas brings out cells and ridges. A kitchen torch or a heat gun works effectively.
- Move the source of heat in a sweeping motion across the canvas.
- Avoid applying too much heat to prevent altering the paint’s structure or causing uneven finishes.
Drying and Finishing Your Painting
After putting your paint on canvas, patience is required while it dries. Proper care ensures your artwork retains its brilliance.
Drying Time and Conditions
Depending on the environment, drying can take 24 to 72 hours. Ensure the area is free of dust and debris that could land on wet paint.
- For optimal results, maintain a steady, mild temperature and low humidity.
Sealing Your Painting
Once dry, sealing your acrylic pour painting protects the surface and enhances the vibrancy of the colors.
- Use a clear varnish or a resin. Test on a small sample area first to ensure compatibility.
- Apply evenly with a brush or a spray, allowing each layer to dry before applying the next.
Troubleshooting and Common Mistakes
Like any art form, mistakes can occur. Recognizing common issues and knowing how to address them helps improve your technique.
Common Problems and Solutions
- Cracking: Often results from paint layers being too thick or the canvas flexing. Thin your paint mixture adequately and ensure the canvas is stretched tight.
- Mud-like Colors: Occurs from over-mixing. Layer colors gently and limit the number of stirs.
- Bubbles: Use a torch immediately after pouring to remove air bubbles.
- Lack of Cells: Increase your silicone oil or adjust your swiping technique to promote cellular formations.
Developing Your Style
As you gain confidence, you may want to develop a signature style. Experimentation is key to discovering what techniques and colors speak to you.
Evolving Techniques
Try altering variables like paint consistency, pouring methods, or drying environments. Each change can contribute to unique outcomes, providing insights into your artistic preferences.
Seeking Inspiration
Explore works by other acrylic pour artists and art from different genres for inspiration. While these sources can offer fresh ideas, strive for authenticity in your pieces. Aim to find what resonates most genuinely with your creative expression.
Conclusion
Acrylic pour painting is both an art and a science. With patience and practice, you can master this rewarding technique and create beautiful, abstract pieces that reflect your personal style. Remember that every pour is a step towards honing your craft, and every mistake is a learning opportunity. Enjoy the process, and watch as your creativity flows on canvas.