In this article, you will learn the step-by-step process of effectively applying dark wax to chalk paint. Dark wax is a fantastic way to add depth, dimension, and an aged look to your furniture or other painted surfaces. By following these simple instructions, you will be able to achieve a professional finish, enhancing the appearance of your pieces and creating a stunning, vintage-inspired look. Discover the secrets to mastering the application of dark wax to chalk paint and elevate your furniture painting skills to the next level.

Preparing the Surface
Clean the surface
Before applying dark wax to chalk paint, it is essential to start with a clean surface. This step ensures that the wax adheres properly and creates a smooth finish. Use a mild cleanser and a lint-free cloth to remove any dirt, grime, or grease from the surface. Make sure to thoroughly clean all areas that will be painted and waxed.
Sand the surface (if necessary)
If the surface you are working with has any rough spots or imperfections, it may be necessary to sand it before applying the chalk paint. Sanding helps to create a smooth and even surface, allowing the paint and wax to adhere better. Use a fine-grit sandpaper to carefully sand the surface, ensuring that any rough areas are smoothed out. Remember to wipe away any dust or debris after sanding.
Remove any residue
After cleaning and sanding (if necessary), it is crucial to remove any residue from the surface. Residue can include leftover cleanser, sanding dust, or any other substances that may hinder the adhesion of the chalk paint. Use a clean lint-free cloth and gentle sweeping motions to remove any residue and prepare the surface for painting.
Gathering Supplies
Dark wax
One of the key supplies needed to apply dark wax to chalk paint is, of course, dark wax itself. Dark wax adds depth and richness to the finished look of your painted furniture or decor. It is typically used to create an antique or distressed effect. Choose a high-quality dark wax that is specifically made for furniture painting to ensure the best results.
Chalk paint
Chalk paint is a popular choice for furniture painting due to its matte finish and ability to adhere to various surfaces without the need for extensive priming. When selecting chalk paint for your project, consider the color you desire to achieve and choose a high-quality brand that offers a wide range of shades. Chalk paint comes in various colors, allowing you to customize your piece to your liking.
Painter’s tape
Painter’s tape is a useful tool for protecting areas that you do not want to paint or wax. It is particularly handy when working on furniture with detailed edges or intricate designs. Use painter’s tape to cover any parts of the furniture that you want to keep free of paint or wax.
Wax brush or lint-free cloth
To apply the dark wax, you will need a wax brush or a lint-free cloth. A wax brush is specifically designed for applying wax, allowing for easy and even application. However, a lint-free cloth can also be used effectively, especially for smaller projects or areas that are difficult to reach with a brush. Choose the application method that works best for your project.
Wax applicator brush or lint-free cloth
Aside from the wax brush or cloth used to apply the dark wax, you may also need a separate wax applicator brush or cloth for blending and removing excess wax. This tool helps to create a more seamless and professional look by ensuring that the wax is distributed evenly and any excess is removed.
Applying Chalk Paint
Choose the desired color of chalk paint
Before applying the chalk paint, it is important to select the color that best suits your project. Look for inspiration and consider the overall aesthetic you want to achieve. Whether you prefer a bold, vibrant color or a more subtle and neutral tone, there are numerous options available in the chalk paint market. Take your time to choose the perfect shade for your piece.
Prepare the chalk paint
To ensure optimal results, it is essential to prepare the chalk paint before application. Follow the manufacturer’s instructions for preparing the paint, which may include stirring or shaking the container to mix the pigments thoroughly. Properly preparing the paint will ensure an even and consistent application.
Apply the chalk paint in thin coats
When applying chalk paint, it is generally recommended to work in thin coats rather than applying a thick layer all at once. Thin coats allow for better control and easier blending. Use a paintbrush or roller to apply the paint evenly and smoothly. Be sure to follow the grain of the wood or intended direction of application to achieve the desired look.
Let the chalk paint dry
Once the chalk paint has been applied, allow it to dry completely before moving on to the next steps. Drying time can vary depending on factors such as temperature and humidity, so refer to the paint manufacturer’s instructions for the recommended drying time. Avoid rushing this step to prevent any smudging or uneven finish.
Preparing the Dark Wax
Stir and mix the dark wax
Before applying the dark wax, it is crucial to stir and mix it thoroughly. Dark wax tends to settle and separate, so giving it a good stir ensures a consistent color and texture throughout. Use a stirring stick or a small spatula to mix the wax until it is well blended.
Choose the right amount of dark wax
Determining the right amount of dark wax to use can be subjective and depends on the desired level of antiquing or distressing. It is generally recommended to start with a small amount and gradually build up the intensity. Remember that it is easier to add more wax than to remove excess, so err on the side of caution and start with a conservative amount.
Optional: Add clear wax as a base
To create a smoother and more controllable application, some people choose to add a layer of clear wax as a base before applying the dark wax. Clear wax acts as a protective barrier between the painted surface and the dark wax, allowing for easier blending and manipulation. This step is optional but can be beneficial for beginners or those seeking more control.

Applying the Dark Wax
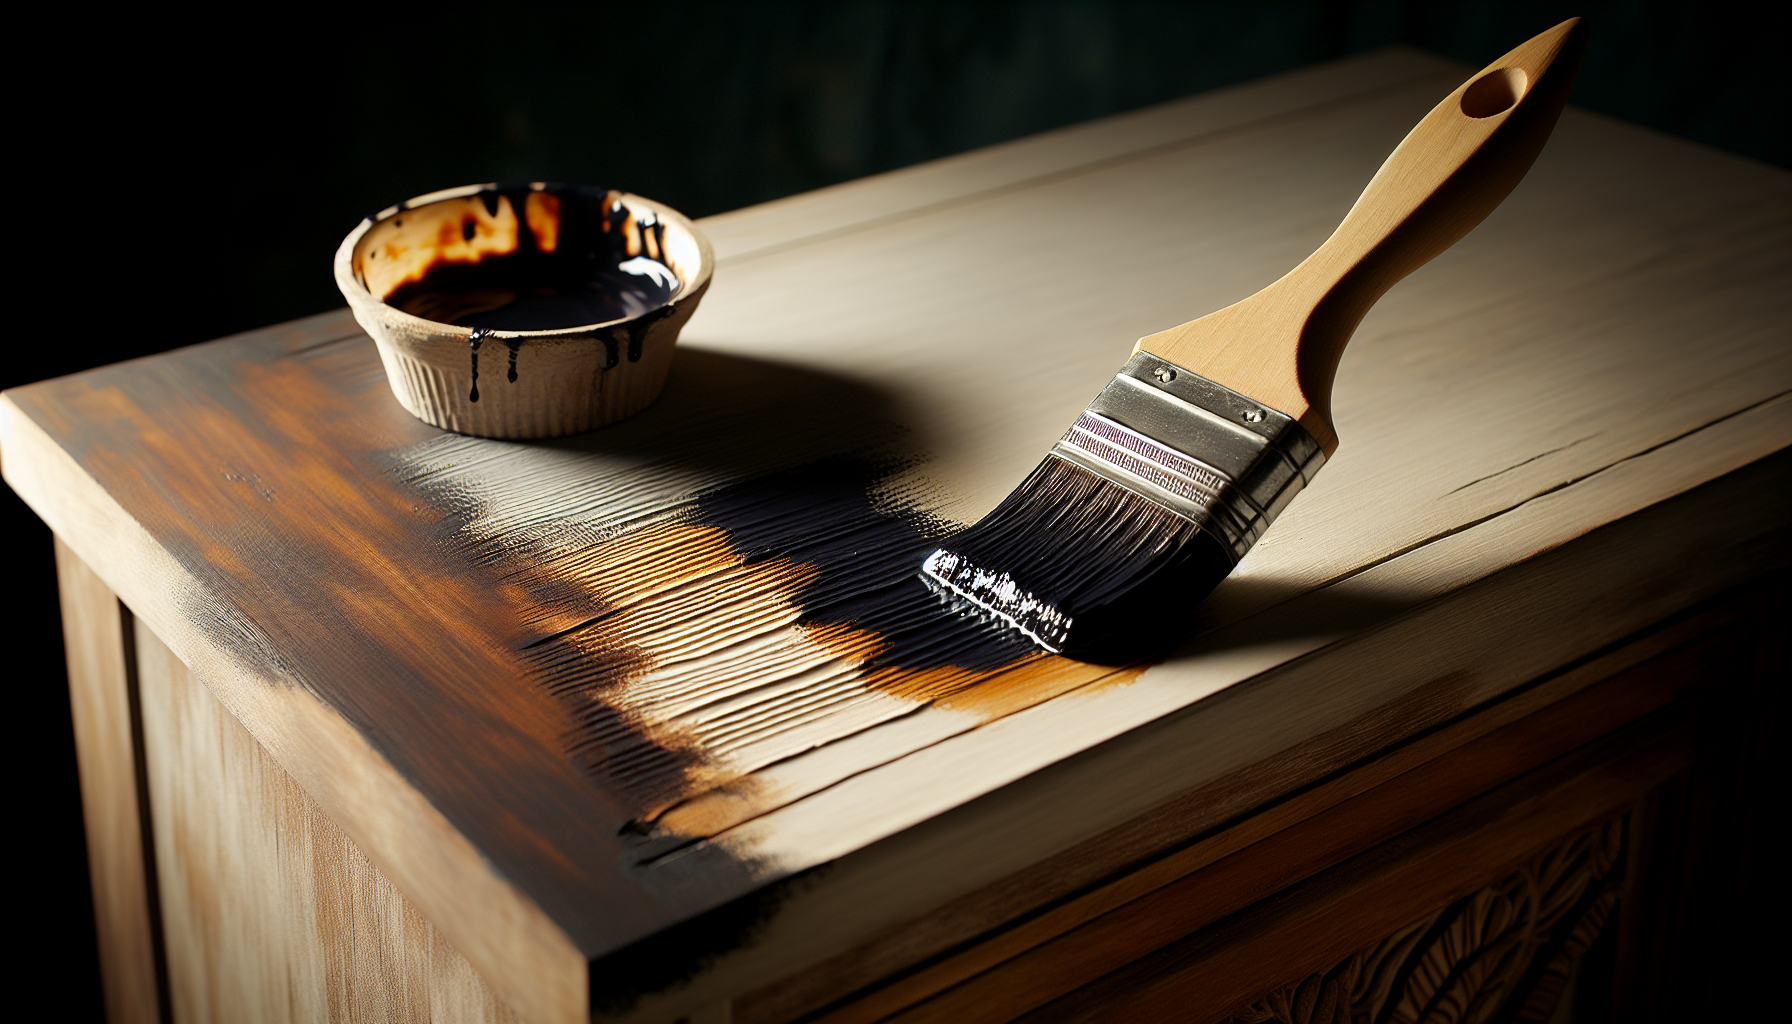
Apply the dark wax using a wax brush
To apply the dark wax, dip a wax brush into the container and gently swirl it around to pick up a small amount of wax. Apply the wax to the painted surface using smooth and even strokes, following the direction of the wood grain or desired pattern. Work in small sections, focusing on blending the wax into the chalk paint.
Apply the dark wax using a lint-free cloth
If you prefer not to use a wax brush, a lint-free cloth can also be used to apply the dark wax. Scoop a small amount of wax onto the cloth and gently rub it onto the painted surface in the desired areas. Make sure to work in small sections and blend the wax thoroughly for a seamless finish.
Work in small sections
When applying dark wax, it is essential to work in small sections rather than attempting to cover the entire surface in one go. This allows for better control and ensures that the wax does not dry before blending. Focus on one area at a time, ensuring that the dark wax is applied and blended before moving on to the next section.
Blend the dark wax with the chalk paint
As you apply the dark wax, it is crucial to blend it with the underlying chalk paint for a harmonious and cohesive look. Use circular motions or gentle back-and-forth strokes to ensure that the wax is evenly distributed and seamlessly integrated with the paint. Pay close attention to any edges or corners, as these areas may require extra blending to achieve a natural look.
Removing Excess Wax
Use a lint-free cloth to remove excess wax
After applying the dark wax, it is common to have some excess wax that needs to be removed for a smoother finish. Take a lint-free cloth and lightly run it over the surface, applying gentle pressure to remove any excess wax. Be careful not to remove too much wax, as it adds to the desired antique or distressed effect.
Buff the surface for a smoother finish
To further enhance the smoothness and sheen of the waxed surface, use a clean lint-free cloth to buff the waxed areas gently. This step helps to remove any remaining residue and gives the surface a polished and refined appearance. Buffing should be done in a circular motion, working over the entire waxed surface until it reaches the desired level of smoothness.
Working with Detailed Areas
Use a wax applicator brush for intricate details
When working with furniture or decor that has intricate details, it is helpful to use a wax applicator brush. This type of brush is specifically designed to reach into smaller crevices and hard-to-reach areas, ensuring that the dark wax is applied evenly and thoroughly. The brush’s bristles allow for better control and precision during application.
Apply a small amount of dark wax
In detailed areas, applying a small amount of dark wax is recommended. This will help prevent the wax from pooling in the corners or crevices, which could result in an uneven or gloopy finish. Use a wax brush or a small, clean cloth to apply a modest amount of dark wax, working it into the detailed areas while ensuring that it is blended with the surrounding chalk paint.
Remove excess wax from detailed areas
After applying the dark wax to detailed areas, it is essential to remove any excess wax for a clean and polished look. Take a clean cloth, preferably lint-free, and gently wipe away any excess wax from the intricate details. Pay close attention to ensure that no clumps or build-up remains, as this could detract from the overall appearance of the piece.
Drying and Curing Time
Allow the dark wax to dry
After applying the dark wax, it is crucial to allow it to dry before proceeding with any further steps. Drying time can vary depending on factors such as temperature and humidity, so refer to the wax manufacturer’s instructions for the recommended drying time. Avoid touching or manipulating the waxed surface until it is completely dry to ensure a smooth and uniform finish.
Give it sufficient curing time
While the dark wax may appear dry to the touch, it is essential to provide it with sufficient curing time to fully set and harden. Curing time allows the wax to fully bond with the chalk paint and creates a durable and long-lasting finish. As a general guideline, it is recommended to allow at least 24-48 hours for the wax to cure before using or handling the waxed piece.
Adding Additional Coats
Optional: Apply additional coats of dark wax
Depending on the desired depth and intensity of the finished look, you may choose to apply additional coats of dark wax. Applying extra coats of dark wax can further enhance the antique or distressed effect, adding more character and depth to your piece. Remember to allow each coat of wax to dry thoroughly before applying the next.
Let each coat dry before applying the next
If you decide to apply multiple coats of dark wax, it is crucial to let each coat dry completely before applying the next. This will prevent the previous coats from smudging or streaking and ensure a consistent and even finish. Proper drying time between coats allows for better control and allows the wax to cure properly.
Finishing Touches
Inspect and touch up any areas
Once the dark wax has dried and cured, it is important to inspect the waxed surface and touch up any areas that may require additional attention. Look for any spots that may have been missed or areas that require additional blending or smoothing. Use a clean cloth and a small amount of wax to touch up these areas, ensuring a seamless and polished final look.
Consider using clear wax for added protection
To provide added protection to your dark waxed surface, consider applying a coat of clear wax. Clear wax acts as a protective barrier, shielding the dark wax and chalk paint from wear and tear. It also enhances the sheen and durability of the finish. Apply the clear wax in the same manner as the dark wax, working it into the surface using a wax brush or cloth.
Allow the final finish to cure completely
After applying any final touches or extra coats, it is essential to allow the final finish to cure completely. Curing time will vary depending on the type of wax used, so refer to the manufacturer’s instructions for the recommended time. Avoid using or handling the waxed piece until the finish has fully cured to avoid any damage or blemishes.
In conclusion, applying dark wax to chalk paint is a process that requires careful preparation, attention to detail, and patience. By following these steps and utilizing the necessary supplies, you can achieve a beautiful and professional-looking finish on your furniture or decor. Remember to take your time, work in small sections, and allow for sufficient drying and curing time. With practice and proper technique, you can master the art of applying dark wax to chalk paint and transform your pieces into stunning works of art.