When it comes to refinishing surfaces, the question of whether you can sand enamel paint frequently arises. Enamel paint is known for its durable finish and resistance to wear and tear. However, if you’re looking to repaint or refinish an enamel-painted surface, you may wonder if sanding is a viable option. In this article, we will explore the topic of sanding enamel paint, discussing its feasibility, benefits, and precautions to ensure a successful outcome.
What is enamel paint?
Definition of enamel paint
Enamel paint is a type of paint that is known for its durable and glossy finish. It is a popular choice for a variety of surfaces due to its excellent adhesion and resistance to wear and tear. Enamel paint is typically made by combining pigment, binder, and solvent, and it can be used on both interior and exterior surfaces.
Characteristics of enamel paint
Enamel paint is characterized by its hard, smooth, and glossy finish. It provides a durable coating that is resistant to scratches, stains, and moisture. Enamel paint is also known for its excellent adhesion, which allows it to adhere to a wide range of surfaces including wood, metal, and plastic. Additionally, enamel paint is available in a wide range of colors, making it versatile for various applications.
Common applications of enamel paint
Enamel paint is commonly used in both residential and commercial settings for a variety of applications. Some common uses of enamel paint include:
-
Furniture: Enamel paint can be used to give furniture a new lease on life. It provides a beautiful and durable finish that can transform old and worn-out furniture into stunning pieces.
-
Appliances: Enamel paint is often used to update and refresh the appearance of appliances such as refrigerators, stoves, and washing machines. It can cover up scratches and dents, giving these appliances a like-new look.
-
Doors and trim: Enamel paint is an excellent choice for painting doors, trim, and baseboards. Its smooth and glossy finish adds a touch of elegance to any room.
-
Metal surfaces: Enamel paint is widely used on metal surfaces, such as railings, fences, and outdoor furniture, to provide protection against rust and corrosion.
-
Vehicles: Enamel paint is commonly used in the automotive industry for painting cars, motorcycles, and other vehicles. It provides a high-gloss finish and excellent durability to withstand the elements.
Why would you want to sand enamel paint?
Reasons for sanding enamel paint
There are several reasons why you might want to sand enamel paint:
-
Surface imperfections: Over time, enamel paint can develop imperfections such as drips, brush marks, or bubbles. Sanding the surface allows you to smooth out these imperfections and create a more even and professional-looking finish.
-
Adhesion: Sanding the enamel paint creates a rougher surface, which improves the adhesion of a new layer of paint. This is particularly important if you are planning to repaint the surface with a different type of paint or color.
-
Color change: If you want to change the color of the enamel paint, sanding can help remove the existing color and create a clean canvas for the new paint.
Benefits of sanding enamel paint
Sanding enamel paint offers several benefits:
-
Improved finish: Sanding removes imperfections and creates a smooth surface, resulting in a more professional-looking finish.
-
Better adhesion: Sanding the enamel paint increases the surface area and creates a rougher texture, improving the adhesion of a new layer of paint.
-
Color uniformity: Sanding can help achieve a more uniform color by removing any previous layers of paint and creating a consistent surface for the new paint.
-
Longer-lasting results: By sanding the surface before repainting, you can ensure that the new paint will adhere properly and resist peeling or chipping, leading to a longer-lasting finish.

Considerations before sanding enamel paint
Surface preparation
Before sanding enamel paint, it is important to properly prepare the surface:
-
Clean the surface: Remove any dust, dirt, grease, or other contaminants from the surface using a mild detergent or degreaser. This ensures that the sandpaper can make direct contact with the enamel paint.
-
Fill any holes or cracks: If there are any holes, cracks, or dents in the enamel paint, fill them with a suitable filler and let it dry completely before sanding.
-
Remove loose or peeling paint: If there are areas of the enamel paint that are peeling or loose, carefully scrape or sand them off to create a smooth surface.
Safety precautions
Sanding enamel paint can create dust particles that may be harmful if inhaled. It is important to take the following safety precautions:
-
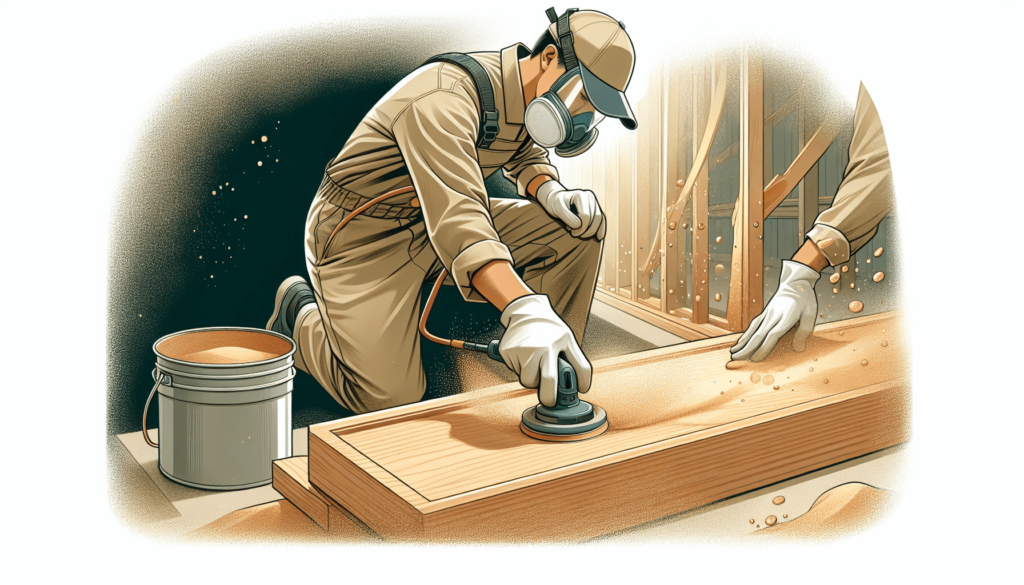
Wear protective gear: Always wear safety goggles, a dust mask, and gloves when sanding enamel paint to protect your eyes, respiratory system, and skin from dust and debris.
-
Work in a well-ventilated area: Ensure that the work area is well-ventilated to minimize the inhalation of dust particles. Open windows or use fans to improve air circulation.
-
Consider using a respirator: For extensive sanding projects, it may be advisable to use a respirator to provide additional protection against dust inhalation.
Choosing the right sandpaper grit
The choice of sandpaper grit depends on the condition of the enamel paint and the desired outcome. Generally, start with a coarser grit to remove any imperfections or old paint layers, and then progressively move to finer grits to create a smooth surface. A commonly used progression is 120 grit, followed by 220 or 320 grit, and finally 400 or 600 grit for a polished finish.
Steps to sand enamel paint
Gather the necessary materials
Before starting, gather the following materials:
- Sandpaper in appropriate grits (e.g., 120, 220 or 320, 400 or 600)
- Sandpaper block or sanding sponge
- Protective goggles, dust mask, and gloves
- Cleaning supplies such as detergent or degreaser, sponge, and clean water
Prepare the work area
Prepare a suitable work area by covering the floor and nearby surfaces with a drop cloth or plastic sheet to catch any dust or debris. Ensure adequate ventilation in the area and remove any items that could get in the way of sanding.
Clean the surface
Thoroughly clean the enamel paint surface using a mild detergent or degreaser and a sponge. Rinse the surface with clean water and allow it to dry completely before proceeding to the next step. Removing any dirt or contaminants ensures that the sanding process is more effective.
Start sanding
Begin sanding the enamel paint surface with a coarser grit sandpaper (e.g., 120 grit). Hold the sandpaper securely either wrapped around a sanding block or attached to a sanding sponge. Sand the surface using light to moderate pressure, moving the sandpaper in a circular or back-and-forth motion.
Continue sanding
After sanding the surface with the initial grit, gradually progress to a finer grit sandpaper (e.g., 220 or 320 grit). Repeat the sanding process, focusing on smoothing out any remaining imperfections or old paint layers. Ensure that the sanding motion is consistent and even.
Inspect the sanded surface
After sanding with the finer grit sandpaper, inspect the sanded surface to ensure it is smooth and free of imperfections. Run your hand over the surface to feel for any rough spots or inconsistencies. If necessary, repeat the sanding process using an even finer grit sandpaper until the desired smoothness is achieved.

Tools and materials needed for sanding enamel paint
Sandpaper
Sandpaper is an essential tool for sanding enamel paint. It is available in various grits, and the choice of grit depends on the condition of the paint and the desired outcome.
Sandpaper block or sanding sponge
A sandpaper block or sanding sponge provides a stable surface to hold the sandpaper securely. It helps to distribute pressure evenly and allows for better control during the sanding process.
Protective gear
When sanding enamel paint, it is important to protect yourself from dust and debris. Protective gear such as goggles, dust masks, and gloves should be worn to minimize the risk of inhalation and skin contact.
Cleaning supplies
Cleaning supplies are necessary to prepare the enamel paint surface before sanding and to remove any dust or debris afterward. Mild detergents or degreasers, sponges, and clean water are commonly used for this purpose.
Techniques for sanding enamel paint
Choosing the right sandpaper
The choice of sandpaper grit is crucial for achieving the desired finish. Coarser grits (e.g., 120) are effective for removing imperfections and old paint layers, while finer grits (e.g., 320 or 400) are ideal for achieving a smooth and polished surface.
Using the correct sanding motion
The sanding motion should be consistent and even to ensure a uniform finish. Circular or back-and-forth motions are commonly used, but it is important to avoid applying excessive pressure, as this can damage the enamel paint.
Avoiding excessive pressure
Applying excessive pressure while sanding can result in uneven surfaces, scratches, or even removal of excessive enamel paint layers. It is important to maintain a moderate amount of pressure and let the sandpaper do the work.
Working in sections
When sanding a large enamel paint surface, it is recommended to work in sections to ensure thorough and consistent sanding. This allows for better control and ensures uniformity throughout the entire surface.
Progressive sanding
Progressive sanding involves starting with a coarser grit sandpaper to remove imperfections and old paint layers, and then gradually moving to finer grits to create a smoother surface. This technique helps achieve the best possible finish.
Tips for successful sanding of enamel paint
Start with a coarser grit
Starting with a coarser grit sandpaper (e.g., 120 or 150) is recommended, especially if the enamel paint has imperfections or old paint layers that need to be removed. This initial sanding step helps create a smoother surface for subsequent sanding.
Gradually move to finer grits
Progressively move to finer grit sandpaper as you sand more layers and imperfections. This step-by-step process ensures that the surface becomes smoother with each pass, resulting in a polished finish.
Maintain consistent pressure
Consistent pressure while sanding is important to achieve an even and uniform surface. Avoid applying too much or too little pressure as it can lead to an uneven finish or damage the enamel paint.
Keep the sandpaper clean
Regularly clean the sandpaper during the sanding process to prevent clogging. Clogged sandpaper is less effective and can lead to uneven sanding. Use a brush or tap the sandpaper on a hard surface to remove dust and debris.
Take breaks to inspect the progress
Periodically stop and inspect the sanded surface to ensure that you are achieving the desired results. Running your hand over the surface can help detect any rough spots or inconsistencies that may require additional sanding.
Common mistakes to avoid when sanding enamel paint
Using too much force
Applying excessive force while sanding enamel paint can result in uneven surfaces, scratches, or damage to the paint. It is important to maintain a moderate amount of pressure and let the sandpaper do the work.
Skipping grits
Skipping grits during the sanding process can lead to poor adhesion and an uneven finish. It is crucial to start with a coarser grit to remove imperfections and then progressively move to finer grits for a smoother surface.
Sanding without proper preparation
Failing to properly prepare the enamel paint surface before sanding can result in ineffective sanding and a subpar finish. Ensure that the surface is clean and free of dust, dirt, and loose or peeling paint before beginning the sanding process.
Neglecting safety precautions
Sanding enamel paint can create dust particles that may be harmful if inhaled. Neglecting to wear protective gear such as goggles, a dust mask, and gloves can put your health at risk. Always prioritize safety when undertaking any sanding project.
After sanding enamel paint
Cleaning the sanded surface
After sanding enamel paint, it is essential to clean the sanded surface to remove any dust or debris. Use a vacuum, soft cloth, or brush to carefully clean the surface, ensuring that it is free of any particles that could affect the application of a new coat of paint.
Applying a new coat of paint
Once the sanded surface is clean and dry, it is ready for a new coat of paint. Choose a high-quality enamel paint that is suitable for the surface and apply it according to the manufacturer’s instructions. Ensure that the paint is evenly applied for a smooth and flawless finish.
Final touch-ups
After applying the new coat of paint, inspect the surface for any touch-ups that may be needed. Address any spots or areas that require additional paint or touch-ups to ensure a seamless and professional-looking finish.
Conclusion
Summary of sanding enamel paint process
Sanding enamel paint is a crucial step in achieving a smooth and professional finish. By understanding the reasons for sanding enamel paint and the benefits it offers, you can make an informed decision about whether to sand your enamel paint surface. Considerations such as surface preparation, safety precautions, and choosing the right sandpaper grit are important for a successful sanding process. By following the steps to sand enamel paint, utilizing the necessary tools and materials, and implementing the appropriate sanding techniques, you can achieve a polished and long-lasting result. Be sure to avoid common mistakes and take the necessary steps after sanding to clean the surface, apply a new coat of paint, and perform any final touch-ups. With proper sanding techniques and equipment, you can transform your enamel paint surface for a renewed and refreshed appearance.


