In the compelling discourse “Can You Paint With A Damp Brush,” you’ll discover the intricacies and subtle nuances of painting techniques not commonly abided by. This discussion carefully unravels the common belief that a brush needs to be completely dry before it dips into paint, challenging conventional wisdom with tried and tested approaches. By explaining the technicalities, taking into account both the benefits and potential drawbacks of painting with a damp brush, this article will provide you with an alternate perspective on how to enhance your artistic endeavors.
The Importance of a Damp Brush
When it comes to painting, a damp brush can be your greatest ally. Utilizing a damp brush can unlock the full potential of your paint and bring a unique range of effects to your canvas that would otherwise be challenging to achieve.
Understanding the Role of Moisture in Painting
Moisture plays a crucial part in the painting process. Adding a certain amount of water to the paint not only enhances its application on various surfaces, but it also changes the texture and opacity of the color. Therefore, understanding the significance of moisture is essential in painting particularly when you are using a damp brush.
Benefits of Using a Damp Brush
One of the main benefits of using a damp brush is that it allows for smoother strokes, enhancing your control over line work. Equally important, it encourages better blending of colors and helps in creating seamless gradients and smooth transitions. A damp brush can also distribute color more evenly, making your painting look more polished and professional.
Different Techniques for Applying Paint with a Damp Brush
Damp brush techniques can vary from simple strokes to complex texture building. Using a largely moist brush allows for loose and expressive brushwork, while a less saturated brush can yield more precise and detailing effects. Knowing how to apply paint with a damp brush will afford you a vast range of possibilities in terms of style and technique.
Preparing Your Brush
Before you begin painting, it is vital to prepare your brush correctly. This includes choosing the right brushes, cleaning them thoroughly, and dampening them just right.
Choosing the Right Brushes
Choosing the right brush is dependent on your style of painting and the methodology you adopt. Brushes are differentiated by their size, shape, and bristle type. Each has its own unique characteristic and advantage. Thus, it is significant that you pick the brush that fits your requirement.
Properly Cleaning and Dampening the Brush
Clean your brushes properly after every use to maintain their shape and extend their lifespan. Dampening the brush involves soaking it in water and then running it against the edge of your water container to remove the excess. Note, however, that this does not mean soaking it to the extent that it becomes too saturated.
Avoiding Excessive Moisture
Although using a damp brush is a beneficial tool in painting, overdoing the moisture can lead to various problems like a runny paint application or over-diluted color. Hence, strike a balance between a too dry and too moist brush by equally controlling the water-to-paint ratio.

Painting Techniques with a Damp Brush
A damp brush technique allows for various painting styles and effects, from creating soft transitions to complex textures, even imitating a watercolor effect.
Blending Colors
With a damp brush, blending colors becomes easier and smoother. Because the paint’s consistency is slightly fluid, the boundaries between two colors are less distinct enabling you to create seamless color gradients.
Creating Soft Transitions
Creating soft transitions, particularly in backgrounds, can add depth to your painting. This can be effortlessly achieved by using a damp brush to blend the different shades gently and evenly.
Creating Textures
Using the right damp brush technique, you can create various textures from smooth to rough. A drier brush will create more of a stippled effect, while a wetter brush will give a smeared, flowing texture.
Achieving a Watercolor Effect
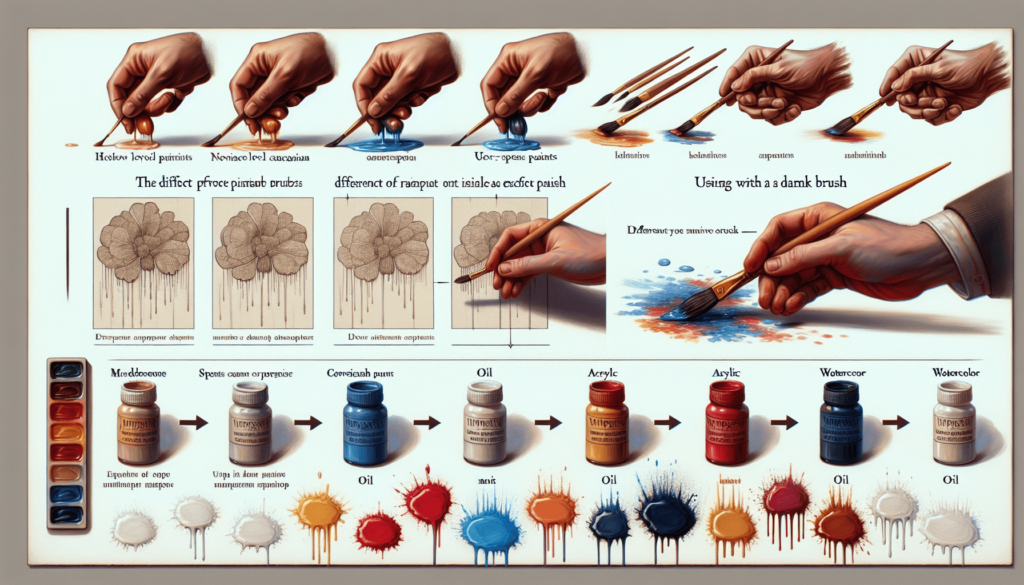
Some artists prefer the look of watercolor paints, but the ease and flexibility of acrylics or oils. With a damp brush, you can achieve the fluidity and translucency of watercolor even when using heavier paint mediums.
Suitable Paint Mediums for Damp Brush Techniques
Though the damp brush technique can be used with various mediums, it is particularly beneficial with certain types of paint.
Watercolors
Watercolors, by nature, require water for the application, so using a damp brush is inherent in the very use of this medium. It results in delicate, translucent effects and offers seamless blending.
Acrylics
Acrylic paint can also be used effectively with a damp brush, given that acrylics are water-based. The damp brush technique can help in thinning the acrylic for semi-translucent layers.
Gouache
Gouache, which is similar to watercolor, can benefit substantially from a damp brush. Using a damp brush can help to achieve the coveted creamy consistency of gouache.
Inks
Inks, particularly water-based ones, can form delicate washes and beautiful gradients when applied with a damp brush.
Tempera
Tempera paint, being typically thick and rich in texture, can be loosened for smoother application with a damp brush.

Common Mistakes to Avoid
With the many benefits that a damp brush can offer, it’s easy to go overboard. Here are some common mistakes you should avoid to get the best out of this technique.
Overloading the Brush with Water or Paint
Too much water can dilute the paint, causing it to lose its intensity. Equally, an excess of paint can make your work look heavy and blockish. Balancing the water-to-paint ratio is essential in achieving the desired effect.
Not Controlling the Water-to-Paint Ratio
On the theme of moderation, it’s essential to be in control of the amount of water you’re adding to your paint. Too much water can lead to a wash-like effect, while too little might make your brushstrokes harsh and visible.
Using Excessive Force
Using excessive force while painting with a damp brush can cause the bristles to fan out and lose their shape. It can also lead to the paint being unevenly distributed. Therefore, use a light hand and allow the brush and paint to do the work.
Guidelines for Beginner Painters
If you’re new to painting, here are some guidelines to help you get started and make the most out of the damp brush technique.
Start with Small Projects
Beginning with small, manageable projects will give you a better grip on controlling your brush. Experiment with simple shapes and basic color gradients before moving on to more complex subjects.
Practice Brush Control
Control over your brush is key when painting with a damp brush. Practice using differing levels of pressure and varying the amount of water and paint on your brush until you achieve your desired effect.
Experiment with Different Techniques
Experimentation is the best way to learn and find the methods that you enjoy most. Feel free to try different brush strokes, color blending techniques, and texture creation methods.

Expert Tips and Tricks
Although mastery of painting with a damp brush comes mainly through practice, these expert tips and tricks can help hone your skills further.
Gradually Build up Layers
Building up layers adds depth to your painting, but ensure that each layer is dry before applying another to avoid your colors getting muddy.
Use a Spray Bottle for Controlled Moisture
A spray bottle can provide a controlled amount of moisture for larger surfaces.
Experiment with Different Brushes and Bristle Types
Different brushes and bristles types can yield different results. It’s worthwhile to test out various brushes to find the ones that work best for your painting style.
Blotting and Drying Techniques
Having a cloth or paper towel at your disposal to blot and control the amount of moisture on your brush and painting can be a real game-changer.
Inspiring Artists Who Use Damp Brush Techniques
The damp brush technique is employed by many renowned artists who have created masterpieces with this simple tool.
Andrew Wyeth
Andrew Wyeth, a prominent figure in the regionalist school of American art, often used the damp brush technique in his detailed and evocative landscapes.
Bob Ross
The famous Bob Ross, known for his “wet on wet” technique, is an excellent example of an artist who capitalized on the effects of a damp brush.
Mary Cassatt
Mary Cassatt, an impressionist best known for her images of social and private lives of women, often incorporated damp brush techniques into her work.
Winslow Homer
Winslow Homer, one of America’s foremost 19th-century landscape painter, frequently featured the damp brush technique in his dynamic and expressive seascapes.

Conclusion
Exploring the Versatility of Painting with a Damp Brush
From soft transitions to textured effects, the damp brush technique offers a myriad of possibilities to artists. With continued practice, experimentation, and learning, you can use this tool to produce a wide range of effects in your artwork.
Unleashing Your Creativity
Learning to master the damp brush technique not only gives you more control over your painting but also opens a gateway to unleash your creativity. The pliability of this technique allows you to make distinct effects, textures, and hues, and ultimately, to translate your abstract imaginations into tangible art.
Continued Practice and Exploration
In conclusion, painting with a damp brush is a versatile and valuable technique that can augment your artistic repertoire. Its mastery comes through practice and is an ongoing journey of exploration and learning. As you experiment and grow as an artist, you’ll continue to discover new ways to use your brush, your water, and your paint to create stunning and unique works of art.


