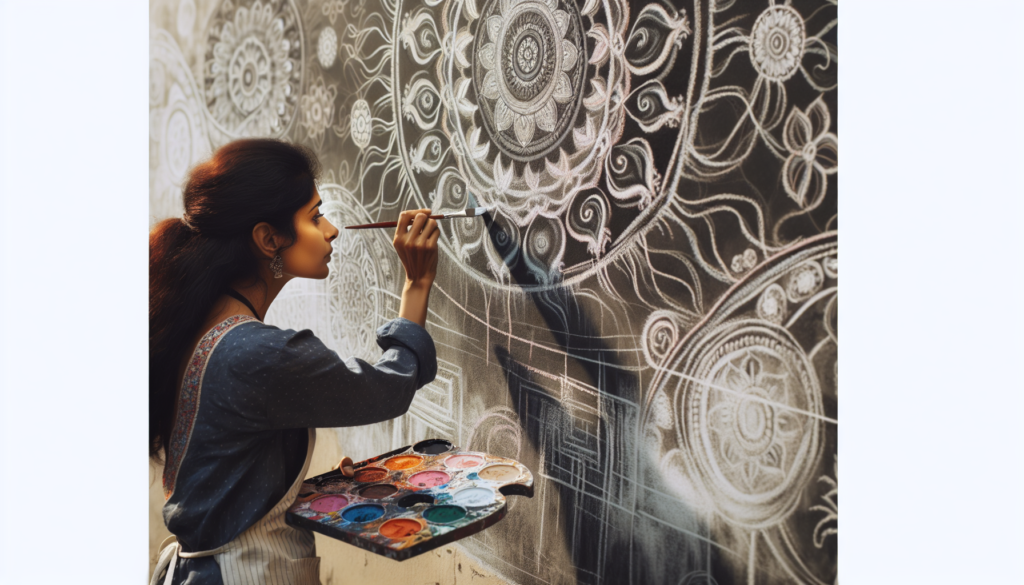
Painting over chalk surfaces can be a tricky task, requiring careful preparation and the right materials. Before grabbing your paintbrush, it’s important to understand the potential challenges and techniques involved in achieving a successful finish. This article will guide you through the process, outlining the necessary steps and considerations for painting over chalk surfaces. Whether you’re looking to refresh an old chalkboard or update the look of a painted chalk wall, this article will provide you with the knowledge and confidence to achieve a professional-looking result.
Preparation
Before you can begin the process of painting over chalk, there are a few key steps you need to take for a successful outcome.
Cleaning the Surface
The first step in preparing the surface for painting over chalk is to clean it thoroughly. Use a mild detergent or a mixture of water and vinegar to remove any dirt, dust, or grease that may be present. Ensure that the surface is completely dry before moving on to the next step.
Sanding the Chalk
Next, you will need to sand the chalk surface. This step is crucial to ensure proper adhesion of the new paint. Use a fine-grit sandpaper to gently sand the chalk until it feels smooth to the touch. Be careful not to apply too much pressure or sand too aggressively, as this can damage the surface.
Selecting the Paint Type
Choosing the right paint type is essential when painting over chalk. There are several options to consider, including latex paint, oil-based paint, and Chalk paint. Each type has its own characteristics and advantages, so it’s important to understand their differences before making a decision.
Gathering the Necessary Tools and Materials
Before you can begin the painting process, it’s important to gather all the necessary tools and materials. Some items you may need include paint brushes, rollers, paint trays, sandpaper, cleaning supplies, primer, and the paint of your choice. Make sure you have everything on hand to ensure a smooth and efficient painting process.
Steps to Paint Over Chalk
Now that you have gone through the preparation phase, it’s time to dive into the actual steps of painting over chalk. Follow these steps to achieve a beautiful and durable finish.
Step 1: Cleaning the Surface
Begin by thoroughly cleaning the surface once again. Remove any dust or debris that may have accumulated during the preparation process. Ensure that the surface is completely dry before moving on to the next step.
Step 2: Sanding the Chalk
Using a fine-grit sandpaper, gently sand the chalk surface until it feels smooth. This step is crucial for ensuring adhesion between the surface and the new layer of paint. Be careful not to sand too aggressively, as this can damage the surface.
Step 3: Priming the Surface
To ensure better adhesion and a more even finish, it is recommended to apply a primer to the surface before painting. The primer creates a uniform base and helps the paint adhere better to the surface. Follow the manufacturer’s instructions for the specific primer you are using.
Step 4: Choosing the Right Paint
Now it’s time to choose the right paint type for your project. Consider the surface you are painting and the desired finish. Latex paint is a popular choice for its durability and ease of use. Oil-based paint is known for its smooth finish and resistance to moisture. Chalk paint, on the other hand, gives a unique matte finish and is often used for furniture refinishing. Select the paint type that best suits your needs.
Step 5: Applying the Paint
Once you have chosen your paint, it’s time to start applying it to the surface. Depending on the size of the project, you can use a brush, roller, or a combination of both. Start with a small area and work your way out, applying the paint in smooth, even strokes. Take care to avoid drips or pooling of the paint.
Step 6: Adding Additional Coats
In some cases, you may need to apply additional coats of paint to achieve the desired finish. Follow the manufacturer’s instructions for drying time between coats. Depending on the paint type and color, multiple coats may be necessary to achieve full coverage and a uniform appearance.
Step 7: Sealing the Paint
Once the final coat of paint has dried, it’s important to seal the surface to protect the paint and enhance its durability. Select a sealer that is compatible with the paint type you used. Apply the sealer in thin, even coats, following the manufacturer’s instructions. This step will help prevent chipping, peeling, and fading of the paint over time.

Choosing the Right Paint Type
Choosing the right paint type is crucial for a successful paint job when dealing with chalk. Here are some options to consider:
Latex Paint
Latex paint is a versatile option that works well on most surfaces. It dries quickly and offers good durability and color retention. It is water-based, making it easy to clean up with soap and water. Latex paint is an excellent choice for both interior and exterior applications.
Oil-Based Paint
Oil-based paint, also known as alkyd paint, provides a smooth and durable finish. It is known for its excellent adhesion and resistance to moisture, making it ideal for surfaces that may be prone to wear or require frequent cleaning. Oil-based paint requires mineral spirits for cleanup and has a longer drying time compared to latex paint.
Chalk Paint
Chalk paint is a unique type of paint that offers a matte, velvety finish. It is often used for furniture refinishing projects and has gained popularity for its rustic and vintage aesthetic. Chalk paint requires little to no surface preparation and generally does not require priming or sanding. It can be easily distressed for a weathered look.
Primer
Applying a primer is an important step when painting over chalk. A primer creates a uniform base, improves adhesion, and enhances the longevity of the paint. There are primers specifically formulated for chalky surfaces, so be sure to choose one that is compatible with the paint type you plan to use.
Sealer
Sealing the paint is essential to protect the surface and extend the lifespan of the paint job. A sealer acts as a protective barrier, preventing chipping, peeling, and fading. Choose a sealer that is compatible with the type of paint you applied and follow the manufacturer’s instructions for application.
Common Challenges
When painting over chalk, there are several common challenges that may arise. Understanding these challenges will help you address them effectively.
Opacity Issues
One common challenge when painting over chalk is achieving full coverage and opacity. Chalk can often show through the new paint, especially if it is a light color. To address this issue, apply multiple coats of paint, allowing sufficient drying time between each coat. Choosing a high-quality paint with good coverage and opacity can also help overcome this challenge.
Adhesion Problems
Another challenge is ensuring proper adhesion between the surface and the new layer of paint. Chalk surfaces can be porous, making it difficult for paint to adhere properly. To improve adhesion, thoroughly clean and sand the surface before applying a primer. Using a high-quality primer specifically formulated for chalky surfaces can also help improve adhesion.
Stain Bleeding
In some cases, stains or discolorations on the chalk surface may bleed through the new layer of paint. To prevent this, it is important to use a stain-blocking primer before painting. This type of primer seals the surface and prevents any stains from bleeding through.
Chalk Show Through
Even after applying multiple coats of paint, there may still be instances where the chalk continues to show through. This can be particularly challenging when painting with light or pastel colors. To address this issue, consider using a paint with higher opacity or applying an additional layer of primer to create a more solid base.

Tips and Tricks
To ensure a successful paint job when painting over chalk, here are some useful tips and tricks to keep in mind.
Testing the Paint
Before applying the paint to the entire surface, it is always beneficial to do a test patch in a less visible area. This will allow you to assess the coverage, color, and adhesion of the paint. It is also advisable to test different techniques or tools to determine the best method for your specific project.
Using a Brush or Roller
When painting over chalk, you can choose between using a brush or roller, depending on the surface and the desired finish. Brushes are ideal for intricate details and smaller areas, while rollers are more efficient for larger surfaces. Consider using a combination of both tools for optimum results.
Applying Thin Coats
To achieve a smooth and even finish, it is better to apply multiple thin coats of paint rather than one thick coat. Thin coats dry faster and are less prone to drips and sags. Additionally, multiple thin coats allow for better coverage and can help minimize visibility of the underlying chalk surface.
Allowing Sufficient Drying Time
Drying time is crucial when painting over chalk. It is important to allow each coat of paint to dry fully before applying additional coats or sealing the surface. Rushing the drying process can lead to a compromised finish and may result in issues such as cracking or peeling. Follow the manufacturer’s instructions for the recommended drying time.
Tackling Difficult Surfaces
Some surfaces may present more challenges when painting over chalk, such as highly porous or heavily textured surfaces. In such cases, it may be necessary to apply additional coats of primer or choose a paint specifically formulated for difficult surfaces. Taking extra care in the preparation process and using proper techniques can help achieve a satisfactory result.
Frequently Asked Questions
Here are some frequently asked questions about painting over chalk:
Can you paint over a heavily chalked surface?
Yes, you can paint over a heavily chalked surface. However, it is important to thoroughly clean and sand the surface before painting to ensure proper adhesion. It may also be necessary to apply multiple coats of paint to achieve full coverage.
Do you need to sand the chalk before painting?
Yes, sanding the chalk before painting is recommended. Sanding creates a smoother surface and helps improve adhesion between the old chalk and the new layer of paint. Use a fine-grit sandpaper and sand gently until the surface feels smooth to the touch.
Is primer necessary when painting over chalk?
Using a primer is highly recommended when painting over chalk. A primer creates a uniform base, improves adhesion, and enhances the longevity of the paint job. Choose a primer specifically formulated for chalky surfaces and follow the manufacturer’s instructions for application.
Can you use any type of paint over chalk?
While you can use different types of paint over chalk, it is important to consider the characteristics and advantages of each type. Latex paint, oil-based paint, and chalk paint are commonly used options. Choose the paint type that best suits your project and desired finish.
How many coats of paint are usually needed?
The number of coats of paint needed will depend on several factors, including the color and opacity of the paint, as well as the condition of the chalk surface. In some cases, one or two coats may be sufficient, while others may require three or more coats to achieve full coverage and a uniform appearance.
Should you seal the paint after painting over chalk?
Sealing the paint is highly recommended to protect the surface and enhance the durability of the paint job. A sealer acts as a protective barrier against chipping, peeling, and fading. Choose a sealer that is compatible with the paint type used and follow the manufacturer’s instructions for application.
Conclusion
With the proper preparation and techniques, painting over chalk can be a rewarding project. By following the steps outlined in this article and choosing the right paint type, you can achieve a beautiful finish and enjoy a fresh new look. Whether you are refinishing furniture or transforming a wall, painting over chalk allows you to explore your creativity and breathe new life into your space.


