? Are you ready to build an artist brush collection that gives you professional results without draining your budget?
How To Build The Perfect Artist Brush Collection (Without Breaking The Bank)
You will learn how to choose, maintain, and strategically acquire brushes so that every purchase delivers value. This guide walks through materials, shapes, sizes, maintenance routines, shopping strategies, and actionable budget plans so you can build a collection that serves your work for years.

Why a curated brush collection matters
A deliberate brush selection improves your control, increases efficiency, and elevates the finish of your paintings. You will find that a smaller set of well-chosen brushes can outperform a large assortment of mediocre tools.
How brush choice affects your work
Brushes influence line quality, edge control, texture, and paint economy, all of which affect the final image. Matching brush type to medium and technique will let you achieve consistent results with less frustration.
Key brush characteristics to understand
Before you spend money, you should know the core features that determine how a brush performs and how long it will last. These features will guide smart choices when balancing cost and performance.
Bristle types: natural vs synthetic
Natural hair brushes come from various animals and provide excellent paint loading and snap for certain media, while modern synthetic fibers have improved dramatically and often outperform natural hair in durability and price. Understanding the strengths of each will help you choose the right tool for your medium and budget.
Table: Bristle types at a glance
| Bristle Type | Typical Materials | Strengths | Weaknesses | Best for |
|---|---|---|---|---|
| Hog (stiff) | Boar/hog | Excellent stiffness, good for heavy-bodied paints | Can be scratchy and lose fine tip | Acrylic impasto, oils |
| Sable (soft) | Kolinsky sable | Superb spring and fine point, holds water/paint well | Expensive, requires careful care | Watercolor, detail work |
| Sable blend | Sable + synthetic | Good balance of spring and cost | Less consistent than pure sable | Watercolor, mixed media |
| Synthetic (nylon, polyester, taklon) | Man-made fibers | Durable, cheap, easy to clean, resistant to solvents | Traditionally less water-holding (improved now) | Acrylics, oils, water-mixable media, beginners |
| Camel (historical name) | Mixed hair (not camel) | Historically cheap | Variable performance | Student brushes (less common now) |
Brush shapes and their uses
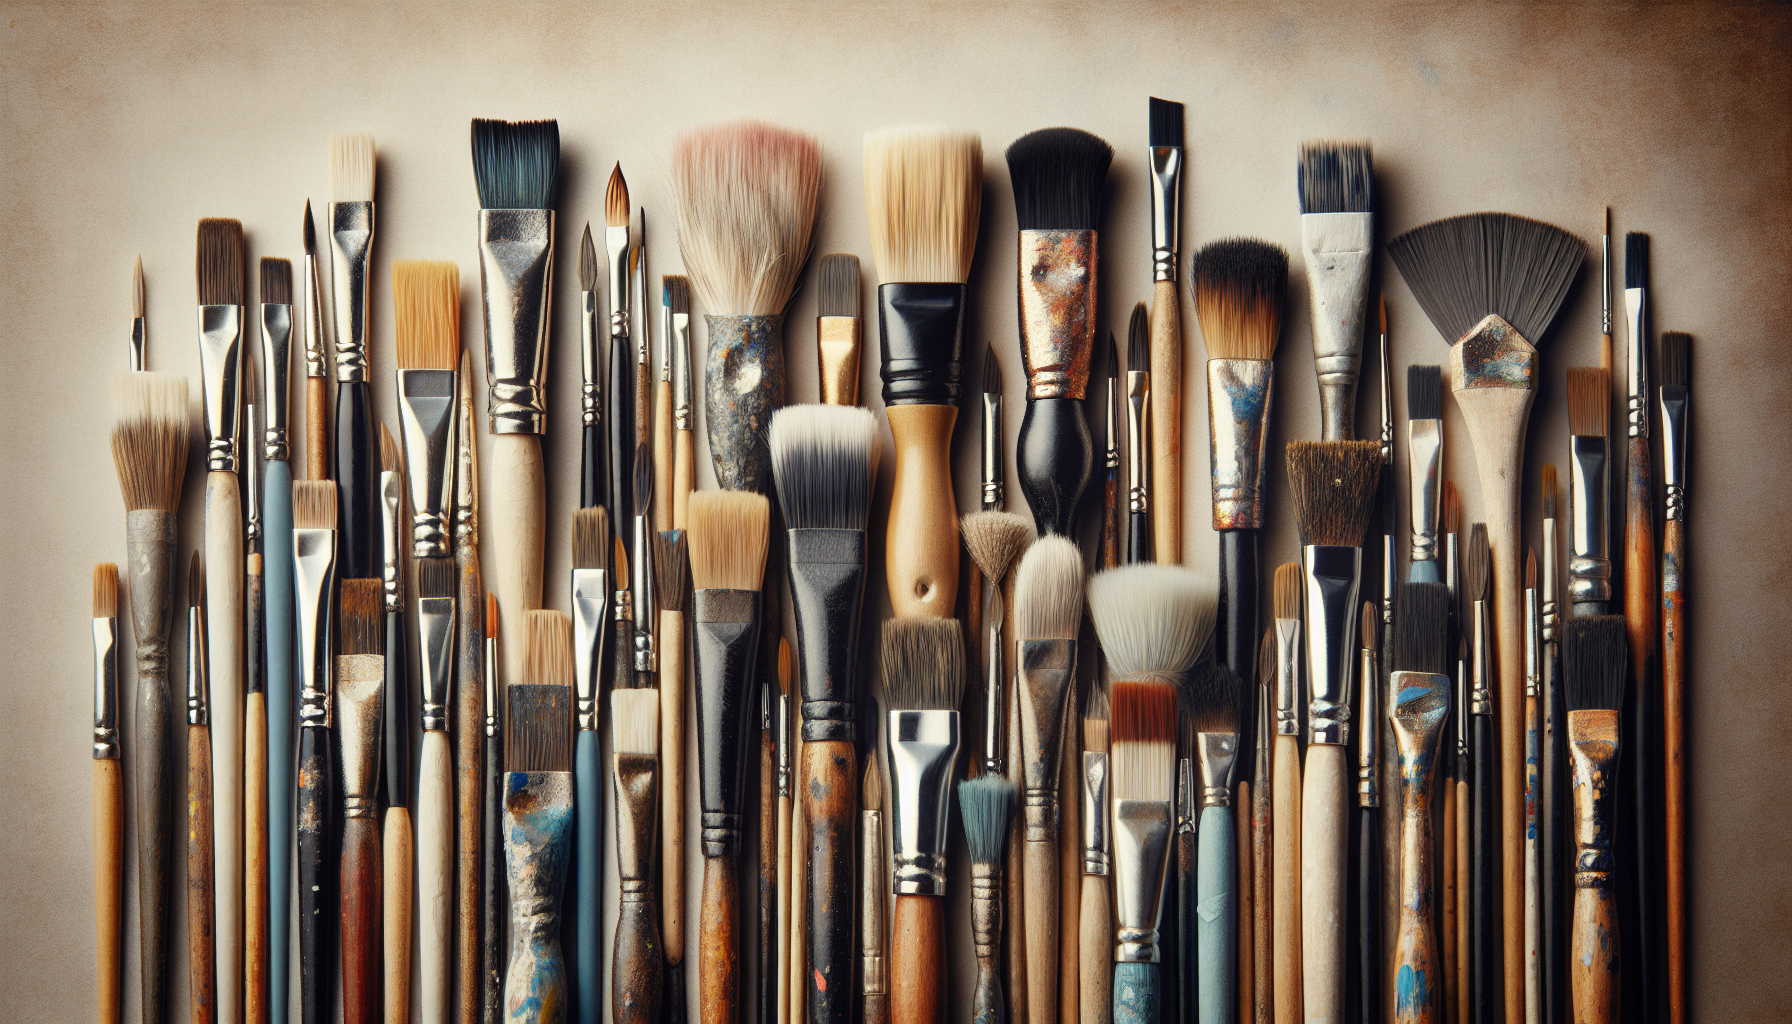
Shape determines the stroke, edge, and area coverage you can achieve; choosing a mix of shapes gives you flexibility. You should prioritize shapes that match your most-used techniques.
Table: common brush shapes and typical uses
| Shape | Visual | Common Uses |
|---|---|---|
| Round | Pointed tip, cylindrical | Detail, lines, controlled washes |
| Flat | Square end, flat body | Broad strokes, edges, bold marks |
| Filbert | Rounded oval end | Blending, soft edges, medium coverage |
| Bright | Short flat | Controlled short strokes, thick paint |
| Fan | Splayed fibers | Blending, textures like foliage |
| Mop | Rounded, large | Large washes, glazing in watercolor |
| Rigger/Liner | Long, thin | Fine lines, script, vines |
| Angle (Angular) | Slanted edge | Corners, controlled angled strokes |
| Shader | Wider flat with slight taper | Shading and blending medium areas |
Brush sizes and numbering system
Size numbers vary by manufacturer but generally indicate the width or diameter of the brush head; larger numbers mean larger brushes. You should buy sizes appropriate to the scale of your work: small sizes for detail, mid-range for most work, and large sizes for backgrounds and washes.
Ferrules, handles, and construction
Ferrules secure hairs to the handle and must be corrosion-resistant and well-crimped; poor ferrules cause shedding or loosening. Handle length and material affect comfort and balance—short handles are common for tabletop work (watercolor), long handles suit easel work (oil, acrylic).
Building a brush collection on a budget
You do not need to buy the most expensive brushes to achieve professional results; strategic choices and good maintenance will yield long-term savings. Focus on a core set that covers your techniques, then expand gradually.
Start with your medium: watercolor, acrylic, oil
Begin by identifying your primary medium because each demands different brush properties. Watercolor benefits from water-holding and soft points, acrylic favors synthetic brushes that resist solvent damage, and oil tolerates natural and synthetic bristles that handle heavy-bodied paint.
Essential brushes by medium
This table outlines a minimalist yet functional starter set for each popular painting medium. Choose the set that aligns with your primary practice.
Table: Minimal essential brushes per medium
| Medium | Shape | Sizes (examples) | Purpose |
|---|---|---|---|
| Watercolor | Round | 2, 6, 10 | Detail, general painting, washes |
| Watercolor | Flat/Mop | 12–20 (mop) | Large washes and backgrounds |
| Watercolor | Rigger/liner | 0 or 1 | Fine lines, lettering |
| Acrylic | Synthetic Flat | 6, 10, 20 | Blocking, shaping, varnishing |
| Acrylic | Bright | 2, 6, 10 | Controlled strokes in thick paint |
| Acrylic | Filbert/Round | 4, 8 | Blending, edges |
| Oil | Hog or Synthetic Flat | 6, 12, 20 | Underpainting, large passages |
| Oil | Round | 2, 6, 10 | Details, building forms |
| Oil | Filbert | 6, 10 | Blending, soft edges |
| Multi/All-media | Synthetic Rounds | 2–8 | Versatile detail and strokes |
Prioritize versatile shapes and sizes
If you must limit purchases, prioritize round sizes 2–10 and flats 6–12; these cover most needs from detail to blocking. Versatile brushes reduce redundancy and maximize the usefulness of each purchase.
Buy singles, not sets
Sets can look cost-effective but often include redundant sizes or low-quality specialty brushes you will not use. Purchasing good singles allows you to choose the exact shapes and sizes you use most, reducing waste and improving overall quality.
Look for synthetic options that mimic natural hairs
Modern synthetics such as taklon or advanced nylon blends often match natural hair performance at a fraction of the price. For acrylics and acrylic-primed surfaces, synthetics are usually a better long-term investment.
Consider maintenance and longevity
A well-maintained mid-range brush can outlast a cheap brush many times over and perform better than an inexpensive “premium” brush when poorly cared for. Factor cleaning time and storage into your cost calculations, as prevention is cheaper than replacement.
Shopping strategies and where to buy
You can find good deals by combining online research, local store testing, and occasional direct brand purchases. Smart buying reduces the risk of disappointment and keeps you within budget.
Compare online vs local art stores
Online shops often have the widest selection and best prices, but you cannot feel the brush until you test it. Local stores allow hands-on tests and immediate returns but may be pricier; use both channels strategically.
Buy used, factory seconds, or sample packs
Factory seconds and gently used brushes can offer excellent value if you check for sound ferrules and intact ferrule crimps. Sample packs or single curated trial brushes let you test a brand before investing in larger sets.
Read reviews and test in-store when possible
Look for consistent reviewer feedback about tip retention, shedding, and spring. When you test in-store, load the brush with the medium you use to assess its feel and point.
Brands worth considering
While brand performance varies by line and manufacturer, these categories can guide your research. The table gives suggestions by budget tier.
Table: Recommended brands by budget
| Budget Tier | Brands (examples) | Notes |
|---|---|---|
| Budget / Student | Princeton, Royal & Langnickel (student lines), Loew-Cornell | Good for practice, inexpensive synthetics |
| Mid-range | Winsor & Newton (Galeria, Cotman), Da Vinci (Natura, Maestro), Escoda | Solid performance, many synthetic options |
| Artist / Premium | Isabey, Raphael, Winsor & Newton Series 7 (sable), Rosemary & Co. | Premium natural hairs, excellent longevity |
| Specialty | Silver Brush (Golden Taklon), Princeton Series 4050 | Known for synthetic innovations |
Essential brush list for a beginner
You should assemble a compact but effective kit that gives you full control across your typical projects. The list below balances versatility and economy.
Table: Recommended starter kit (one for each medium)
| Medium | Brush Type | Size(s) | Rationale |
|---|---|---|---|
| Watercolor Starter | Round (sable or synthetic) | 6, 10 | Core painting and washes |
| Watercolor Starter | Mop or large round | 12–20 | Large washes and soft blending |
| Watercolor Starter | Rigger/liner | 0 | Fine lines and detail |
| Acrylic Starter | Synthetic Flat | 8, 12 | Blocking and edges |
| Acrylic Starter | Synthetic Round | 4, 8 | Details and general work |
| Acrylic Starter | Bright | 6 | Thicker paint control |
| Oil Starter | Hog/Synthetic Flat | 12, 20 | Underpainting and large passages |
| Oil Starter | Round | 2, 6, 10 | Building forms and details |
| Oil Starter | Filbert | 8 | Blending and soft edges |
Advanced brushes and specialty tools
Specialty brushes extend your creative vocabulary, especially as your work becomes more ambitious. You should add these selectively based on technique and subject matter.
Fan brushes
Fan brushes are excellent for blending, feathering edges, and creating foliage textures. Synthetic fans tend to be more durable for acrylics and oils.
Mops and wash brushes
Mops hold a lot of water and pigment, making them perfect for large watery washes or glazing in watercolor. They require careful cleaning to prevent hair splaying.
Riggers and liners
Riggers are long and thin for continuous lines like tree branches and lettering. They are fragile but indispensable for specific linear work.
Filberts and angled brushes
Filberts combine flat and round qualities for gentle blending and organic marks; angled brushes are excellent for corners and controlled marks. Hog hair or firm synthetics are common for heavier paints.
Specialty liners and script brushes
Script brushes have long hairs and excellent paint capacity for continuous scripted marks. Use them sparingly and clean immediately to preserve the long hairs.
Caring for brushes to extend lifespan
Proper care saves money and keeps your brushes performing like new. You should adopt routines based on your primary medium and painting habits.
Daily cleaning routines
After each painting session, remove excess paint and thoroughly rinse brushes in the appropriate solvent or water. Finish with a mild soap and work the bristles to restore shape before drying.
Cleaning procedures by medium
Different media demand specific cleaning steps to prevent damage and buildup:
Table: Cleaning steps by medium
| Medium | Immediate Solvent | Soap/Cleaner | Final Rinse | Notes |
|---|---|---|---|---|
| Watercolor | Water | Gentle soap (e.g., brush soap) | Clear water | Avoid harsh detergents; reshape tip |
| Acrylic | Water (while wet) or commercial brush cleaner | Mild soap, sometimes specialized acrylic brush cleaner | Water | Clean immediately after use; acrylic dries hard |
| Oil | Odorless mineral spirits or citrus solvent | Mild solvent or brush cleaner, then soap and water | Water | Solvent first to remove oils, then soap to remove residue |
Deep cleaning and restoration
If paint has hardened, soak bristles in a commercial brush restorer or a diluted solvent approved for your brush type; avoid aggressive scrubbing that damages the tip. For stubborn paint, alternate solvent soak and gentle reshaping with soap until the hairs return to form.
Storage best practices
Store brushes horizontally or bristles-up in a jar while drying, and upright in a holder when clean and dry to avoid bending the tip. Avoid crushing bristles or leaving brushes standing in water, which degrades ferrules and glue.
When to replace brushes
Replace brushes when the ferrule loosens, shedding becomes excessive, or the brush cannot form a proper point or edge even after cleaning. Consider keeping older brushes for texture work or ground preparation when precision is no longer required.
Techniques and exercises to test brushes
You will identify the strengths and limitations of each brush by doing focused tests. These exercises help you evaluate snap, capacity, and edge control.
Basic tests to perform on each brush
- Line test: Draw thin to thick lines to test the tip and elasticity.
- Wash/coverage test: Lay a flat stroke to test coverage and flatness.
- Repeated stroke test: Use the brush repeatedly without reloading to test paint holding.
Perform each test with the medium you intend to use to get accurate results.
Texture and blending tests
Use a filbert or round to create gradients and check how smoothly the brush blends. Test fan brushes and bristle flats on textured applications like foliage to confirm they create the desired effect.

Cost-saving long-term strategies
You will save money over time by combining smart purchases with consistent care. Think in terms of lifetime cost per brush rather than just purchase price.
Buy the best you can afford for the brushes you use most
Invest in high-quality versions of the few brushes you reach for often; they will retain shape longer and reduce replacement frequency. Buy economical options for rarely used specialty brushes.
Rotate and designate brushes by purpose
Designate inexpensive brushes for priming, gesso, or student-grade surfaces and reserve better brushes for final layers and detail. This prevents high-wear misuse of your best tools.
Repair and repurpose
You can sometimes restore damaged tips with careful trimming or use worn brushes for texture work, glazes, or underpainting. Repurposing prolongs serviceable life and reduces waste.
Bulk buying at sales
Monitor seasonal sales and stock up on brands you trust when prices are low, but avoid overbuying items you will not use. Bulk replacement of frequently used sizes during sales can be economical.
Sample budget plans and shopping lists
A clear plan helps you get started immediately and keeps purchases focused. Below are three scenarios that map to different budgets while keeping quality and longevity in mind.
Budget starter — $30 to $50
You should focus on a minimal versatile set if you have limited funds.
Suggested buys:
- 3 synthetic rounds (sizes 2, 6, 10)
- 1 synthetic flat (size 8)
- 1 inexpensive rigger or liner (size 0)
- Mild brush soap sample
This will allow you to practice fundamentals and determine which shapes you use most before investing more.
Intermediate kit — $100 to $150
With a modest budget, you can combine higher-quality synthetics and perhaps one natural hair brush.
Suggested buys:
- 3–4 synthetic rounds (sizes 2, 4, 8, 12)
- 1 synthetic flat (10 or 12)
- 1 filbert (size 8)
- 1 mop or large watercolor round (if you paint watercolor)
- Mid-range brand sable blend round for detail (watercolor) or hog-synthetic mix for oils
- Brush soap and holder
This kit covers most studio needs and will last with proper care.
Advanced starter — $300+
You can afford a mix of premium and specialized brushes that will serve you for years.
Suggested buys:
- Premium sable round (2, 6) for watercolor detail
- Premium synthetic flats and filberts for acrylics and oils (multiple sizes)
- Specialty brushes: fan, rigger, mop
- Several high-quality hog bristle flats for oil impasto
- Brush cleaning kit and storage roll
At this level, pick the best brush for the tasks you perform daily, not every available option.
Testing and choosing between similar brushes
When deciding between similar brushes, use direct comparisons with your medium on paper or canvas. Evaluate tip, snap, and how much work you must do to achieve a stroke without added corrections.
Questions to ask while testing
- Does the brush hold enough paint for the stroke I want?
- Does the tip reform after use and cleaning?
- Is shedding acceptable or immediate red flag?
- How comfortable is the handle for long sessions?
Answering these questions will shorten decision time and increase confidence in purchases.
Troubleshooting common brush problems
You will encounter issues, but many have straightforward fixes.
Flared or splayed bristles
If a brush flares easily, it may have been left in water or paint too long. Try reshaping with warm water and brush soap, and dry flat or bristles-up.
Loss of point
If the tip loses shape even after cleaning, trim the hairs very slightly to restore a tapered point or repurpose the brush for broader marks.
Shedding
If shedding appears immediately, return or exchange the brush; if it begins later, check for corrosion at the ferrule or weak glue due to solvents, and retire the brush for non-detail tasks.
Sustainable and ethical considerations
You may prefer synthetics for ethical or ecological reasons, and modern synthetics often match or exceed natural hair in many applications. Choose cruelty-free and responsibly produced lines if those factors matter to you.
Eco-friendly options
Look for brands that disclose sourcing and production practices, or that offer take-back or recycling programs. You can also reduce waste by maintaining brushes well and repurposing worn-out tools for texture or underpainting.
Final checklist before buying
Before you buy, run through a quick checklist to avoid impulse purchases and maximize value.
- Have you identified your primary medium and most-used techniques?
- Do you know which shapes and sizes you reach for most?
- Have you tested the brush or read consistent reviews?
- Do you have cleaning supplies and storage ready?
- Have you set a realistic budget and prioritized essential purchases?
Answering these will keep your collection focused and cost-effective.
Actionable 12-week plan to build your collection
A staged plan helps you avoid overspending while acquiring what you need sequentially.
Week 1–2: Audit your current brushes and mark what fails; buy 1–2 essential replacements (round and flat). Week 3–4: Practice basic strokes and identify missing shapes or sizes; purchase one specialty brush if needed (e.g., filbert or rigger). Week 5–6: Buy a mid-range quality brush for your most-used size; start a maintenance routine with brush soap. Week 7–8: Replace one wear-item (e.g., a synthetic flat) and test a brand you considered online. Week 9–10: Acquire one professional-quality brush for precision work. Week 11–12: Evaluate progress, resell or repurpose unneeded brushes, and plan purchases during upcoming sales.
This gradual approach prevents impulse buying and lets you learn which brushes truly matter to your practice.
Conclusion
You can build a perfect brush collection without breaking the bank by prioritizing versatility, choosing quality where it counts, and maintaining brushes carefully. With a stewardship mindset—buy well, care well, and replace selectively—you will spend less over time and produce better work. Follow the shopping strategies, maintenance routines, and staged plans outlined here, and your brush kit will become a reliable partner in your artistic process.


