?Do you want to understand why your paint brush keeps leaving streaks and how you can stop it the next time you paint?
Why Your Paint Brush Leaves Streaks — And How To Fix It
This article explains the mechanical, material, and technique-related reasons brushes create streaks and provides practical, professional solutions. You will get step-by-step guidance, product recommendations, and troubleshooting tips so you can achieve smooth, consistent results on walls, trim, and furniture.
Quick overview: what a “streak” is and why it matters
A streak is an uneven line, ridge, or change in sheen or color left behind by a brush stroke that breaks the finish’s uniformity. You should care because streaks are visible imperfections that undermine both the appearance and protective function of paint.
Common causes of brush streaks
Understanding the root causes prevents repeated mistakes and reduces rework. The causes fall into four main categories: the brush, the paint, the surface, and your technique; each category contains specific issues that are easy to diagnose.
Brush selection and condition
The brush itself is often the single biggest factor in streaking, whether due to poor-quality bristles, improper width, or damaged tips. You will minimize streaking by using a brush designed for the type of paint and the surface you are coating.
- Natural bristles (hog hair) are best for oil-based paints and varnishes because they hold more paint and create a smooth finish when used correctly.
- Synthetic bristles (nylon, polyester, or blends) perform better with water-based paints (acrylics and latex) because they do not absorb water and stay firm.
Bristle stiffness and taper
Bristles that are too stiff or too soft can both create marks; stiffness affects how much paint the brush holds and how the bristles lay down the film. You will get cleaner strokes from brushes with a proper taper and well-flagged tips, which fan out and feather the paint edge instead of leaving ridges.
Brush width and shape
Using a brush that’s too narrow for a large surface means more strokes and more chances to leave visible overlap marks. Conversely, a brush that’s too wide for detailed work will make it harder to maintain control and produce consistent pressure.
Paint consistency and mixing
Paint that is too thick will not level properly after application and can show brush marks when it skins over. Paint that’s too thin can run or soak into the substrate unevenly, also causing streaks.
Incorrect thinning or use of additives
Thinning beyond manufacturer recommendations, or using the wrong additive, can change drying times and surface tension, making the paint behave differently when laid with a brush. You should always follow label instructions for thinning and use compatible conditioners, such as latex flow improvers or oil-compatible solvents.
Surface preparation problems
A dusty, glossy, or uneven substrate prevents the paint from bonding and leveling properly. You will reduce streaking by cleaning, sanding, and priming the surface so the paint films form uniformly.
Environmental conditions: temperature and humidity
High temperatures can cause paint to dry too quickly, preventing proper leveling and causing visible brush marks. High humidity can similarly affect drying and promote uneven sheen; aim to paint under recommended temperature and humidity ranges.
Dry edge and overworking
Stopping and restarting within the same area leaves a “lap mark” where the previously applied paint has started to dry. Overworking the area with repeated brushing while it is setting can also pull partially dried paint into streaks.
Improper load and brush technique
Loading the brush with too much paint, too little paint, or unevenly across the bristles results in either ridges of excess paint or dry streaks. Proper loading and a consistent brushing pattern reduce visible strokes.
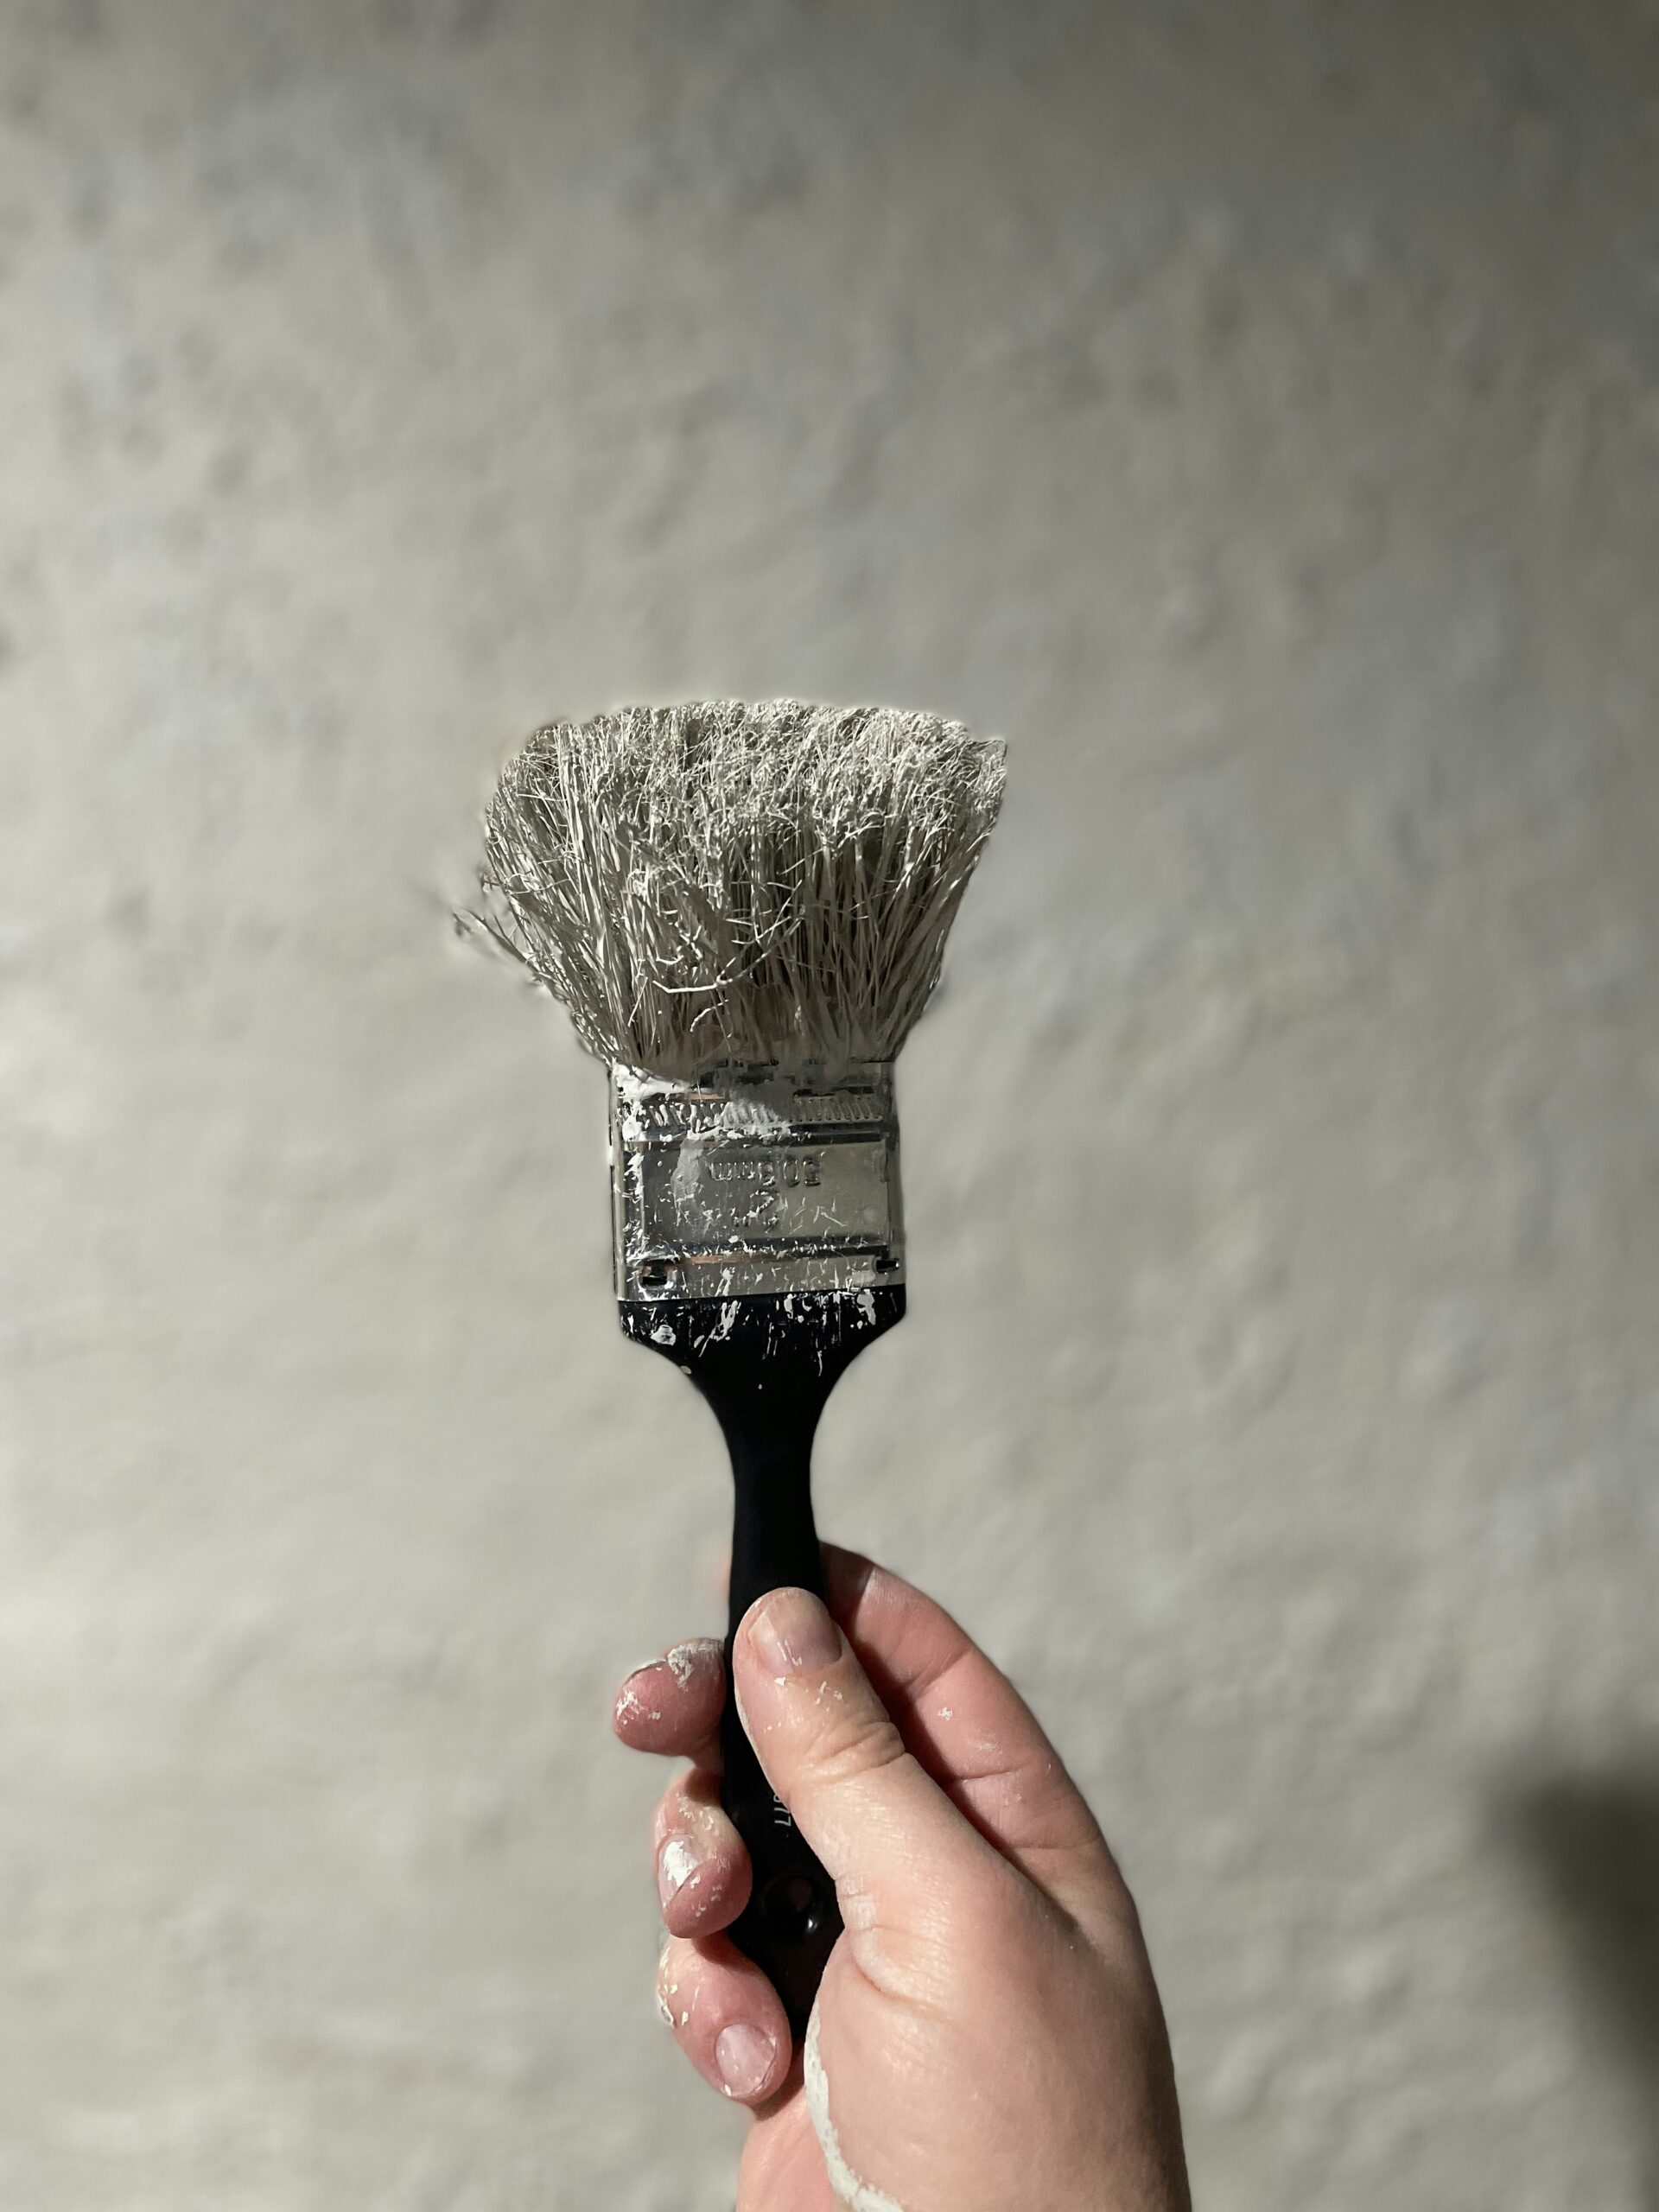
Wear and contamination
Old, frayed brushes, brushes with hardened paint between bristles, or brushes contaminated with incompatible paint types will not lay paint smoothly. You should clean and inspect brushes before you use them to prevent foreign material from creating streaks.
How to diagnose streaks quickly
Diagnosing streaks correctly helps you select the fastest and most effective remedy. Use a simple checklist to identify whether the problem is brush-, paint-, surface-, or technique-related.
- Perform a small test stroke on scrap material to isolate the issue.
- Check the brush for splayed bristles, hardened paint, or missing flags.
- Note whether the streaks appear as ridges (excess paint), gaps (dry brush), directional marks (brushing pattern), or sheen differences (show-through or leveling problems).
- Consider drying behavior: are streaks evident immediately, or do they develop as paint levels and cures?
Table: Common streak symptoms and probable causes
This table summarizes typical streak appearances and the most likely root causes so you can diagnose the problem quickly.
| Streak appearance | Likely cause(s) | Immediate action |
|---|---|---|
| Raised ridges or visible brush marks | Too much paint on brush; stiff bristles; overworking | Thin load; use softer-bristled brush; apply long, even strokes |
| Dry lines or gaps | Underloaded brush; paint too thick; wrong brush for paint | Load brush adequately; thin per instructions; use synthetic bristles for latex |
| Directional, repeating strokes | Poor brushing technique; inconsistent pressure | Maintain consistent pressure; brush in same direction; use larger brush |
| Sheen differences / flashing | Paint not mixed; sheen variation due to poor leveling | Re-mix paint; use flow additive; ensure consistent application |
| Splotchy or mottled finish | Uneven surface absorption; insufficient primer | Sand and prime substrate; apply full-coverage coat |
| Streaks appearing as paint dries | Low leveling properties; fast drying; temperature too high | Use retarder/conditioner; lower temperature; increase humidity control |

Choosing the right brush for the job
Selecting the appropriate brush is the most cost-effective way to prevent streaks and improve finish quality. You should match bristle type, shape, and quality to the paint and the task at hand.
Bristle materials and their best uses
Naturally sourced hog bristles work well with oil-based paints and varnishes because they are resilient and hold more product. Synthetic brushes (nylon, polyester, or blends) are recommended for water-based paints because they maintain shape and resist swelling.
Brush shapes and sizes
Use angled sash brushes for cutting-in and trim because they give precision and control. Flat or square brushes are preferable for broader, flat surfaces and for “laying off” to reduce brush marks.
Investing in quality
A higher-quality brush can cost more but will reduce the number of strokes required, hold paint better, and provide a cleaner edge. You should treat professional-grade brushes as tools that deliver consistent results and last longer when maintained correctly.
Proper brush loading and paint application
How you load a brush and apply paint is critical to avoid streaks. Incorrect loading results in either excess paint that leaves ridges or too little paint that causes dry, streaky strokes.
How to load a brush correctly
Dip the brush tip into paint only to about one-third to one-half the length of the bristles; do not submerge the ferrule (metal band). Tap the brush gently on the side of the can to remove excess rather than wiping hard on the rim; this helps distribute paint evenly across the bristles.
Application technique: strokes, pressure, and feathering
Apply long, steady strokes with consistent pressure and aim to finish each pass with a light feathering motion to blend the edge into the wet paint. Keep a wet edge by painting from a freshly coated area into an adjacent fresh section; stop at natural breaks, such as corners or trim.
Step-by-step: how to paint without leaving streaks
Following a consistent workflow reduces streaks and improves finish uniformity. This step-by-step method works for walls and trim with minor adjustments.
- Prep: Clean, sand, and prime as needed. A properly prepared surface will accept paint evenly.
- Select brush: Use a high-quality brush suitable for the paint type and surface dimension. Match brush width to work area.
- Mix paint: Stir thoroughly to reincorporate pigments and flatten sheen variations. Pour into a tray or container if needed.
- Load brush: Dip to one-third of bristle depth and tap off excess on can side. Avoid wiping hard on the rim.
- Cut in first: Use steady, angled strokes for edges and corners; keep a wet edge.
- Fill and lay off: Apply paint across the main area using wide strokes, then lightly “lay off” with long, feathering strokes to smooth the surface.
- Maintain consistency: Re-load the brush frequently and keep pressure uniform to avoid dry lines.
- Inspect and touch up: While paint is still wet, smooth any marks with light strokes; do not overwork drying paint.
- Dry and sand between coats if needed: Light sanding removes imperfections before the next coat.
- Apply additional coats: Follow manufacturer drying times and maintain technique consistency for subsequent layers.
Using additives and thinning safely
Additives can improve leveling and reduce brush marks, but using the wrong one or too much causes more issues. Follow the manufacturer’s guidance on compatible solvents and flow agents.
For latex (water-based) paints
Use a latex-compatible flow improver or extender (e.g., Floetrol) to slow drying and boost leveling. Thin slightly only if the label allows; do not exceed recommended proportions.
For oil-based paints
Use mineral spirits or a manufacturer-recommended reducer sparingly to adjust viscosity and flow. Retarders and leveling agents for oils are different from those for latex; ensure compatibility.
Extenders, retarders, and conditioners
These additives increase open time and allow brush marks to relax out before the paint skins. You should measure carefully and test on scrap material to avoid altering the finish or drying time excessively.
Surface preparation: sanding, cleaning, and priming
A well-prepared surface is the foundation of a smooth finish and prevents absorption-related streaking. You will reduce visible brushwork by creating a uniformly receptive substrate.
Cleaning and deglossing
Remove dirt, grease, and loose material with appropriate cleaners or a TSP substitute; glossy surfaces need scuff sanding or a chemical deglosser to increase adhesion. You should dry and wipe the surface before painting to prevent contamination.
Sanding and feathering edges
Sand high spots, drips, and previous paint edges smooth, using progressively finer grits to create a uniform plane. Feather transitions between old and new paint so the brush does not show a hard edge.
Priming and sealing porous surfaces
Use a primer or sealer on chalky, stained, or highly porous substrates to prevent variable absorption that causes streaks. A primer also ensures uniform sheen and helps subsequent coats lay down consistently.

Environmental control: temperature, humidity, and airflow
Controlling drying conditions is a practical way to improve paint leveling and reduce brush marks. Small adjustments in temperature and ventilation can change drying speed markedly.
Recommended conditions
Most interior latex paints perform best between 50°F and 85°F (10°C–29°C) and with moderate humidity (40–60%). Avoid painting in direct sunlight or when temperatures fall outside the paint’s recommended range.
Managing airflow
Moderate airflow prevents dust accumulation and helps drying without creating a skin too fast; avoid high-speed fans or open windows that create drafts. You should aim for steady, gentle air circulation.
Troubleshooting: how to fix streaks after they appear
If streaks are already visible, you can often correct them without stripping the entire surface. The fix depends on whether paint is still wet, tacky, or fully cured.
If paint is still wet or tacky
Lightly feather the affected area with a clean, well-loaded brush, working from the surrounding wet paint into the streak to blend edges. For larger areas, lay off with a nearly dry brush or a soft, dry foam brush to smooth the surface.
If paint is dry but not fully cured
Sand the streaks lightly with a fine-grit paper (220–320 grit) to remove ridges, then wipe clean and apply a thin touch-up coat using proper technique. You should allow recommended dry times to pass before recoating to avoid trapping solvents.
If paint is fully cured
When defects are fully cured, the remedy is typically sanding to smooth the texture followed by a full recoat. Use a high-quality brush or consider spraying to achieve a uniform finish for large remedial areas.
Table: Recommended brushes and use cases
This table lists common brush types, best paint match, and typical application uses.
| Brush type | Best for | Typical use cases |
|---|---|---|
| Natural hog bristle | Oil-based paints and varnishes | Trim, furniture, oil stains, varnish |
| Synthetic nylon/polyester | Water-based paints (latex, acrylic) | Walls, ceilings, doors, trim with latex |
| Blended bristles | Both water and oil-based finishes | Versatile tasks where both paint types may be used |
| Angled sash brush | Precision work and cutting-in | Cutting in around trim, corners, and windows |
| Wide flat brush | Large flat surfaces | Panels, broad trim, doors where rolling is impractical |
When to use a roller or sprayer instead
A brush is essential for edges and tight areas, but rollers and sprayers often produce smoother finishes on large flat surfaces. You should use a brush only where precision is necessary and consider a roller or sprayer to minimize brush marks over broad areas.
Rollers
Use a roller with the appropriate nap for the surface texture (short nap for smooth surfaces, longer nap for textured walls). Rollers distribute paint quickly and create fewer directional brush marks, but require back-rolling or light brushing for edges.
Sprayers
Sprayers produce the most uniform finish by atomizing paint into a fine mist, eliminating brush and roller texture. They require masking, careful setup, and experience to avoid overspray, but they are often the best solution for cabinetry, doors, and trim work you want to remain streak-free.
Cleaning and caring for brushes to prevent future streaks
Proper cleaning and storage maintain bristle integrity and extend brush life, preventing hardened paint or bent bristles from causing future streaking. You will save time and money by maintaining your brushes correctly.
Cleaning procedure for water-based paints
Rinse brushes thoroughly with warm water and mild detergent, working the bristles until paint rinses clear. Use a brush comb to remove trapped paint and reshape the bristles before drying.
Cleaning procedure for oil-based paints
Wipe excess paint on rags, then clean the brush in mineral spirits or a recommended solvent until clean. Follow with soap and water to remove solvent residues, then reshape and dry.
Storage and long-term care
Wrap brushes in plastic wrap or store them in a breathable case to maintain shape; for short breaks, place the brush in a resealable plastic bag with the bristles immersed in water or solvent as appropriate. Always hang or lay brushes flat to prevent bristle deformation.
Preventive checklist to avoid streaks on every job
A simple checklist helps ensure you do not repeat common mistakes that cause streaks. Use this before starting each painting task.
- Verify substrate is clean, dry, and properly sanded.
- Choose the correct brush for paint type and surface.
- Stir paint thoroughly and strain if necessary.
- Check environmental conditions meet paint recommendations.
- Load brush to one-third depth and apply consistent pressure.
- Maintain a wet edge and avoid overworking.
- Inspect and touch up while paint is still wet if needed.
- Clean tools immediately after use.
Advanced tips for professionals and serious DIYers
Fine finishing demands additional attention to detail and technique beyond the basics. These advanced tips will help you achieve a near-professional look with brushed finishes.
- Thin a small portion of the paint with a recommended extender to improve leveling while testing on a sample area first.
- Keep a wet edge by working in manageable sections and aligning your work with natural breaks such as windows or trim.
- For high-gloss surfaces, consider an extra-smooth brush (flagged tips) and minimal brushing, followed by a final pass with a soft, dry brush to reduce stipple.
- Use cross-coating (lightly brush at 45° then final stroke in the direction of the surface) to reduce directional streaks.
Frequently asked questions
This section answers common, practical questions you will encounter while trying to remove or prevent streaks. The answers emphasize actionable steps you can take immediately.
Why do streaks sometimes appear after the paint dries?
Streaks can develop as solvents evaporate and surface tension changes, revealing differences in how the paint laid down and leveled. You may need an additional coat, light sanding, or a leveling additive to correct the issue depending on severity.
Can a cheap brush cause streaks even with perfect technique?
Yes — cheap brushes often have uneven bristles, poor taper, and less paint-holding capacity, which all increase the chance of streaking. Investing in a quality brush usually reduces the number of coats and touch-ups needed.
When should I sand between coats to avoid streaking?
Light sanding with fine grit (220–320) between coats is appropriate when the current coat has visible texture or dust nibs, or when moving from a lower-quality undercoat to a higher-quality topcoat. Always remove sanding dust thoroughly before recoating.
Is it better to reload the brush frequently or to work with a fuller load?
You should reload frequently and consistently to maintain even coverage, but avoid overloading the brush in a single pass which can leave ridges. A well-loaded brush applied with long, even strokes gives optimal results.
Final recommendations and professional checklist
Addressing streaks is a combination of choosing the right tools, preparing the surface properly, and applying paint with consistent, correct technique. If you follow the steps and recommendations in this article, you will significantly reduce streaking and improve the quality of your finishes.
- Invest in at least one high-quality brush for trim and one for general surfaces.
- Keep materials at recommended temperatures and humidity levels before and during work.
- Always test a method on scrap material before applying it to a visible surface.
- Keep a simple kit of flow additives, fine sandpaper, and a soft-bristled brush for on-the-spot troubleshooting.
If you follow these procedures and take time to diagnose the root cause rather than repeatedly repainting, you will save time and obtain a much more professional finish.