Embarking on the journey of oil painting can be both exhilarating and challenging. “How To Start An Oil Painting” provides you with a comprehensive guide to begin your artistic endeavor. This article covers essential preparatory steps, including selecting the right materials, setting up your workspace, and mastering fundamental techniques. By following these carefully curated instructions, you will gain the confidence needed to approach your first oil painting with precision and creativity. Whether you are a novice or looking to refine your skills, this resource sets the foundation for your successful foray into the world of oil painting. Have you ever found yourself mesmerized by the rich textures and vibrant colors of oil paintings, and wondered how you could create such masterpieces yourself? Starting an oil painting can be both exhilarating and daunting. This guide is designed to help you navigate the process from initial setup to completing your artwork.

Understanding Oil Painting
What Is Oil Painting?
Oil painting is a traditional art form that uses pigments mixed with a medium of drying oil, such as linseed oil. This type of paint is praised for its versatility, richness, and depth of color.
Why Choose Oil Painting?
Oil paints allow for a wide range of techniques, from thick, textured layers to thin, translucent glazes. They also have a slow drying time, which provides the flexibility to rework and refine details over an extended period.
Required Materials
Essential Tools and Supplies
Before you start, you will need to gather some essential tools and supplies:
| Item | Description |
|---|---|
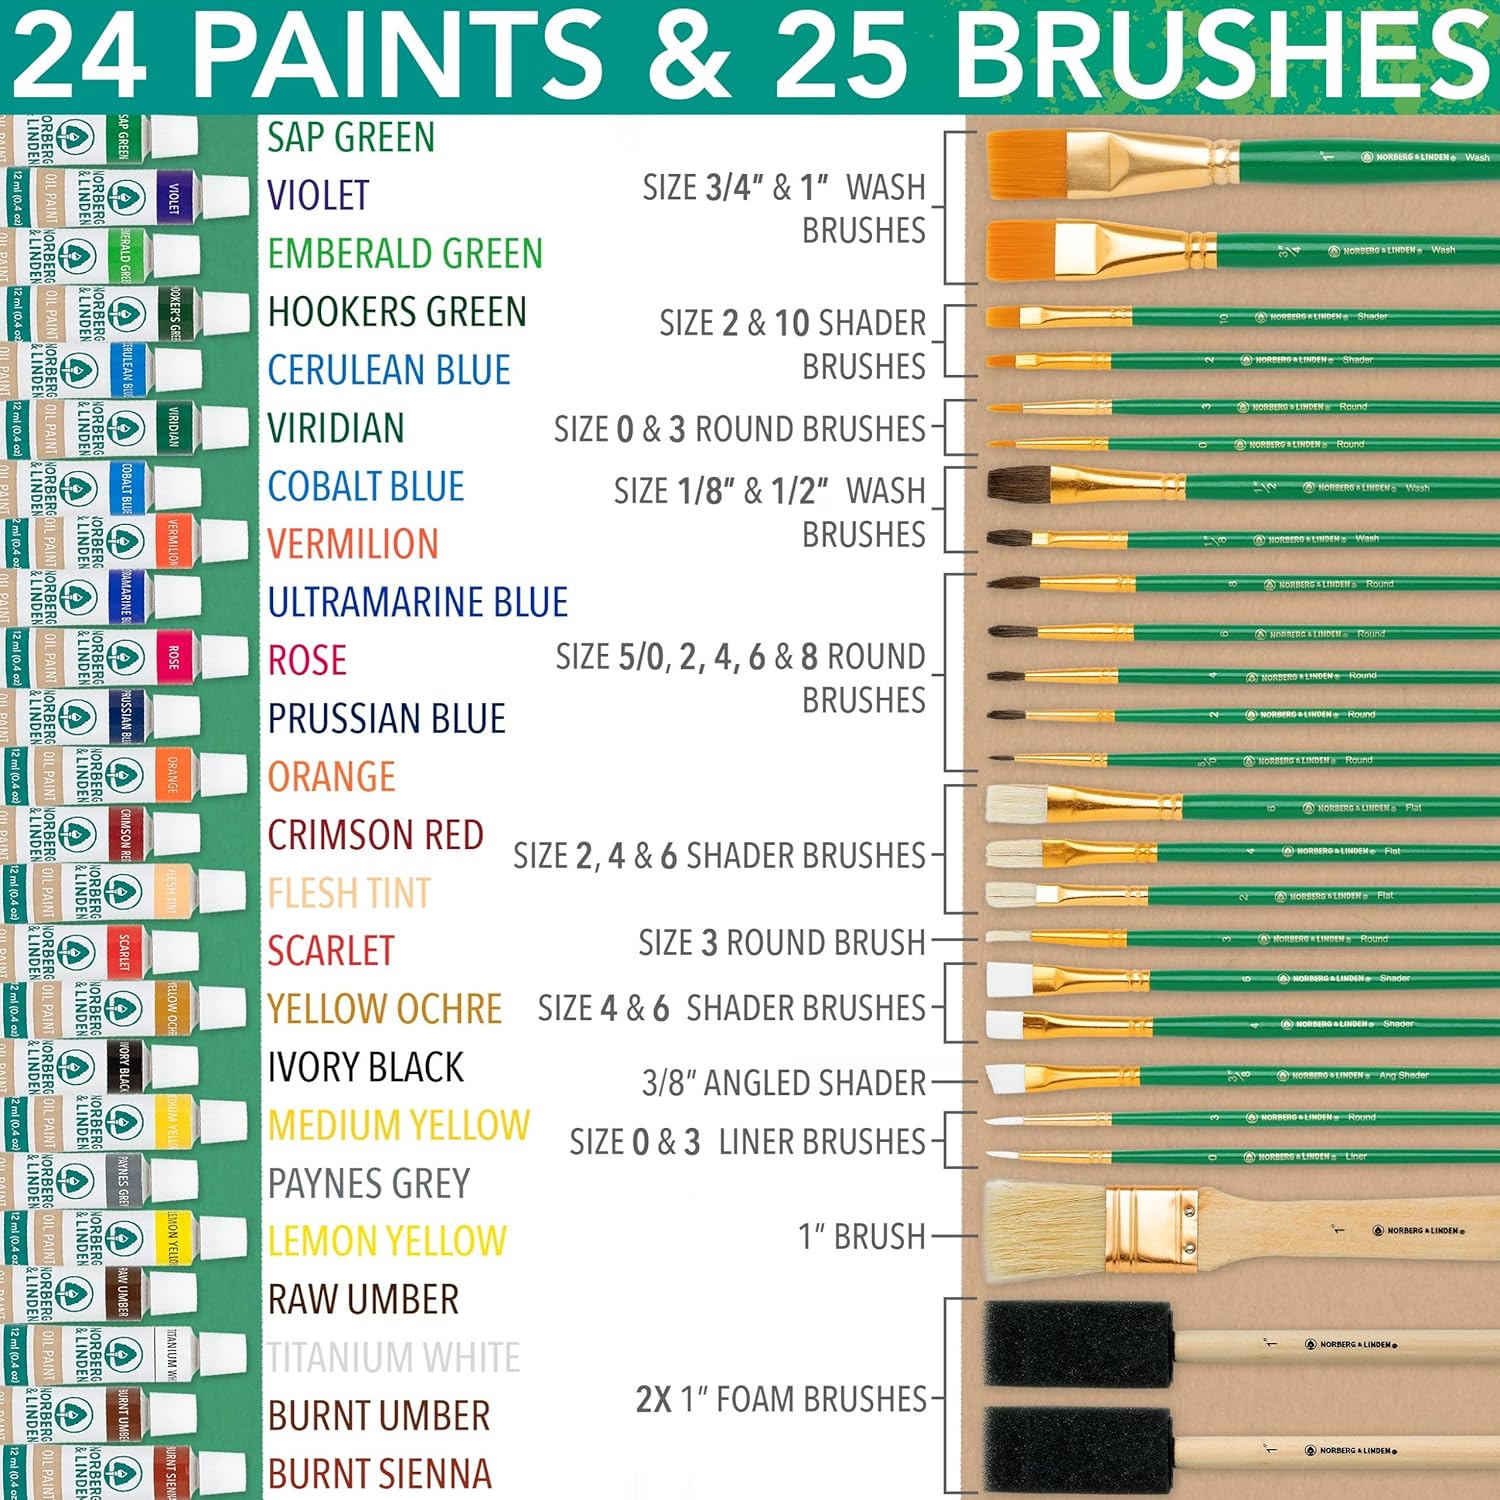
| Oil Paints | A basic set of quality oil paints including primary colors and neutrals. |
| Brushes | Various sizes and types, including filbert, flat, and round brushes. |
| Palette | A surface for mixing your paints. |
| Canvas | Primed canvas stretched over a frame or board. |
| Easel | An adjustable stand to hold your canvas while you work. |
| Palette Knives | For mixing paint and creating texture on the canvas. |
| Mediums | Such as linseed oil, turpentine, or other thinning agents. |
| Solvents | For cleaning brushes, usually turpentine or mineral spirits. |
| Rags/Paper Towels | For cleaning brushes and wiping off excess paint. |
| Brush Cleaner | Specifically designed cleaner to thoroughly clean your brushes. |
Optional Materials
These additional items can enhance your oil painting experience:
- Gesso: For priming and prepping your canvas.
- Varnish: To protect and preserve your finished painting.
- Reference Materials: Photos, sketches, or real-life objects for inspiration.
Setting Up Your Workspace
Choosing a Location
It’s important to choose a well-ventilated workspace. Oil paints and solvents emit fumes that can be harmful if inhaled over extended periods. A room with windows or a proper ventilation system is ideal.
Organizing Your Tools
Arrange your supplies within easy reach. Keep your paints, brushes, and palette on one side, and solvents, rags, and medium on the other. This organization helps maintain a smooth workflow as you paint.
Preparing Your Canvas
Priming the Canvas
Most canvases come pre-primed with gesso, a white paint mixture that preps the surface for painting. If your canvas is unprimed, apply a layer of gesso and let it dry completely. This step ensures the paint adheres properly and the canvas doesn’t absorb too much oil, which could deteriorate it over time.
Sketching Your Composition
Lightly sketch your composition on the canvas using a pencil or charcoal. This initial drawing helps you plan the placement and proportions of your subject matter. Don’t worry about details at this stage; the sketch is a guideline, not a final draft.

Mixing and Handling Paints
Understanding Color Mixing
When mixing colors, start with a limited palette to understand the relationships between colors. Basic colors like red, blue, yellow, along with white and black, can be mixed to create a wide range of hues.
| Primary Color | Complementary Color | Resulting Hue |
|---|---|---|
| Red | Green | Muted Brown |
| Blue | Orange | Grayish Tone |
| Yellow | Purple | Warm Neutral |
Using Mediums
Mediums can alter the consistency, drying time, and texture of your paint. For example:
- Linseed Oil: Increases gloss and transparency, but also extends drying time.
- Turpentine: Thins paint and speeds up drying, but can be harsh and toxic.
- Liquin: Speeds drying and adds a subtle gloss.
Experiment with different mediums to find what works best for your style and technique.
Painting Techniques
Underpainting
An underpainting is a monochromatic sketch done with a single color, often in earth tones, to establish values and composition. This stage allows you to plan out light and shadow before adding colors.
Blocking In Colors
Start by blocking in the main colors and shapes of your painting. Use broad strokes and a limited palette. This stage is about laying the groundwork for your more detailed work later.
Building Layers
Oil painting is typically done in layers, allowing each layer to dry before adding the next. This method, known as “fat over lean,” ensures that the top layers of paint don’t crack as they dry.
- Lean Layers: Thinner application with less oil, usually done early in the painting.
- Fat Layers: Thicker application with more oil, used in the final stages for detail and texture.
Adding Details
Once your foundational layers are dry, begin working on details. Use smaller brushes and more refined strokes to define your subject. Pay attention to highlights, shadows, and subtle color variations.
Glazing
Glazing involves applying a thin, translucent layer of paint over a dry layer. This technique enriches colors and adjusts tones without covering the details of underlying layers.
Maintaining Your Equipment
Cleaning Brushes
Properly cleaning your brushes is crucial for their longevity. Rinse them in a solvent like turpentine to remove paint, then wash with soap and water. Shape the bristles and let them dry naturally.
Storing Paints
Store your oil paints in a cool, dry place with lids tightly closed. This prevents them from drying out and becoming unusable.
Disposing of Waste
Dispose of solvents and rags with dried oil paint responsibly. Many materials used in oil painting are hazardous, so follow local regulations for hazardous waste disposal.
Troubleshooting Common Issues
Paint Isn’t Drying
Oil paint can take days to weeks to dry, depending on the thickness and medium used. Ensure your workspace is well-ventilated and use faster-drying mediums if needed.
Colors Are Muddy
Over-mixing paint or applying wet paint over a still-wet layer can result in muddy colors. Allow layers to dry fully and use clean brushes.
Paint is Cracking
This issue is often caused by improper layering. Remember the “fat over lean” rule to prevent cracking.
Final Touches
Varnishing
Once your painting is completely dry, apply a varnish to protect it from dust, UV light, and other environmental factors. Choose between a gloss, satin, or matte finish based on your desired look.
Framing Your Artwork
A well-chosen frame enhances the presentation of your painting. Select a frame that complements the style and colors of your artwork.
Signing Your Work
Add your signature to your painting as a final touch. Your signature is not just a mark of authorship but also a part of your painting’s compositional balance.
Continuing Your Practice
Stay Inspired
Keep challenging yourself with new subjects and techniques. Visit galleries, read art books, or join a painting class to stay inspired.
Seek Feedback
Constructive critique from fellow artists or mentors can provide valuable insights and help you grow your skills.
Practice Regularly
Like any craft, regular practice is key to improvement. Dedicate time each week to work on your painting skills.
Conclusion
Starting an oil painting may seem overwhelming, but with the right tools, techniques, and guidance, you can achieve incredible results. Follow the steps outlined in this guide to begin your journey into the world of oil painting, and remember to enjoy the creative process. Each stroke of the brush brings you closer to expressing your unique vision on canvas.