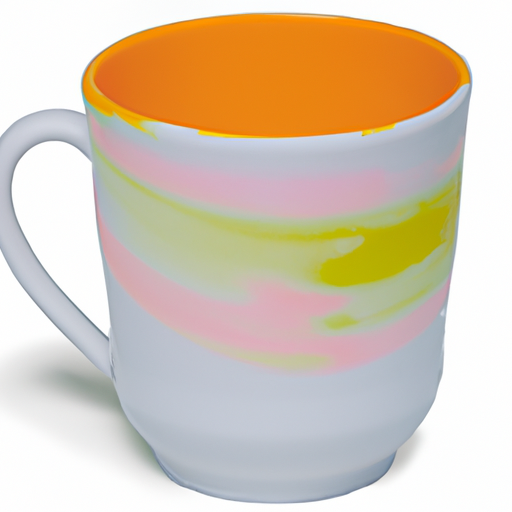
If you’re a fan of DIY projects or simply love adding a personal touch to your daily routine, then painting your own ceramic mug is a fantastic idea. However, once you’ve created your beautiful design with acrylic paint, you may wonder how to preserve it for long-lasting use. In this article, you’ll discover the step-by-step process of sealing acrylic paint on a ceramic mug, ensuring that your masterpiece remains vibrant and durable through countless sips of your favorite beverage. Get ready to unleash your creativity and protect your artwork with these easy-to-follow tips.

Choosing the Right Type of Acrylic Paint
Understanding Different Types of Acrylic Paint
When it comes to choosing the right type of acrylic paint for your ceramic mug, it’s important to understand the different options available. Acrylic paint comes in various forms, including student-grade, artist-grade, and craft-grade. Student-grade acrylics are a good choice for beginners or those on a budget, as they are more affordable. Artist-grade acrylics, on the other hand, offer higher-quality pigments and better lightfastness. Craft-grade acrylics are often used for crafts and DIY projects and may not have the same durability as artist-grade paints.
Selecting Acrylic Paints Suitable for Ceramic Mugs
Not all acrylic paints are suitable for ceramic mugs, as some may not adhere well to the surface or withstand the heat from hot liquids. When selecting acrylic paints for your ceramic mug project, be sure to choose ones that are labeled specifically for use on ceramics or glass. These paints are designed to bond with the surface of the mug and provide a durable finish that can withstand washing and regular use.
Considering Factors like Glossy or Matte Finish
Another factor to consider when choosing acrylic paint for ceramic mugs is the desired finish. Acrylic paints are available in both glossy and matte finishes. The finish you choose ultimately depends on your personal preference and the overall aesthetic you want to achieve. A glossy finish can give your mug a polished and shiny look, while a matte finish offers a more subtle and understated appearance. Consider the design and style of your mug before deciding on the finish that best complements it.
Preparing the Ceramic Mug
Cleaning the Surface of the Ceramic Mug
Before you begin painting your ceramic mug, it’s essential to clean the surface thoroughly. Any dirt, grease, or residue on the mug can interfere with the paint’s adhesion and result in a poor finish. Start by washing the mug with warm water and mild dish soap. Scrub gently with a sponge or soft cloth, paying extra attention to any areas with stubborn stains or grime. Rinse the mug thoroughly to remove any soap residue, and then allow it to air dry completely.
Removing Any Existing Design or Coating
If your ceramic mug already has a design or coating on it, you may need to remove it before applying the acrylic paint. This can be done using a gentle abrasive, such as fine-grit sandpaper or a ceramic paint scraper. Be careful not to scratch the surface of the mug while removing the existing design. Once the design or coating has been removed, clean the mug again to ensure a clean and smooth surface for painting.
Drying the Mug Completely
Before you move on to the next steps of the painting process, it’s crucial to ensure that the ceramic mug is completely dry. Any moisture on the surface can affect the adhesion of the paint and cause it to peel or chip off. After cleaning the mug, set it aside in a well-ventilated area and allow it to air dry naturally. Avoid using a hairdryer or any artificial heat source, as this can lead to uneven drying or damage to the mug.
Using a Primer
Applying a Ceramic Primer
Using a primer on your ceramic mug before painting can help promote better adhesion and longevity of the acrylic paint. Look for a ceramic primer specifically designed for use with acrylic paints. Apply the primer to the mug’s surface using a brush or foam applicator, making sure to cover the entire area evenly. The primer creates a smooth and porous surface for the paint to adhere to, ensuring a more professional-looking finish.
Allowing the Primer to Dry
After applying the ceramic primer, it’s crucial to allow it ample time to dry. Check the manufacturer’s instructions for the recommended drying time, as this may vary depending on the specific product you’re using. It’s essential not to rush this step, as applying the paint before the primer is fully dry can affect the paint’s adhesion and overall finish. Allow the primer to dry completely before moving on to the next steps of the painting process.
Benefits of Using a Primer
Using a primer on your ceramic mug provides several benefits. First, it enhances the adhesion of the paint to the mug’s surface, ensuring a durable and long-lasting finish. The primer also helps to prevent the acrylic paint from chipping, peeling, or fading over time. Additionally, a primer can help create a smoother and more even base for the paint, resulting in a more professional-looking final product. Overall, using a primer is a crucial step in achieving the best results when painting a ceramic mug.
Painting the Ceramic Mug
Choosing Paintbrushes and Tools
When it comes to painting your ceramic mug, selecting the right paintbrushes and tools is essential. For larger areas, a flat or filbert brush is often the best choice, as it allows for broader strokes and coverage. A round brush is ideal for adding details and intricate designs. Additionally, consider using a small sponge or sponge brush for techniques such as stippling or creating textured effects. Experiment with different brush sizes and types to find the ones that suit your style and the design you have in mind.
Layering Acrylic Paint on the Mug
To achieve a vibrant and opaque color on your ceramic mug, it’s usually necessary to apply multiple layers of acrylic paint. Start with a base layer and allow it to dry before adding additional layers. Be sure to follow the drying time instructions provided by the manufacturer of the acrylic paint you’re using. Apply each layer evenly and smoothly, taking care not to let the paint pool or streak. Multiple thin layers will provide better coverage and a more professional-looking finish than a single thick layer.
Creating the Desired Design
When painting your ceramic mug, the design possibilities are endless. From simple patterns and geometric shapes to intricate landscapes or personalized messages, you can let your creativity shine. Sketch your design lightly onto the mug using a pencil or create a stencil to guide your painting. Take your time and paint carefully, using thin brushstrokes for finer details and broader strokes for larger areas. Don’t be afraid to make mistakes – acrylic paint is forgiving and can be corrected or touched up as needed.

Allowing the Paint to Dry
Understanding the Drying Time
Once you’ve finished painting your ceramic mug, it’s essential to allow the paint ample time to dry before proceeding to the next steps. The drying time can vary depending on factors such as the brand of acrylic paint, the number of layers applied, and the environmental conditions. Refer to the instructions provided by the paint manufacturer for the recommended drying time. It’s crucial not to rush this step, as premature handling or sealing can lead to smudging or damage to the paint.
Ensuring Sufficient Ventilation
During the drying process, it’s important to ensure that the area where you’ve placed your painted ceramic mug has sufficient ventilation. Adequate air circulation helps the paint dry more evenly and reduces the risk of dust or debris settling on the surface. Avoid drying the mug in a humid environment, as this can prolong the drying time and affect the final appearance of the paint. If needed, use fans or open windows to improve air circulation and speed up the drying process.
Avoiding Touching or Moving the Mug
While waiting for the paint to dry, it’s crucial to resist the temptation to touch or move the ceramic mug. Resting your hands on the painted surface can leave smudges or fingerprints, ruining your hard work. Moving the mug prematurely can also cause the paint to smear or become unevenly distributed. It’s best to find a safe and undisturbed spot where the mug can dry without being disturbed. Exercise patience during this phase to ensure the best possible outcome for your painted ceramic mug.
Applying a Sealant
Understanding the Importance of a Sealant
Applying a sealant to your painted ceramic mug is a crucial step to protect the paint from damage and ensure its longevity. A sealant acts as a protective barrier, guarding against scratches, fading, and moisture. It can also enhance the overall appearance of the painted surface, making the colors more vibrant and giving the mug a polished finish. Without a sealant, the acrylic paint on your ceramic mug may be prone to chipping or peeling, especially with regular use and washing.
Choosing the Right Type of Sealant
When selecting a sealant for your painted ceramic mug, it’s important to choose one that is compatible with acrylic paint and suitable for use on ceramics or glass. Look for a sealant specifically designed for these materials, as it will provide the best adhesion and durability. Some sealants come in a spray form, while others are applied with a brush. Consider your personal preference and the nature of your design when selecting the type of sealant. Always follow the instructions provided by the manufacturer for the best results.
Applying the Sealant Evenly
To ensure a smooth and even application of the sealant, it’s important to follow the proper technique. If you’re using a brush-on sealant, start by dipping a clean brush into the sealant and removing any excess on the rim of the container. Apply a thin and even coat of the sealant onto the painted surface of the ceramic mug, taking care not to let it pool or drip. If using a spray sealant, hold the can a few inches away from the mug and apply a light, sweeping motion to achieve an even coverage. Allow the sealant to dry fully according to the manufacturer’s instructions.

Curing or Baking the Mug (Optional)
Understanding the Purpose of Curing
While optional, curing or baking the painted ceramic mug can offer extra durability to the painted surface. Curing involves heat-setting the paint, which helps it bond more securely to the mug’s surface. This process can improve the paint’s resistance to scratching, chipping, and fading, making it more suitable for everyday use. However, not all acrylic paints require curing, so be sure to check the instructions provided by the paint manufacturer to determine if it is necessary for the specific type of paint you used.
Following the Manufacturer’s Instructions
If you decide to proceed with curing the painted ceramic mug, it’s crucial to follow the manufacturer’s instructions carefully. Each brand of acrylic paint may have different recommendations for the temperature and duration of the curing process. Typically, the mug is placed in a cold oven, and the temperature is gradually increased over a specified period. Avoid sudden changes in temperature, as this can cause the mug to crack or break. Once the curing process is complete, allow the mug to cool down before handling.
Benefits of Baking the Mug
Baking the painted ceramic mug can offer several benefits. Firstly, it helps the paint become more resistant to wear and tear, allowing it to withstand regular use and washing without significant damage. Baking also helps to set the paint, reducing the risk of smudging or smearing. Additionally, the process can enhance the vibrancy and durability of the colors, giving the mug a professional and long-lasting finish. While baking is optional, it is worth considering if you want the best possible results for your painted ceramic mug.
Caring for the Sealed Acrylic Paint Mug
Wait for the Recommended Curing Time
If you’ve decided to cure or bake the painted ceramic mug, it’s important to wait for the recommended curing time before using or washing it. This allows the paint to fully bond and achieve maximum durability. Rushing the process or using the mug before it’s completely cured can lead to premature damage or wear. Refer to the instructions provided by the paint manufacturer for the specific curing time needed for your project.
Handwashing Vs. Dishwasher Safe
When it comes to cleaning your sealed acrylic paint mug, handwashing is generally the safest method. While some acrylic paints and sealants may claim to be dishwasher safe, it’s still best to err on the side of caution. The repeated exposure to hot water and harsh dishwasher detergents can gradually weaken the bond between the paint and ceramic surface, leading to potential damage over time. To prolong the lifespan of your painted ceramic mug, opt for gentle handwashing with mild dish soap and lukewarm water.
Avoiding Abrasive Cleaners
When cleaning your sealed acrylic paint mug, it’s important to avoid using abrasive cleaners or scrubbing brushes. These can scratch the sealed surface and compromise the integrity of the paint. Instead, opt for soft sponges or cloths that won’t cause damage. Gently scrub the mug with mild dish soap and rinse thoroughly to remove any dirt or residue. After washing, allow the mug to air dry or pat it dry with a soft towel. Taking care during the cleaning process will help keep your painted ceramic mug looking its best for years to come.

Troubleshooting
Sealant Not Drying Clear
If you find that your sealant is not drying clear on your painted ceramic mug, there may be a few possible causes. First, make sure that you applied the sealant in a thin and even coat, as thick layers can take longer to dry and may result in a cloudy or streaky appearance. Additionally, environmental factors such as high humidity or cold temperatures can affect the drying time of the sealant. Ensure proper ventilation and follow the recommended drying time provided by the manufacturer. If the sealant still does not dry clear, consider trying a different brand or type that is specifically formulated for acrylic paints.
Sealant Peeling or Chipping
If the sealant on your painted ceramic mug begins to peel or chip over time, it may be due to improper application or insufficient drying. Make sure you clean and prepare the mug’s surface thoroughly before applying the sealant to ensure proper adhesion. Follow the manufacturer’s instructions for the recommended drying time to allow the sealant to dry fully. Avoid using the mug until the sealant has had ample time to cure and harden. If the peeling or chipping persists, it may be necessary to remove the old sealant and reapply a fresh coat.
Correcting Mistakes or Imperfections
Sometimes, mistakes or imperfections can occur when painting and sealing a ceramic mug. Fortunately, acrylic paint is forgiving and can be corrected or touched up. If you notice any smudges, uneven lines, or areas where the paint has chipped off, you can carefully fix them with small brushes and matching paint colors. For minor imperfections, a gentle sanding with fine-grit sandpaper can help smooth the surface before applying a fresh coat of paint or sealant. Take your time and be patient during this process, as it may require multiple layers or touch-ups to achieve the desired result.
Conclusion
Painting and sealing acrylic paint on a ceramic mug is a fun and creative way to personalize your drinkware. By following the steps outlined in this article, you can ensure that your painted ceramic mug not only looks beautiful but also withstands the test of time. From choosing the right type of acrylic paint to properly preparing and sealing the mug, each step plays a crucial role in achieving a professional and durable finish. Remember to always read and follow the instructions provided by the paint and sealant manufacturers to ensure the best possible results. With a little patience and creativity, you can enjoy a customized ceramic mug that adds a personal touch to your morning coffee or tea.


